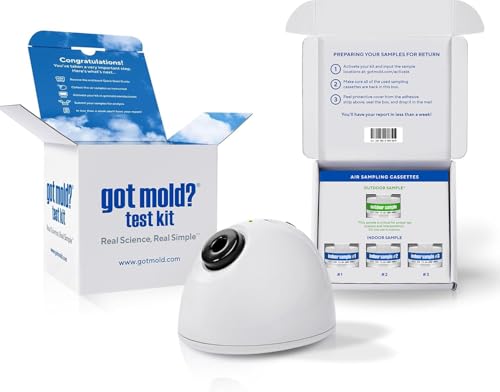
Discovering mold in your home or workplace can feel overwhelming, especially when physical symptoms are already affecting your daily life. A clear, structured mold action plan removes the guesswork and gives you a reliable sequence of steps to follow, from first suspicion through long-term prevention. This guide walks you through each phase of that process so you can move forward with confidence and make informed decisions at every stage.
What Is a Mold Action Plan and Why Do You Need One?
A mold action plan is a structured, step-by-step framework for identifying a potential mold or moisture problem, assessing its scope, remediating the source, and maintaining a healthier indoor environment over time. Without a deliberate plan, it is easy to skip critical steps, such as finding hidden moisture sources, or to address symptoms without ever fixing the underlying environmental cause.
The U.S. Environmental Protection Agency (EPA) emphasizes that controlling moisture is the single most important factor in preventing and eliminating mold growth indoors. A good action plan keeps that principle at the center of every decision.
This plan is organized into four phases: Recognition, Assessment, Remediation, and Ongoing Maintenance. Each phase builds on the previous one, and skipping ahead often leads to incomplete results.
Phase One: Recognize That Something Needs to Be Investigated
You do not need certainty to begin. You only need one qualifying indicator to justify moving forward with a closer look. Acting early can significantly reduce the scope of damage and the cost of repairs.
Key Indicators That Warrant Investigation
- Physical symptoms: Unexplained respiratory issues, chronic fatigue, brain fog, headaches, skin irritation, or other recurring symptoms that improve when you leave the building are worth taking seriously. This article is informational only; please consult a qualified medical professional for any health concerns.
- History of water damage: Past flooding, roof leaks, plumbing failures, basement seepage, or visible staining on walls and ceilings all indicate that conditions for mold growth may exist or have existed.
If either indicator is present, proceed to Phase Two. You do not need both boxes checked to take action.
Phase Two: Consultation and Situation Audit
You cannot build an effective plan without first understanding the full picture. Phase Two involves assessing both your indoor environment and, if symptoms are present, your body’s response to potential exposures. These two assessments ideally happen in parallel.
Test the Indoor Environment
For home and workplace testing, the ERMI (Environmental Relative Moldiness Index) is generally preferred over standard air sampling. The ERMI uses dust collection and DNA-based analysis to identify and quantify mold species present in a space. ERMI scores range from roughly -10 to +20; scores above 5 are generally considered elevated and warrant further action. Air testing alone can miss settled spores and dormant contamination that the ERMI method captures.
A qualified Indoor Environmental Professional (IEP) or certified mold inspector can interpret results in context. Learn more about your testing options in our mold testing guide.
Assess the Body if Symptoms Are Present
If occupants are experiencing symptoms, functional lab testing can help identify whether mycotoxin exposure or related issues are contributing factors. Common panels used in this context include mycotoxin urine testing, organic acid testing (OAT), and tickborne illness panels, since some conditions can overlap in presentation. These labs should be reviewed and interpreted by a qualified health practitioner. This article does not constitute medical advice.

Consult Qualified Professionals
A knowledgeable professional can synthesize your test results and help you prioritize next steps. On the building side, that means a certified mold inspector, IEP, or building biologist. On the health side, consult your primary care physician or a specialist familiar with environmental exposures. Avoid making major remediation or treatment decisions based on test results alone without professional interpretation.
Phase Three: Remediation of the Environment
Remediation is the active phase where problems are physically corrected. The human body needs a clean, low-toxin environment to recover, so environmental remediation is not optional if you are also pursuing health improvements. Both must happen together for the best outcomes.
Step 1: Identify and Fix Water Intrusion Sources
No remediation is durable if the moisture source is not resolved first. Common sources include roof leaks, foundation cracks, HVAC condensation, plumbing leaks inside walls, and inadequate bathroom or kitchen ventilation. Indoor relative humidity should be kept below 60%, and ideally between 30% and 50%, to prevent mold growth. A building biologist or IEP can use moisture meters and thermal imaging to locate hidden problem areas.
Step 2: Develop a Remediation Plan with a Qualified Inspector
Before any materials are removed or treated, a scope of work should be developed with the help of a certified professional. The IICRC S520 standard is the recognized industry guideline for mold remediation. The scope should specify which materials need to be removed and replaced, which can be cleaned, and what containment procedures are required.
For context on what remediation typically involves, see our mold removal overview. Professional remediation costs vary widely depending on the size and severity of the problem. Small contained jobs under 10 square feet may cost a few hundred dollars, while larger structural remediations involving multiple rooms can range from $3,000 to $30,000 or more.
Step 3: Remediate and Replace Affected Materials
Porous materials such as drywall, insulation, carpet, and ceiling tiles that are visibly contaminated or have been wet for more than 24 to 48 hours generally cannot be cleaned and should be removed and replaced. Semi-porous and non-porous materials may be cleanable depending on the extent of contamination. All work should follow containment protocols to prevent cross-contamination of unaffected areas.
Step 4: Address Residual Contamination and Air Quality
After physical remediation, fine particulates and mycotoxins can remain on surfaces and in the air. High-efficiency air filtration (HEPA-rated) and photocatalytic oxidation (PCO) technology are tools used to address residual airborne contamination. Proper air exchange and filtration are especially important in the weeks immediately following remediation. For guidance on post-remediation air quality, visit our indoor air quality section.
Step 5: Support the Body During Remediation
If you or household members have been experiencing symptoms, the remediation period is a critical time to work closely with a qualified health professional. Reducing the overall toxic burden in the environment is the foundation, and any supportive health interventions should be guided by your lab results and your doctor or qualified practitioner’s recommendations.
Phase Four: Ongoing Maintenance and Prevention
Remediation solves the current problem. Maintenance prevents the next one. This phase is ongoing rather than a finite checklist, and it addresses both the building and, if applicable, continued health recovery.
Regular Home Monitoring and Preventive Upkeep
- Inspect roof, gutters, and foundation drainage at least twice per year.
- Check under sinks, around water heaters, and at HVAC drain pans seasonally.
- Replace HVAC filters on schedule and keep the system maintained.
- Monitor indoor humidity with an inexpensive hygrometer; act promptly if readings exceed 55% consistently.
- Address any new water intrusion within 24 to 48 hours to prevent mold establishment.
For a detailed seasonal checklist, see our article on preventing mold in your home year-round.
Continued Health Support
Recovery from prolonged mold exposure can take time. Supportive practices such as regular exercise, adequate sleep, stress reduction, and appropriate nutrition all support the body’s ability to recover. Nervous system regulation practices, including breathwork, meditation, and movement-based therapies, are increasingly recognized as helpful complements to conventional care. Always pursue these in coordination with your healthcare provider.
Quick Reference: The Four-Phase Mold Action Plan
| Phase | Focus | Key Actions |
|---|---|---|
| 1 – Recognition | Identify the need to act | Check for symptoms; check for water damage history |
| 2 – Assessment | Understand the full situation | ERMI testing; functional labs if symptomatic; professional consultation |
| 3 – Remediation | Fix the environment and support the body | Fix moisture sources; certified remediation; air filtration; health interventions guided by labs |
| 4 – Maintenance | Prevent recurrence | Regular inspections; humidity monitoring; continued health support |
Frequently Asked Questions
How do I know if I need a professional mold inspector or if I can handle it myself?
If the visible mold covers an area larger than 10 square feet, if you suspect mold inside walls or HVAC systems, or if anyone in the home is experiencing health symptoms, you should work with a certified mold inspector or Indoor Environmental Professional. Small surface mold in isolated, clearly moisture-related areas (such as grout in a well-ventilated bathroom) may be addressable by a competent homeowner using proper safety precautions. When in doubt, professional assessment is the safer choice. You can learn more about finding qualified help in our mold testing and inspection section.
Why is ERMI testing recommended over standard air testing?
Standard air sampling captures what is airborne at a single point in time, which can miss settled spore reservoirs and does not reflect cumulative contamination well. The ERMI test analyzes settled dust collected from the home, using DNA-based identification of over 36 mold species to produce a standardized score. This makes it more useful for assessing the overall mold burden in a living space, though it should still be interpreted by a knowledgeable professional in context with a physical inspection.
How long does full mold recovery typically take?
Environmental remediation timelines depend on the scope of damage. A small, contained job may take a few days; larger structural remediation can take several weeks. Health recovery timelines vary considerably from person to person and depend on the duration and intensity of exposure, individual biology, and how thoroughly the environment is cleaned. There is no universal timeline. Working with qualified professionals on both the building and health sides gives you the best chance of a thorough and lasting recovery.
What humidity level should I maintain in my home to prevent mold?
The EPA recommends keeping indoor relative humidity below 60%, and ideally between 30% and 50%. Humidity levels above 60% create conditions that support mold growth, especially in areas with limited airflow. A basic digital hygrometer costs under $20 and is a worthwhile investment for any home that has had moisture issues. If your home consistently reads above 55%, investigate ventilation, condensation sources, and HVAC performance before mold becomes established.
Is it safe to stay in a home during mold remediation?
This depends on the size and location of the remediation area, the species of mold identified, and the health status of the occupants. For large-scale remediation or situations where sensitive individuals (children, elderly, immunocompromised, or those already experiencing symptoms) are present, temporary relocation is often recommended. Your certified remediator and healthcare provider can help you weigh this decision based on your specific situation. Never reoccupy remediated spaces before clearance testing confirms the work is complete.
These statements have not been evaluated by the Food and Drug Administration. This information is not intended to diagnose, treat, cure, or prevent any disease. Content is for informational purposes only and is not medical advice; consult a qualified healthcare provider before starting any supplement. As an Amazon Associate we earn from qualifying purchases.