The short answer: Replace insulation that has visible mold growth, a persistent musty odor, or has been wet for more than 24–48 hours. Treat and dry insulation only when mold is limited to a small surface area on non-porous facing material and the insulation itself remains structurally intact and dry. When in doubt, replace — insulation is inexpensive compared to the health costs of leaving active mold in place.
At a Glance: Replace vs. Treat
| Condition | Decision | Reason |
|---|---|---|
| Visible mold growth on insulation surface | Replace | Mold has colonized — treating surface doesn’t address spores inside batt |
| Musty odor coming from insulation area | Replace | Odor = active mold metabolism even if not visible |
| Insulation was wet for >48 hours | Replace | Mold begins growing within 24–48 hours on wet organic material |
| Cellulose insulation with any moisture | Replace | Cellulose is organic — always replace when wet or moldy |
| Spray foam insulation with surface mold | Treat if intact | Spray foam is non-organic — surface mold can be cleaned if foam is undamaged |
| Rigid foam board with surface mold | Treat if intact | Non-porous surface — treat with HEPA vacuum + antimicrobial wipe |
| Mold only on paper facing, not fiberglass | Replace | Paper facing is organic — it feeds mold and cannot be fully cleaned |
| Insulation compressed, crumbling, or water-stained | Replace | Structural damage means moisture penetrated fully |
Why Does Mold Grow on Insulation?
Mold needs three things to grow: moisture, a food source, and temperatures between 40°F and 100°F. Most homes provide two of three at all times. The moisture is the variable — and insulation is exactly where moisture accumulates and stays hidden.
Common moisture sources that cause insulation mold:
- Roof leaks — water travels along rafters and soaks into attic insulation without visible ceiling damage
- Condensation — warm interior air meets cold exterior walls or attic sheathing, depositing moisture directly on insulation facing
- Plumbing leaks — slow drips inside walls soak insulation for months before detection
- Bathroom exhaust fans venting into attic — one of the most common and overlooked causes of attic insulation mold
- Crawl space moisture — ground vapor rises into floor insulation without a vapor barrier
- Flooding or storm water intrusion — insulation in basements and crawl spaces saturates completely
The reason mold on insulation is so dangerous is that it often grows undetected for months or years in areas homeowners never inspect. By the time it’s discovered, colonies are well-established and spore counts are high enough to affect air quality throughout the home.
Mold on Each Insulation Type: What to Look For and What to Do
Fiberglass Batt Insulation (Most Common)
Fiberglass itself does not support mold growth — the glass fibers are inorganic and provide no food source. However, fiberglass batts almost always come with a paper or foil facing, and that facing is organic. Dust and debris that accumulates on fiberglass batts over time also provides a food source for mold.
What mold looks like on fiberglass: Black, green, or gray splotches on the kraft paper facing. The fiberglass itself may appear discolored or compressed. In advanced cases, you’ll see visible fungal growth with a fuzzy texture.

Decision: Replace. Even if the mold appears only on the paper facing, the spores have penetrated the batt. There is no cost-effective way to clean fiberglass batts. Fiberglass insulation costs $0.50–$1.50 per square foot installed — replacement is the right call every time.
Cellulose Insulation (Blown-In)
Cellulose is made from recycled paper treated with borate-based fire retardant. Because it’s entirely organic, cellulose is the most vulnerable insulation type to mold. The borate treatment provides some mold resistance, but it is not mold-proof — sustained moisture overwhelms the treatment.
What mold looks like on cellulose: Cellulose often shows mold as dark clumping or matting of the fibers. The material may look damp, compacted, or have an obvious musty odor even before visible growth appears. In attics, affected areas often appear darker than surrounding sections.
Decision: Always replace. There is no salvaging wet or moldy cellulose. The organic material cannot be dried and retreated effectively. Remove all affected cellulose, treat the substrate surface, dry thoroughly, and reinstall fresh material. Blown-in cellulose replacement runs $1.00–$2.00 per square foot.
Spray Foam Insulation (Open-Cell and Closed-Cell)
Closed-cell spray foam is the most mold-resistant insulation available. It has no organic material, creates a vapor barrier that prevents moisture infiltration, and provides no food source for mold. Open-cell spray foam is more permeable and can allow moisture transfer, making it slightly more susceptible.
What mold looks like on spray foam: Mold on spray foam appears as surface growth only — it cannot penetrate into the foam itself. You’ll see discoloration (black or green) on the foam surface, typically where dust has accumulated. The foam beneath the surface remains unaffected.
Decision: Treat if intact. Surface mold on closed-cell spray foam can be cleaned. HEPA vacuum the surface, wipe with an antimicrobial cleaner (Concrobium works well), and address the moisture source. If the foam has physical damage, gaps, or shrinkage that allowed moisture behind it, professional inspection is warranted.
Mineral Wool / Rockwool Insulation
Mineral wool is made from basalt rock and recycled slag — both inorganic. Like closed-cell spray foam, mineral wool provides no food source for mold. It also maintains its integrity when wet, unlike fiberglass or cellulose.
What mold looks like on mineral wool: True mold growth on mineral wool fiber itself is rare. When you see mold in mineral wool installations, it’s almost always growing on dust accumulation on the surface or on adjacent organic materials (wood framing, drywall paper) that has spread to the insulation surface.
Decision: Treat with caution. If the mineral wool is structurally intact, HEPA vacuum the affected area, treat the surface, and verify there’s no mold on adjacent framing. If the mineral wool was fully saturated and has been wet for an extended period, replacement is safer.
Rigid Foam Board (EPS, XPS, Polyiso)
Rigid foam boards are non-organic and inherently resistant to mold growth. Like spray foam, they provide no food source. Rigid foam is commonly used in basement walls, exterior sheathing, and under slabs.
What mold looks like on rigid foam: Surface discoloration from mold growing on dust or debris. The foam itself will not be degraded by the mold.
Decision: Treat. HEPA vacuum, clean with an antimicrobial wipe, verify no mold on adjacent framing or drywall, and address the moisture source. Rigid foam boards with physical damage (cracking, moisture infiltration behind the board) should be replaced.
How to Identify Mold on Insulation
Insulation mold is often invisible from the living space. These are the reliable indicators that warrant investigation:
- Musty or earthy odor in a specific room or from a vent — the smell gets stronger as you approach the affected area
- Allergy or respiratory symptoms that improve when you leave home — a strong indicator of elevated spore counts
- Visible staining on ceilings or walls — water staining often indicates insulation has been wet
- Recent water damage or flooding — any insulation that was saturated should be inspected within 48 hours
- High indoor humidity consistently above 60% — creates conditions for insulation mold even without a specific leak
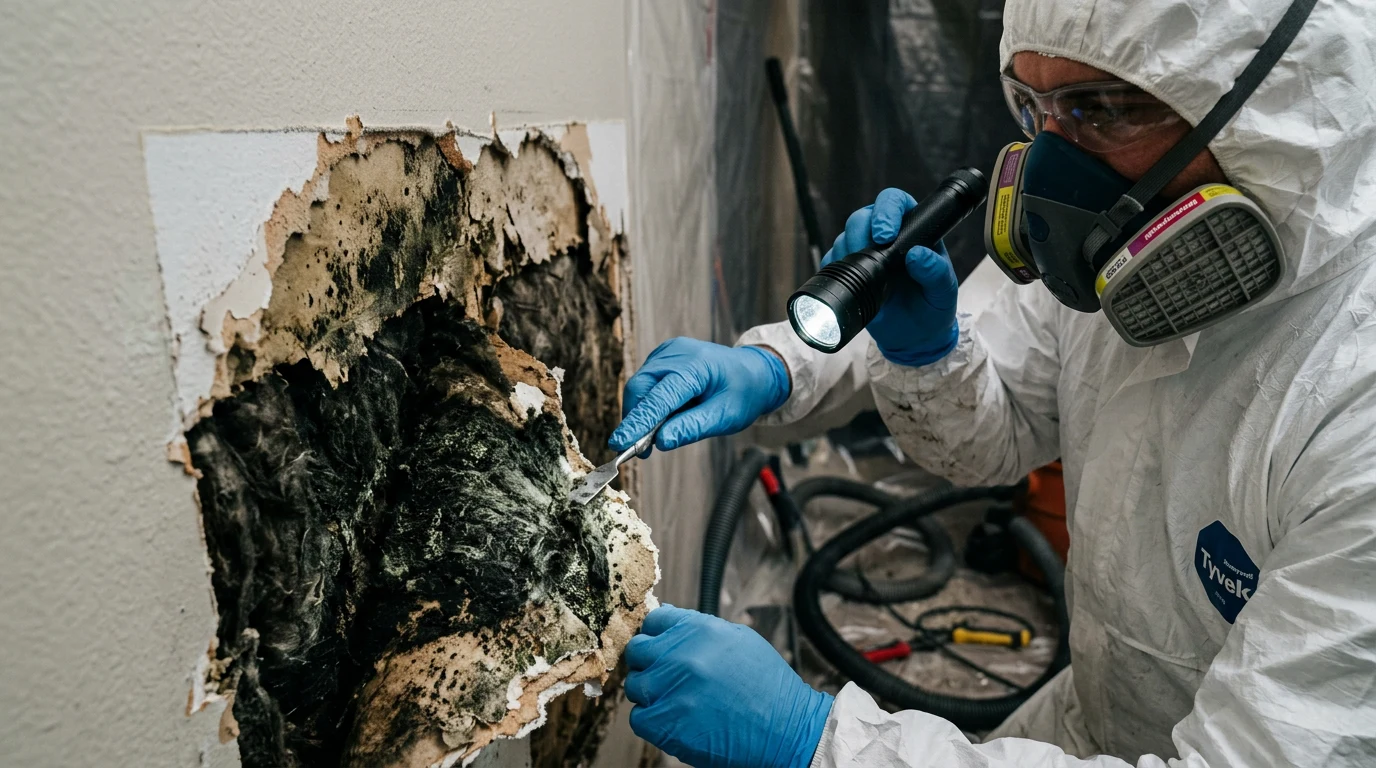
How to Inspect Insulation for Mold
- Safety first: Wear an N95 respirator, nitrile gloves, and safety glasses before entering any potentially moldy space. Don’t use a regular dust mask — mold spores pass through them.
- Check accessible areas first: Attic hatches, basement crawl spaces, and unfinished basement walls give you direct visual access to insulation without demolition.
- Use a flashlight: Look for discoloration, dark patches, or fuzzy growth on insulation surfaces and facing material.
- Check adjacent framing: Wood joists, rafters, and studs near insulation often show mold before the insulation does. Black staining on wood is a reliable indicator.
- Test with a moisture meter: Readings above 20% on wood adjacent to insulation confirm active or recent moisture — even if mold isn’t yet visible.
- Check with your nose: A distinct musty odor from an insulated cavity is a strong indicator even without visible growth.
If you cannot access the insulation without opening walls, professional mold testing or thermal imaging inspection is the appropriate next step before cutting into drywall.
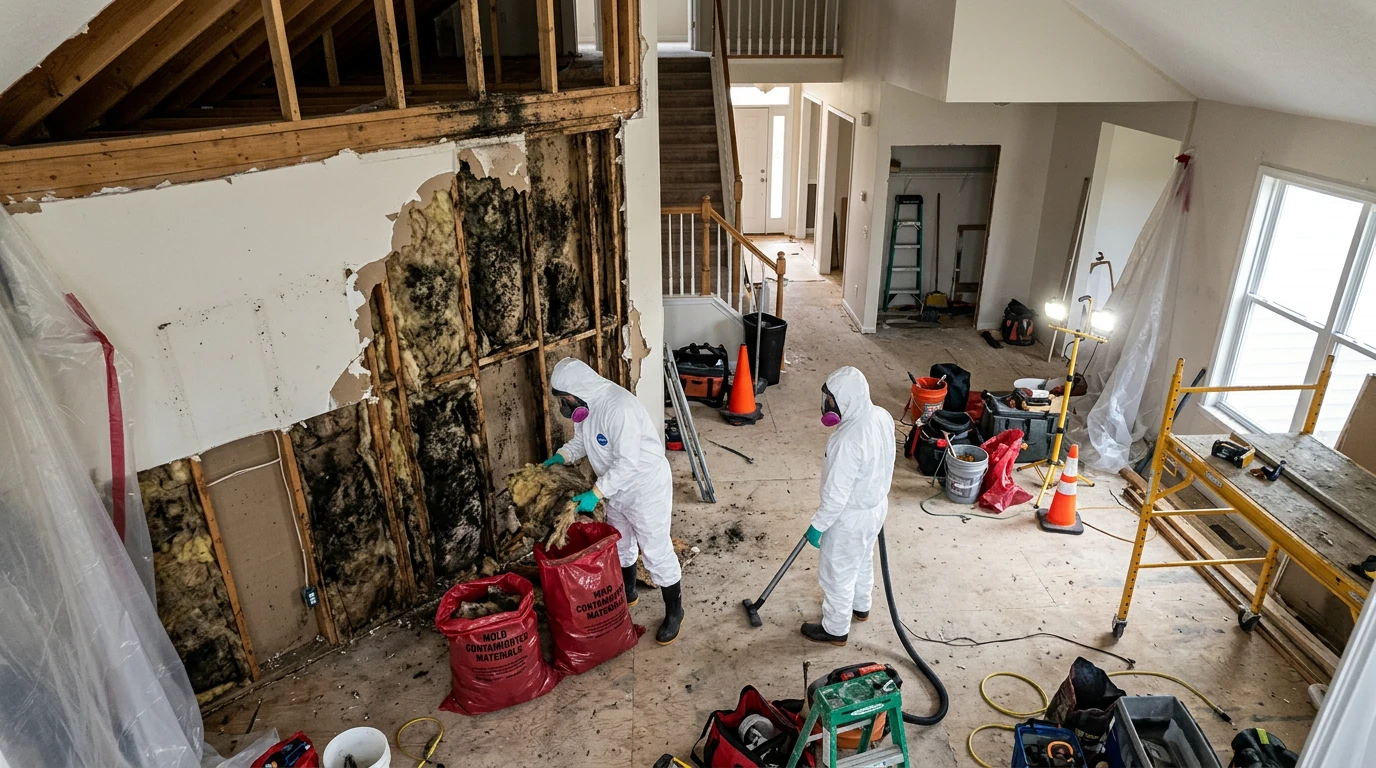
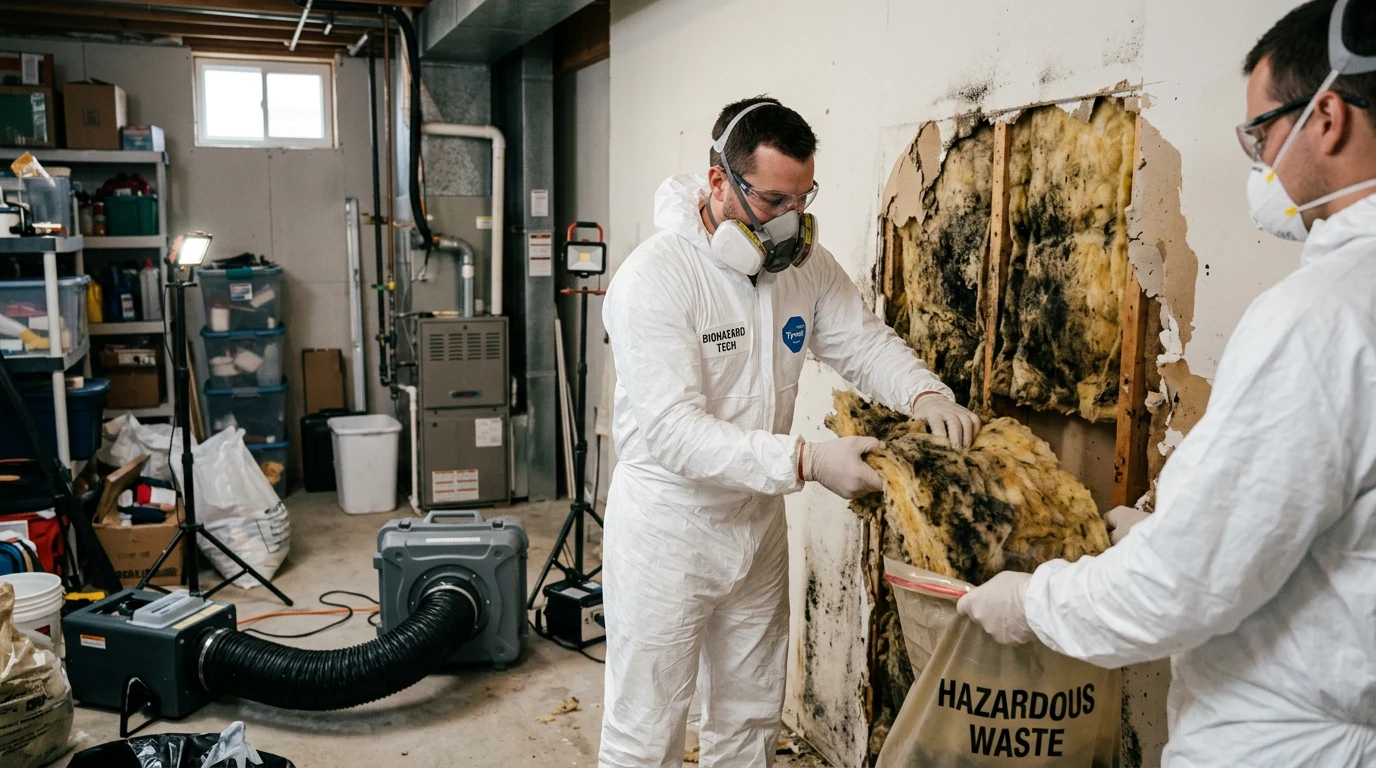
Step-by-Step Mold Removal from Insulation
These instructions apply to insulation removal in accessible areas (attics, basements, crawl spaces). Wall cavity insulation that requires opening drywall is best handled by professionals due to containment requirements.
What You’ll Need
- N95 or P100 respirator
- Full Tyvek disposable suit
- Nitrile gloves and safety glasses
- Heavy-duty contractor bags (6 mil)
- HEPA shop vacuum
- Antimicrobial spray (Concrobium Mold Control or RMR-141)
- Replacement insulation
Removal Process
- Contain the work area. Tape plastic sheeting over HVAC registers and doorways before disturbing any moldy material. Mold spores become airborne the moment insulation is moved.
- Mist the insulation lightly with water before removal to reduce airborne spore release. Do not soak it.
- Remove insulation carefully and double-bag it immediately in 6-mil contractor bags. Seal each bag before moving it.
- HEPA vacuum all surfaces — framing, subfloor, sheathing — after insulation is removed. A standard shop vac will redistribute spores; it must be HEPA-filtered.
- Treat all wood surfaces with an antimicrobial spray. Apply, let dwell 10 minutes, and let dry completely. Concrobium Mold Control is effective and leaves a residual antimicrobial layer. RMR-141 kills on contact but has no residual protection.
- Address the moisture source before reinstalling insulation. If you reinstall without fixing the leak or improving ventilation, mold returns within weeks.
- Allow complete drying — at minimum 24–48 hours with fans running — before installing new insulation.
- Install new insulation with appropriate vapor barrier for your climate zone.
Recommended Products
Concrobium Mold Control — Best for treating wood framing and non-porous surfaces after insulation removal. Leaves a residual antimicrobial barrier that prevents regrowth. Safe to use indoors without extensive ventilation. View on Amazon
RMR-141 RTU — EPA-registered disinfectant and mold killer. Kills mold on contact on cleaned surfaces. Use after HEPA vacuuming when you need EPA-registered kill claims (required for some professional remediation). View on Amazon
HEPA Shop Vacuum — Required for cleanup. Standard vacuums exhaust mold spores back into the air. Look for a HEPA-filtered wet/dry vacuum rated for fine dust and mold remediation. View on Amazon
N95 Respirators — Minimum protection for working around moldy insulation. For heavy mold, use a half-face respirator with P100 cartridges. View on Amazon
Cost of Replacing Moldy Insulation
Professional insulation replacement (including mold remediation preparation) typically runs:
| Insulation Type | DIY Material Cost | Professional (Installed) | Notes |
|---|---|---|---|
| Fiberglass batt (1,000 sq ft) | $400–$800 | $1,000–$2,500 | Accessible attics can be DIY |
| Blown-in cellulose (1,000 sq ft) | $300–$600 + rental | $1,000–$2,000 | Blower rental adds $100–$200/day |
| Spray foam (per 1,000 sq ft) | Not DIY-recommended | $2,000–$6,000 | Requires professional equipment |
| Rigid foam board (1,000 sq ft) | $500–$1,500 | $1,500–$3,500 | Labor-intensive cutting and sealing |
Remediation preparation (mold removal, surface treatment, drying) typically adds $500–$2,000 to professional jobs depending on the extent of contamination and accessibility.
When to Call a Professional
Call a licensed mold remediation contractor when:
- The affected area exceeds 10 square feet (EPA guideline for professional remediation)
- The insulation is inside wall cavities — opening drywall for remediation requires proper containment
- HVAC ductwork runs through or near the affected insulation
- Anyone in the home has respiratory conditions, is immunocompromised, or is pregnant
- You find mold in multiple locations simultaneously — indicates a whole-house moisture problem
- After removal, mold returns within weeks — suggests an ongoing moisture source that hasn’t been identified
How to Prevent Mold on Insulation
- Maintain indoor humidity below 50% — use a dehumidifier in basements and crawl spaces during humid months
- Install and maintain attic ventilation — soffit vents and ridge vents must remain unblocked; insulation should not cover soffit vents
- Route all exhaust fans outside — bathroom fans, kitchen exhausts, and dryer vents must terminate to the exterior, not the attic
- Install a crawl space vapor barrier — 6-mil polyethylene sheeting over the ground prevents ground moisture from rising into floor insulation
- Inspect attic insulation annually — visual check in spring and fall takes 10 minutes and catches moisture problems before mold establishes
- Address any roof leak immediately — even a slow drip saturates insulation within hours
Frequently Asked Questions
How do I identify mold on insulation?
Look for dark discoloration (black, green, or gray) on insulation surfaces or facing, a persistent musty odor near insulated areas, and visible water staining on adjacent wood framing. A moisture meter reading above 20% on wood near insulation confirms active or recent moisture even without visible mold.
Is mold on insulation dangerous?
Yes. Moldy insulation continuously releases spores into the air that travels through your home via air movement and HVAC systems. Prolonged exposure causes respiratory symptoms, worsens asthma, and in sensitive individuals can cause more serious health effects. Address it promptly.
How much does it cost to remove mold from insulation?
Professional mold remediation for insulation runs $500–$2,000 for the remediation work alone, plus $1,000–$3,500 for insulation replacement depending on type and area. DIY removal is feasible for accessible attic or basement insulation under 10 square feet with proper protective equipment.
Can you paint or seal over mold on insulation?
No. Painting or sealing over mold is not a remediation method. It temporarily covers the growth but does not kill the mold or stop it from spreading. The mold continues to grow beneath the coating and eventually breaks through. Remove and replace the insulation.
How long does it take for mold to grow on insulation?
Mold can begin colonizing wet organic insulation (fiberglass paper facing, cellulose) within 24–48 hours of water exposure. This is why any insulation that has been wet for more than 24 hours should be inspected immediately and replaced if moisture penetrated the material.
What causes mold on insulation?
Moisture is the primary cause in every case — from roof leaks, plumbing failures, condensation, exhaust fans venting into attics, high indoor humidity, or flooding. The insulation itself provides a surface for mold to grow on; it does not create the moisture problem.
Can you save insulation with mold on it?
Only in limited cases: closed-cell spray foam and rigid foam board with surface-only mold growth can be cleaned. All organic insulation types (fiberglass, cellulose, mineral wool) with visible mold or persistent odor should be replaced. The cost of replacement is far lower than the ongoing health and structural risks of leaving mold in place.
How do I prevent mold on insulation?
Control moisture: maintain humidity below 50%, ensure all exhaust fans vent to the exterior, install crawl space vapor barriers, keep attic ventilation clear, and inspect insulation annually. Address any roof leak or plumbing failure within 24 hours to prevent mold establishment.
When should I call a professional for insulation mold?
Call a professional when the affected area exceeds 10 square feet, when insulation is inside wall cavities, when anyone in the home is immunocompromised or has respiratory conditions, or when mold returns after DIY removal (indicating an unresolved moisture source).
For authoritative background, see the EPA’s guidance on mold and health.
Frequently Asked Questions
Can insulation be cleaned if it has mold, or does it always need to be replaced?
In most cases, insulation with mold growth cannot be effectively cleaned and must be removed and replaced. The fibrous nature of insulation makes it difficult to thoroughly remove mold spores, and attempting to clean it can spread spores further, potentially worsening the problem.
What are the signs that insulation might have mold growth?
Visible discoloration, often black, green, or white patches, is a primary indicator of mold on insulation. Additionally, a persistent musty odor in the affected area, even without visible mold, strongly suggests its presence within the insulation materials.
Is it safe to remove moldy insulation myself, or should I hire a professional?
For small, contained areas of mold (less than 10 square feet) and if you are not allergic or immunocompromised, you might be able to remove it yourself with proper PPE. However, for larger areas, extensive growth, or if you have health concerns, it is highly recommended to hire a professional mold remediation specialist to ensure safe and thorough removal.
What types of insulation are most susceptible to mold growth?
Fibrous insulation materials like fiberglass and cellulose are particularly susceptible to mold growth when exposed to moisture, as they provide an excellent food source and harbor humidity. Rigid foam insulation types, such as XPS or polyisocyanurate, are generally more resistant to mold growth themselves but can still trap moisture that promotes mold on adjacent materials.

After removing moldy insulation, what steps are crucial before installing new insulation?
Before installing new insulation, it is critical to identify and rectify the moisture source that caused the mold growth to prevent recurrence. The affected area must also be thoroughly cleaned, disinfected, and completely dried to eliminate any remaining mold spores and ensure a clean substrate for the new insulation.
How quickly can mold grow in insulation once it becomes wet?
Mold can begin to grow on insulation within 24 to 48 hours of becoming wet, especially if conditions are warm and humid. The speed of growth depends on factors like temperature, humidity levels, and the type of organic material present in the insulation.
These statements have not been evaluated by the Food and Drug Administration. This information is not intended to diagnose, treat, cure, or prevent any disease. Content is for informational purposes only and is not medical advice; consult a qualified healthcare provider before starting any supplement. As an Amazon Associate we earn from qualifying purchases.