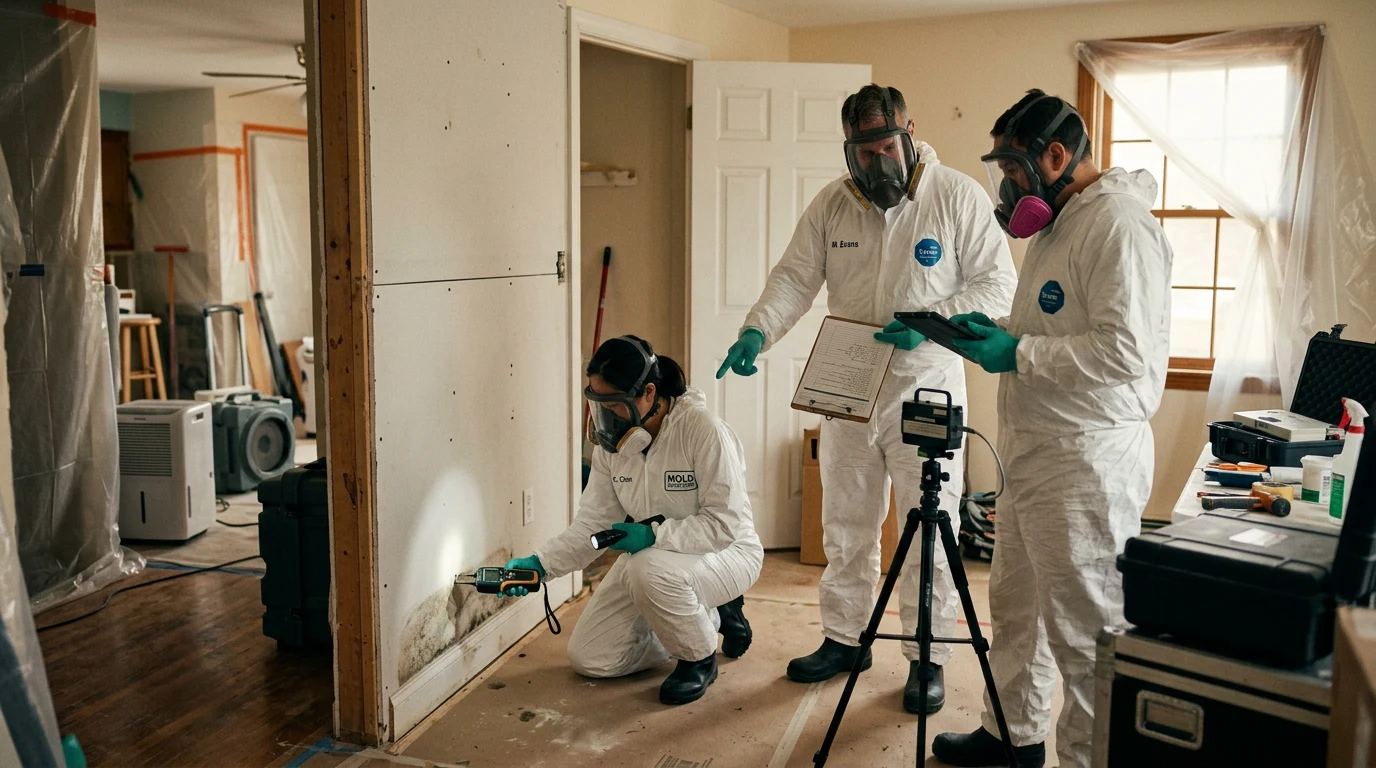
You hired a mold remediation company. They set up containment, removed materials, ran air scrubbers, and told you the job is complete. But how do you actually know the mold problem is resolved? Without post-remediation testing by an independent third party, you are taking the remediation company’s word for it. That is like having your mechanic also perform your vehicle inspection — there is an obvious conflict of interest.
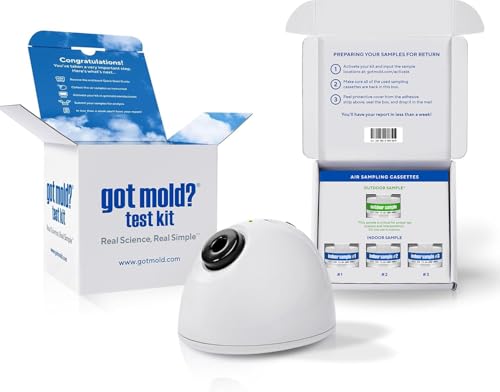
Post-remediation verification (PRV) testing, also called clearance testing, is the objective confirmation that a mold remediation project was successful. It involves air sampling, visual inspection, and moisture verification by a testing professional who was not involved in the remediation work. This guide explains exactly how the process works, what it costs, and what the results mean.
Why Independent Testing Is Non-Negotiable
The IICRC S520 Standard for Professional Mold Remediation — the industry’s governing document — recommends that post-remediation verification be performed by an independent party. “Independent” means a company or individual who has no financial relationship with the remediation contractor. Here is why this matters:
- Conflict of interest: A remediation company that also performs its own clearance testing has a financial incentive to pass the job. If they fail their own test, they have to redo work at their own expense. Independent testers have no such incentive.
- Accountability: An independent clearance report creates a paper trail. If mold returns within months, you have documented evidence of what the conditions were at the time of clearance.
- Insurance requirements: Many insurance companies require independent post-remediation testing before closing a claim. Without it, you may not receive full reimbursement.
- Real estate transactions: If you sell your home, a clearance report from an independent testing company provides documented proof that a mold issue was properly resolved.
- Legal protection: In disputes with remediation companies, landlords, or home sellers, an independent clearance report is admissible evidence. A self-performed test by the remediation company carries little weight.
Any remediation company that resists independent testing or insists on performing their own clearance should raise a red flag. Reputable companies welcome third-party verification because it validates their work.
When to Schedule Post-Remediation Testing
Timing matters. Post-remediation testing should happen at a specific point in the project timeline:
- After remediation is complete but before containment barriers are removed
- After HEPA vacuuming of all surfaces in the work area
- After the area has been dried to normal moisture levels
- Before replacement materials are installed — no new drywall, insulation, flooring, or paint until clearance is achieved
This timing is critical. If testing happens after containment is removed, cross-contamination can skew results. If it happens after new drywall is installed, you cannot visually inspect the framing behind it. The testing window is after cleaning but before closing things back up.
Most testing companies can schedule within 1-3 business days. The inspection itself typically takes 1-2 hours on-site, with lab results available within 24-48 hours.
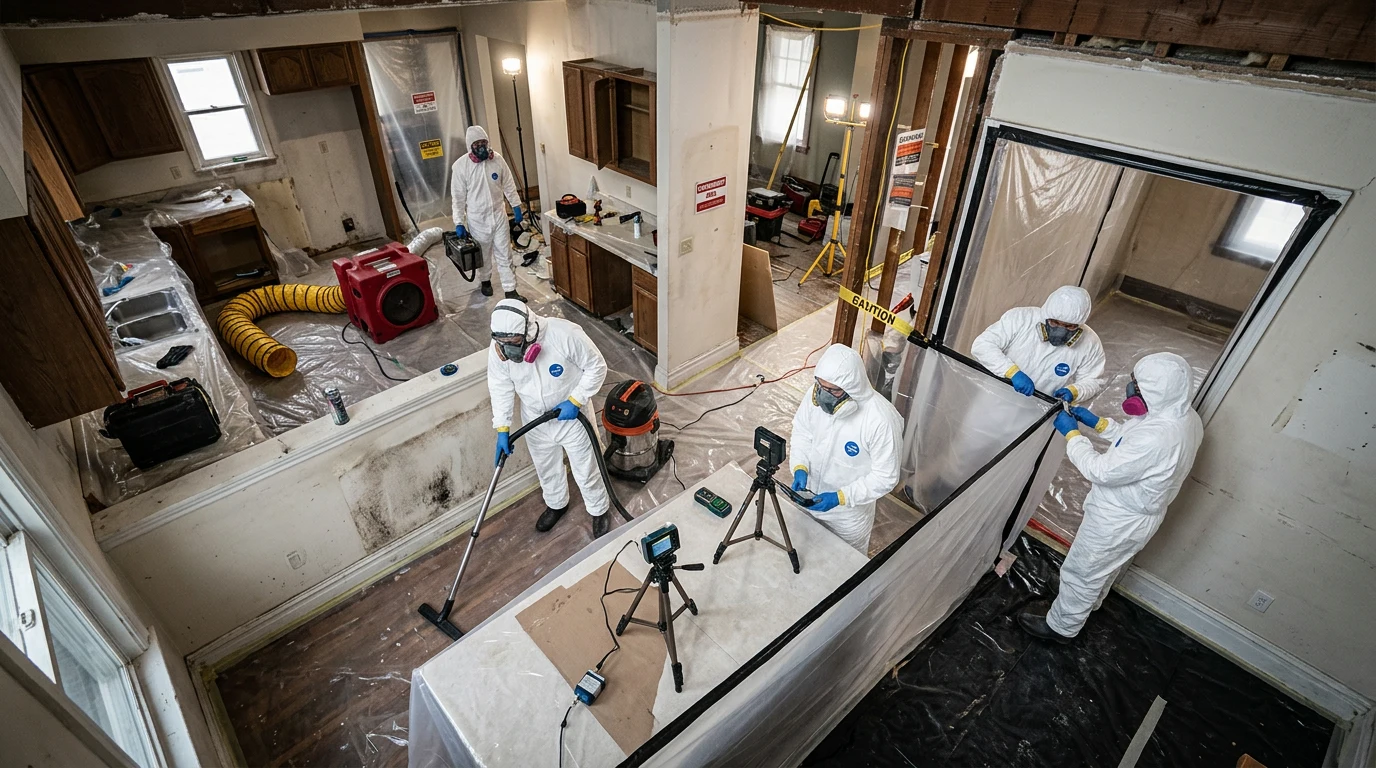
What the Testing Process Involves
A thorough post-remediation verification includes three components: visual inspection, moisture verification, and air sampling.
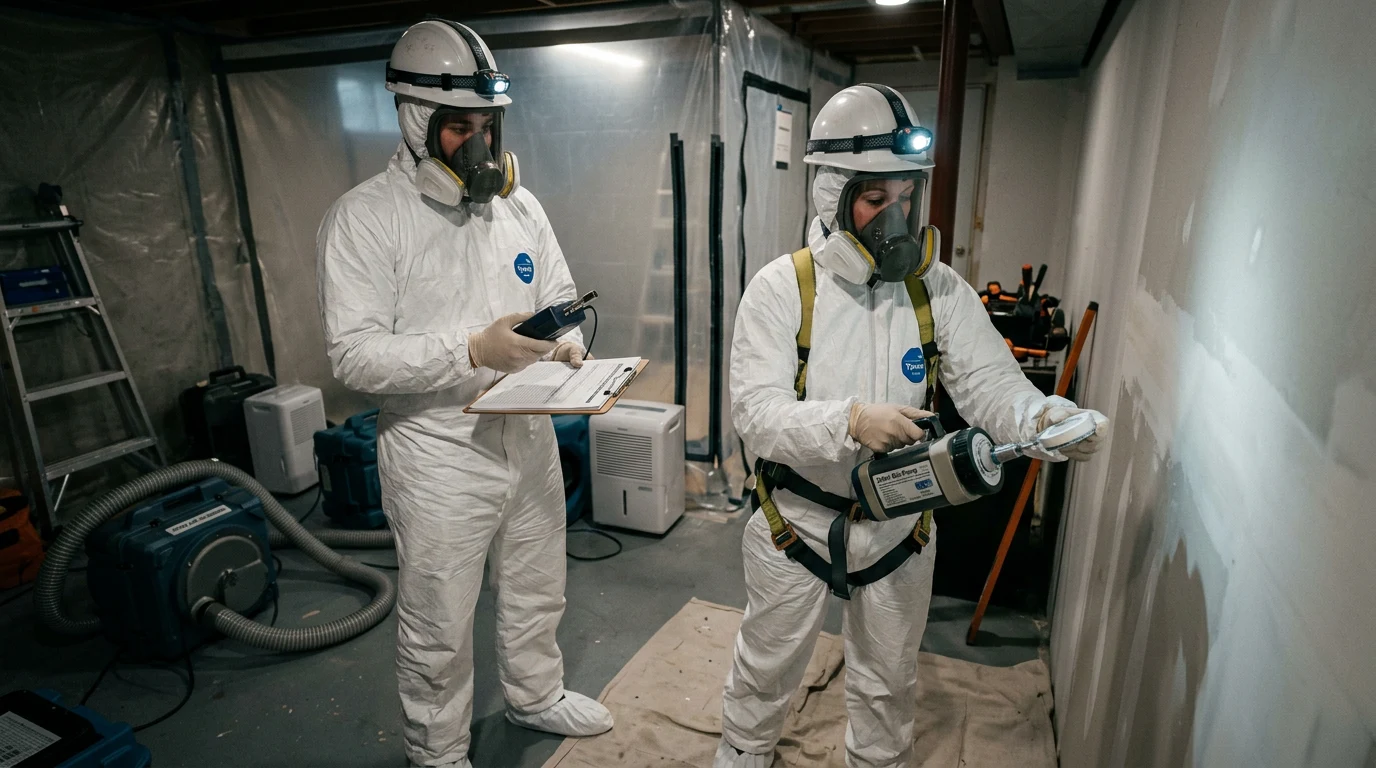
1. Visual Inspection
The inspector physically examines every surface in the remediation work area. They are looking for:
- Any remaining visible mold growth on framing, subfloor, or other structural components
- Staining that may indicate incomplete removal
- Debris or dust that should have been HEPA vacuumed
- Proper removal of all contaminated materials (no contaminated drywall remnants, insulation fragments, or carpet pad)
- Adequate cleaning of the containment area itself
If visible mold or contamination is found during visual inspection, the inspector will typically fail the project without proceeding to air sampling. There is no point in running lab tests when the visual evidence already shows incomplete work.
2. Moisture Verification
The inspector uses a moisture meter to check all structural materials in the work area. Acceptable readings vary by material:
- Wood framing: Below 15% moisture content (some standards require below 12%)
- Concrete/masonry: Below 4% moisture content
- Drywall (if any remains): Below 1% moisture content
- Subfloor: Below 15% for wood, varies for concrete
Elevated moisture readings indicate the structure is not adequately dried. Installing new materials over wet framing creates the conditions for mold to return. If moisture levels are elevated, the remediation company needs to continue drying before clearance testing proceeds.
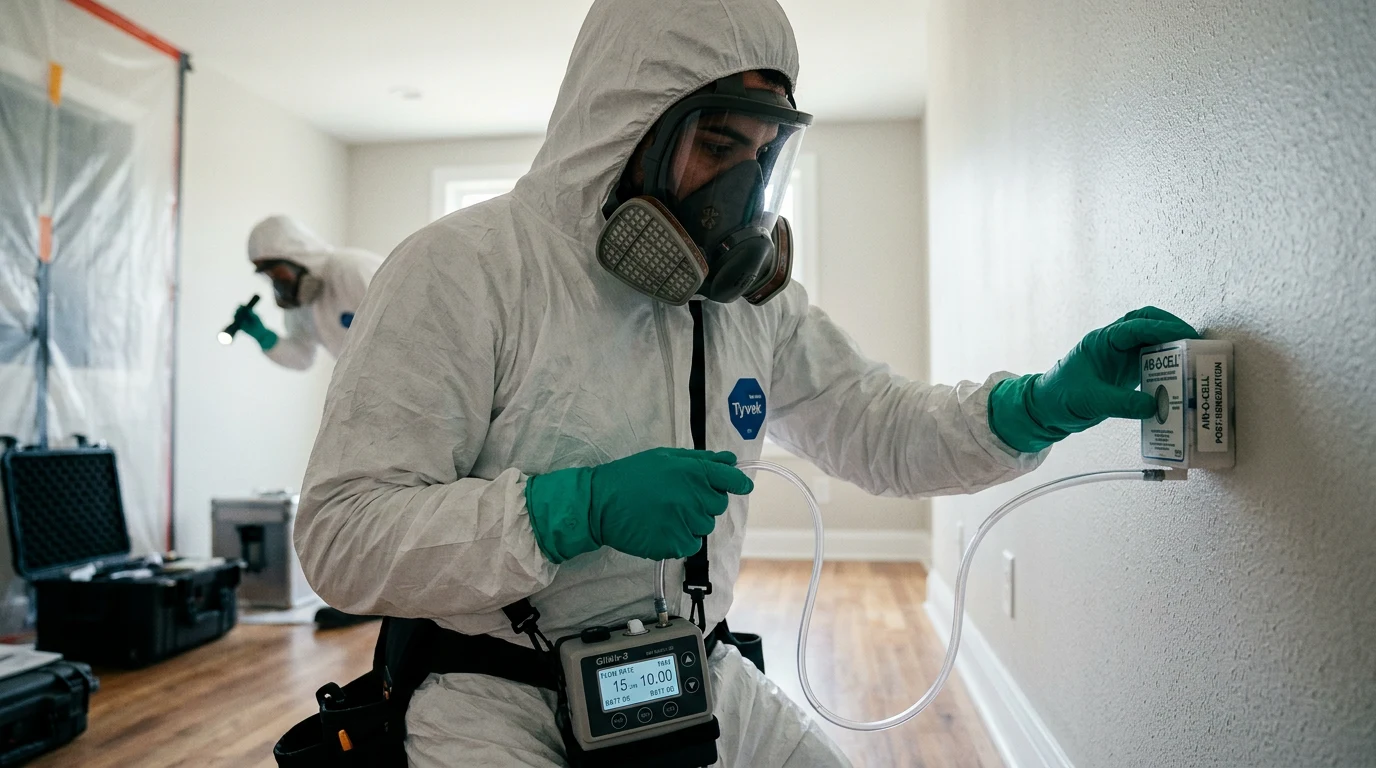
3. Air Sampling
Air sampling is the quantitative component of post-remediation testing. The inspector collects air samples from inside the work area and from outside the building (the outdoor control sample). These samples go to an accredited laboratory for analysis.
The standard sampling method uses a spore trap — a cassette containing a sticky surface that captures airborne particles when a calibrated pump draws air through it. A typical sample collects air for 5-10 minutes at a flow rate of 15 liters per minute, capturing particles from approximately 75-150 liters of air.
A standard post-remediation testing protocol includes:
- 1 outdoor sample: Establishes baseline spore counts in the ambient air
- 1-2 work area samples: Taken inside the remediation containment zone
- 1 sample from a non-affected room: Provides an indoor comparison baseline
Total sample count varies by project size. A single-room bathroom remediation might require 3-4 samples. A whole-basement project might require 6-8. Each sample costs approximately $35-$75 for laboratory analysis.
Reading Your Clearance Report
The laboratory report will list spore counts by type and location. Here is how to interpret the numbers:
Passing Criteria
There is no single government-mandated “safe” spore count threshold. However, the industry uses these general criteria for passing a post-remediation clearance:
- Total spore count in work area should be at or below the outdoor sample. If the outdoor air has 1,200 spores per cubic meter, the work area should have 1,200 or fewer.
- Species distribution should match outdoor air. The types of mold found inside should be similar to what is found outside. Finding high counts of indoor-indicator species like Stachybotrys (black mold) or Chaetomium inside when they are absent outdoors indicates a problem.
- No dominant indoor species. If one species accounts for a disproportionate percentage of the indoor sample compared to outdoor, it suggests an active indoor source.
- Work area counts should not exceed non-affected room counts. The remediated space should be as clean as or cleaner than the rest of the house.
Common Species in Reports
- Cladosporium: The most common outdoor mold. High outdoor counts are normal and do not indicate a problem.
- Penicillium/Aspergillus: Common both indoors and outdoors. Elevated indoor counts compared to outdoor may indicate a moisture issue. These are reported together because they look identical under standard microscopy.
- Stachybotrys: The species commonly called “black mold.” Any presence indoors when absent outdoors is concerning and typically requires further investigation. See our guide on black mold vs regular mold for more on this species.
- Chaetomium: A strong indicator of chronic water damage. Like Stachybotrys, any indoor presence when absent outdoors warrants attention.
What a Failing Report Looks Like
A failed clearance typically shows one or more of these patterns:
- Work area spore counts significantly higher than outdoor counts (2x or more)
- Presence of indicator species (Stachybotrys, Chaetomium) inside but not outside
- One species dominating indoor samples at 60-80% or higher
- Elevated moisture readings in structural materials
- Visible contamination noted during visual inspection
A failed clearance means the remediation company needs to return, identify what was missed, and re-clean. You should not pay for the remediation in full until clearance is achieved. This is another reason independent testing matters — it protects you from paying for incomplete work.
Cost of Post-Remediation Testing
Post-remediation testing costs vary by region and project size, but typical ranges are:
- Small project (bathroom, single wall): $300-$400 for 3-4 air samples plus inspection
- Medium project (bedroom, small basement area): $400-$500 for 4-6 air samples plus inspection
- Large project (full basement, multiple rooms): $500-$800 for 6-10 air samples plus inspection
- Lab fees per sample: $35-$75 depending on analysis type and turnaround time
This cost is separate from the remediation itself. Some remediation contracts include clearance testing in their price — but remember, the testing should be performed by an independent party, not the remediation company. If the remediation company is paying for the testing, make sure the testing company has no business relationship with them.
For context on overall remediation expenses, our mold removal cost guide breaks down pricing for different scenarios.
How to Find an Independent Testing Professional
Not all mold testing companies are equal. Look for these qualifications:
- Certifications: Look for ACAC (American Council for Accredited Certification) certified inspectors or CMI (Council-certified Microbial Investigator) designation. These require passing an exam and maintaining continuing education.
- No remediation services: The best testing companies do not also perform remediation. If they do both, they have the same conflict of interest you are trying to avoid.
- Accredited laboratory: Ask which laboratory they send samples to. The lab should be accredited by AIHA (American Industrial Hygiene Association) or EMLAP (Environmental Microbiology Laboratory Accreditation Program).
- Written report: You should receive a detailed written report including sample locations, results, methodology, photographs, and a clear pass/fail determination.
- Insurance and licensing: The testing company should carry professional liability (errors and omissions) insurance. Some states require specific licensing for mold assessors.
Ask your remediation company for a referral to an independent tester, but also get an independent recommendation (your insurance company, a real estate agent, or an online search) to verify they are truly independent. For more on choosing between DIY and professional testing approaches, see our comparison of DIY mold testing vs professional testing.
What Happens If the Project Fails Clearance
A failed clearance is not the end of the world — it means the system is working. Here is the typical sequence after a failed test:
- Review the report with the remediation company. The clearance report identifies where the problem is — elevated counts in a specific area, missed contamination, or inadequate drying.
- The remediation company returns to address deficiencies. This additional work should be at no extra cost to you. Reputable companies include re-cleaning in their contract if clearance is not achieved.
- Re-testing is performed. After the remediation company completes additional work, the independent tester returns for another round of sampling. You may need to pay for this second round of testing ($200-$400).
- Repeat until clearance is achieved. Most projects pass on the first or second attempt. If a project fails three or more times, it may indicate a fundamental problem with the remediation approach or an unidentified moisture source.
Before signing a remediation contract, clarify the re-work policy. Good contracts include language stating the company will re-clean at no charge until independent clearance is achieved. If a company refuses this term, consider it a warning sign. For a detailed understanding of what professional remediation should include, see our guide on the mold remediation process.
Post-Clearance: What Comes Next
Once clearance testing passes, you can proceed with reconstruction. But the mold prevention work is not over:
- Confirm the moisture source is permanently fixed. Remediation removes the mold. The plumber, roofer, or waterproofing contractor fixes the cause. Both must be resolved.
- Install moisture-resistant materials. When replacing drywall in moisture-prone areas (bathrooms, basements), use mold-resistant drywall (paperless or fiberglass-faced). Use closed-cell spray foam insulation in previously affected wall cavities.
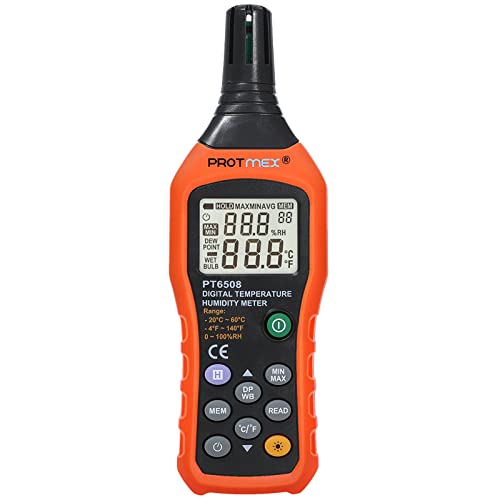
- Set up monitoring. Place a hygrometer ($10-$20) in the affected area to monitor relative humidity. Your target is consistently below 50%. If humidity creeps above 60%, investigate immediately.
- Keep the clearance report. Store it with your home’s permanent records. You will need it for insurance, future real estate transactions, or if mold recurs.
For long-term moisture control strategies, our guide on mold prevention products covers the tools and systems that keep humidity in check after remediation. According to the EPA’s guide on mold cleanup, controlling moisture is the key to preventing mold recurrence.
Frequently Asked Questions
Is post-remediation mold testing required by law?
Requirements vary by state and municipality. Some states (New York, Texas, Florida, Maryland) have mold assessment licensing requirements that effectively mandate independent testing. Others leave it to the homeowner’s discretion. Regardless of legal requirements, independent clearance testing is the only objective way to verify a remediation project was successful. The cost ($300-$600) is minimal compared to the risk of paying thousands for incomplete work.
How long after remediation should testing be done?
Testing should happen after remediation cleaning is complete and the area is dried to normal moisture levels, but before containment barriers are removed and before new materials are installed. This is typically 1-3 days after the remediation company says they are done. Do not wait weeks — the containment needs to remain in place until clearance is confirmed.
What if my remediation company says their own testing is sufficient?
It is not. The IICRC S520 standard recommends independent verification for a reason — conflict of interest. A company testing its own work is not objective. Some states explicitly prohibit companies from performing both remediation and clearance testing on the same project. Even where it is not prohibited, always hire a separate company for testing. The $300-$600 cost of independent testing protects your entire remediation investment.
Do I need post-remediation testing for small DIY mold removal?
For small areas (under 10 square feet) on non-porous surfaces that you cleaned yourself, formal post-remediation testing is typically not necessary. However, if you removed mold from porous materials like drywall or wood, or if the affected area was larger than 10 square feet, post-remediation testing provides peace of mind that the cleanup was thorough. It is especially recommended if anyone in the household has respiratory conditions or allergies.
Can I use a home mold test kit for post-remediation verification?
No. Home test kits (settle plates or petri dishes) are not suitable for post-remediation verification. They lack calibrated air flow, cannot provide quantitative spore counts, and do not include the outdoor control sample needed for comparison. Post-remediation testing requires calibrated spore trap sampling analyzed by an accredited laboratory with results interpreted by a qualified professional.
Frequently Asked Questions
Is post-remediation mold testing always necessary?
While not legally mandated in most areas, post-remediation mold testing is highly recommended. It provides objective evidence that the mold removal was successful and that the indoor air quality has returned to acceptable levels, protecting your health and investment.
Who should perform post-remediation mold testing?
It is crucial that an independent, third-party mold assessor performs post-remediation testing. This ensures unbiased results and avoids potential conflicts of interest that could arise if the remediation company tested their own work.
What does post-remediation mold testing involve?
Post-remediation testing typically involves visual inspection, moisture readings, and air sampling, often comparing indoor air samples to outdoor baseline samples. Surface samples may also be taken in areas of concern to confirm proper cleaning.

What criteria determine a successful post-remediation test?
A successful test indicates that mold spore counts in the remediated area are significantly lower than pre-remediation levels and comparable to outdoor baseline levels. There should be no visible mold growth, and moisture levels should be within normal ranges, indicating the source of the problem has been addressed.
What happens if the post-remediation test fails?
If the post-remediation test fails, it means the mold issue has not been fully resolved. The remediation company will need to re-evaluate their work, identify any remaining mold or moisture sources, and perform additional remediation until the area passes testing.
How soon after remediation should post-testing occur?
Post-remediation testing should typically occur after the remediated area has been thoroughly dried and cleaned, usually within a few days to a week after the remediation work is completed. This timeframe allows for any disturbed spores to settle and ensures the environment is stable for accurate assessment.
These statements have not been evaluated by the Food and Drug Administration. This information is not intended to diagnose, treat, cure, or prevent any disease. Content is for informational purposes only and is not medical advice; consult a qualified healthcare provider before starting any supplement. As an Amazon Associate we earn from qualifying purchases.