Mold remediation is not simply a matter of scrubbing visible growth off a wall. Effective remediation requires finding and eliminating the moisture source that allowed mold to grow in the first place, then systematically removing contaminated materials and preventing recontamination. Without both steps, mold will return. This article walks through the core mold remediation steps so homeowners understand what a proper process looks like and what to expect when working with qualified professionals.
Why Mold Comes Back Without Source Control
Mold is a symptom, not the root problem. The root problem is moisture. Mold spores are present in virtually every indoor environment, but they only colonize and grow when relative humidity rises above roughly 60% or when building materials stay wet. If a slow pipe leak, roof intrusion, or chronic condensation zone is left unaddressed, mold will re-establish on new or cleaned surfaces within days to weeks.
This is why the sequence of mold remediation steps matters. Source control must come before or alongside removal. Skipping source control is the single most common reason homeowners pay for remediation twice.
Step 1: Recognize the Signs and Gather Information
Before any physical work begins, you need to confirm a mold problem exists and understand its scope. Key indicators that warrant further investigation include:
- Visible mold growth on walls, ceilings, flooring, or inside cabinets
- A persistent musty odor, especially in basements, bathrooms, or after rain
- Known or observed history of water damage, flooding, or leaks
- Occupants experiencing unexplained symptoms that improve when away from the building (consult a qualified physician for any health concerns)
If any of these indicators are present, the next step is a proper assessment, not immediate cleaning. Disturbing mold without containment can spread spores throughout the building.
Step 2: Test and Assess the Environment
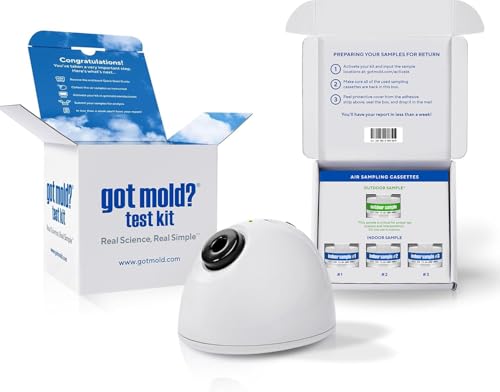
A structured assessment tells you where the mold is, what types may be present, and how extensive the contamination is. This informs the remediation plan and helps set a baseline for post-remediation verification.
Choosing the Right Test
Environmental Relative Moldiness Index (ERMI) testing analyzes settled dust for a wide panel of mold species using DNA-based methods (MSQPCR). ERMI scores are reported on a scale, and higher scores indicate a greater concentration of water-damage-related mold species relative to common background molds. ERMI is generally considered more sensitive than a single air sample for identifying whether problematic mold reservoirs exist in a building. Air sampling, while commonly used, can miss mold hidden inside walls or in settled dust.
For professional assessment, working with a certified Indoor Environmental Professional (IEP) or building biologist is strongly recommended. These specialists can identify hidden moisture sources using tools like thermal imaging and moisture meters, and they can develop a remediation scope that contractors can actually follow.
Moisture Mapping
A qualified inspector will check relative humidity levels throughout the building, ideally targeting indoor humidity between 30% and 50%. Readings consistently above 60% signal an active moisture problem. They will also probe wall cavities, subfloor assemblies, and crawlspaces where water damage is not visible from the surface.
Learn more about what a thorough mold inspection involves at our mold testing resource center.
Step 3: Identify and Mitigate Moisture Sources
This step is non-negotiable. Common moisture sources that drive indoor mold growth include:

- Plumbing leaks, including slow drips inside wall cavities
- Roof damage, missing flashing, or clogged gutters allowing water infiltration
- Foundation cracks or improper grading directing water toward the structure
- Condensation on cold surfaces such as window frames, cold water pipes, or poorly insulated exterior walls
- High indoor humidity from inadequate ventilation in bathrooms, kitchens, or crawlspaces
- HVAC system leaks, drain pan overflow, or improperly sealed ductwork
Until the moisture source is repaired, containment and removal are temporary measures. Structural repairs, waterproofing, improved ventilation, and in some cases dehumidification systems are all valid tools depending on the specific source.
Step 4: Develop a Written Remediation Plan
A professional remediation plan defines the scope of work clearly before any removal begins. This protects the homeowner and gives the remediator a documented standard to work toward. The plan should specify:
- Which areas and materials are affected
- Containment methods to prevent cross-contamination during removal
- Personal protective equipment (PPE) requirements for workers
- Whether materials will be cleaned or demolished and removed
- Disposal procedures for contaminated materials
- Air filtration requirements, typically HEPA filtration units during active work
- Clearance testing criteria to verify successful remediation
The EPA’s mold remediation guidance and the IICRC S520 Standard for Professional Mold Remediation are the primary reference frameworks used by qualified remediators. You can review the EPA’s guidance directly at EPA.gov.
Step 5: Containment and Physical Removal
For mold affecting more than 10 square feet, the EPA recommends professional remediation with proper containment. Smaller areas may be addressable by a careful homeowner, but any mold in HVAC systems, covering large surface areas, or resulting from sewage water should always be handled by a certified professional.
Containment
Remediators establish negative air pressure containment zones using polyethylene sheeting and HEPA air scrubbers to prevent spores from migrating to clean areas of the building during work. This is particularly important in occupied homes.
Material Removal vs. Cleaning
Porous materials that are significantly colonized, such as drywall, insulation, carpet, and ceiling tiles, are typically removed and bagged for disposal rather than cleaned. Non-porous surfaces like concrete, tile, and metal can often be HEPA-vacuumed and cleaned with appropriate antimicrobial solutions. Semi-porous materials like wood framing are evaluated case by case. Sanding or dry ice blasting may be used on wood structural members.
See our detailed guide on mold removal methods and material decisions for a deeper look at this process.
Step 6: Post-Remediation Verification
After work is complete and the area has dried, a clearance inspection confirms that remediation goals were met. Clearance typically involves visual inspection and either air sampling or surface sampling. Post-remediation air samples should show mold levels and species profiles comparable to or better than outdoor reference samples, with no significant elevation of water-damage indicator species.
This clearance step should ideally be performed by an independent IEP, not the same company that did the removal. Independent verification protects the homeowner and gives them documentation for insurance or future real estate transactions.
Step 7: Ongoing Prevention and Maintenance
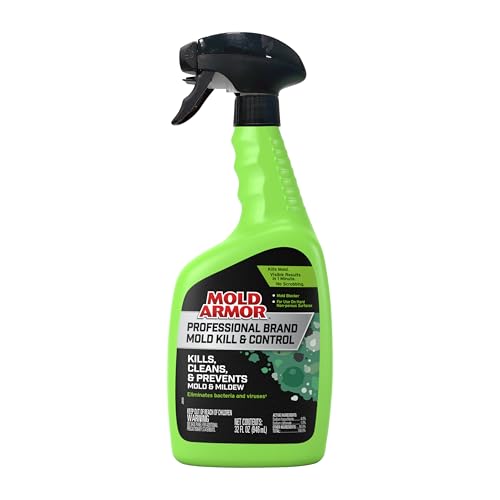
Once remediation is complete, maintaining a low-humidity indoor environment is the key to preventing recurrence. Practical ongoing measures include:
- Maintaining indoor relative humidity between 30% and 50% year-round
- Running bathroom and kitchen exhaust fans during and for 15 to 20 minutes after use
- Inspecting plumbing, roof, and foundation annually, and after significant weather events
- Keeping gutters clear and grading soil away from the foundation
- Addressing any water intrusion within 24 to 48 hours to prevent mold establishment
- Using quality HEPA air filtration, particularly in high-risk areas like basements and crawlspaces
Learn more about long-term prevention strategies in our mold prevention section.
Understanding Remediation Costs
Cost varies considerably based on the size of the affected area, materials involved, and geographic location. As a general reference point, small contained remediation jobs covering a few square feet may cost a few hundred dollars, while larger whole-room or multi-room projects commonly range from $1,500 to $10,000 or more. Severe cases involving structural components, crawlspaces, or HVAC systems can exceed those figures significantly. Always get multiple written estimates and verify that any contractor holds relevant certifications such as IICRC Applied Microbial Remediation Technician (AMRT).
For help evaluating contractor bids, visit our mold removal contractor guidance page.
A Note on Health
This article is informational only and does not constitute medical advice. Mold exposure can affect people differently depending on individual factors. If you or anyone in your household has health concerns related to potential mold exposure, consult a qualified physician. For questions about the building itself, consult a certified mold inspector, IEP, or building biologist.
Frequently Asked Questions
What is the most important of all the mold remediation steps?
Source control, meaning finding and fixing the moisture problem, is the most critical step. Without eliminating the water source, mold will grow back on cleaned or newly installed materials, making any remediation work a temporary fix at best.
Can I do mold remediation myself, or do I need a professional?
The EPA suggests that small mold areas of less than 10 square feet may be handled by a careful homeowner using appropriate PPE, including an N-95 respirator, gloves, and eye protection. However, larger infestations, mold in HVAC systems, mold resulting from contaminated water, or situations where occupants are experiencing health concerns should be handled by a certified professional remediator.
How long does mold remediation typically take?
A small bathroom or single room project may take one to three days. Larger projects involving multiple rooms, wall cavities, or structural framing can take a week or more, factoring in containment setup, material removal, drying time, and clearance testing. The timeline also depends on how quickly the underlying moisture source is addressed.
What is ERMI testing and is it better than air testing for mold?
ERMI, or Environmental Relative Moldiness Index, is a dust-based DNA test that measures a wide panel of mold species in settled dust samples. Because it captures mold that has accumulated over time in dust, it can detect contamination that a single air sample might miss, particularly mold hidden inside walls or in materials not actively releasing spores at the moment of sampling. It provides a numeric score that can be compared to a reference database, making it useful for initial assessment and post-remediation comparison.
How do I know when remediation has been successful?
Successful remediation is confirmed through a clearance inspection conducted by an independent IEP. This involves a visual inspection confirming no visible mold remains and that moisture levels in building materials are within acceptable ranges, followed by post-remediation sampling. Results should show no significant elevation of water-damage indicator mold species and levels comparable to or better than outdoor baseline samples for the same time period.
These statements have not been evaluated by the Food and Drug Administration. This information is not intended to diagnose, treat, cure, or prevent any disease. Content is for informational purposes only and is not medical advice; consult a qualified healthcare provider before starting any supplement. As an Amazon Associate we earn from qualifying purchases.