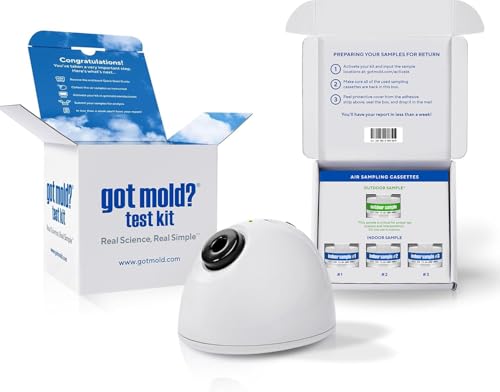
The Environmental Relative Moldiness Index, or ERMI, is one of the most detailed mold screening tools available for residential and commercial spaces. It uses DNA-based analysis (qPCR) to identify and quantify 36 specific mold species in dust, then produces a single numeric score that helps gauge how moldy a building is compared to a national reference database. Collecting the sample correctly is critical, an improperly collected sample can produce misleading results that either miss a real problem or flag one that does not exist.
What Is an ERMI Score and Why Does It Matter?
The ERMI scoring system was developed by the U.S. Environmental Protection Agency to evaluate mold-related indoor air quality concerns, particularly in relation to mold-associated asthma. The score is calculated by subtracting the sum of log values for Group 2 (common indoor molds) from the sum of log values for Group 1 (water-damage-associated molds):
ERMI Score = Sum of Logs (Group 1) − Sum of Logs (Group 2)
The 36 mold species are split between these two groups. Group 1 includes species strongly associated with water damage, such as Stachybotrys chartarum, Chaetomium globosum, Aspergillus niger, and Penicillium purpurogenum. Group 2 includes molds commonly found in buildings regardless of moisture problems, such as Cladosporium cladosporioides, Alternaria alternata, and Penicillium chrysogenum.
Results are reported as Spore Equivalents per milligram of dust (SE/mg). The lab also flags species whose levels are 10-fold (*), 100-fold (**), or 1,000-fold (***) above the geometric mean from the 2007 national U.S. survey baseline.
ERMI Score Interpretation Table
| Quartile | ERMI Score Range | Relative Moldiness | General Interpretation |
|---|---|---|---|
| Q1 | Less than −4 | Low | Further investigation generally not needed to determine mold sources |
| Q2 | −4 to < 0 | Low-Medium | Further investigation may be needed if occupants are reactive or sensitized |
| Q3 | 0 to < 5 | Medium-High | Investigation recommended |
| Q4 | 5 and above | High | Remediation and source identification strongly recommended |
For individuals with Chronic Inflammatory Response Syndrome (CIRS), many practitioners consider an ERMI score of 2 or lower to be an acceptable threshold, though you should always consult with your physician and a certified indoor environmental professional for guidance specific to your health situation. This article is informational only and does not constitute medical advice.
For more on how ERMI results connect to broader testing strategies, see our guide to mold testing options.
Choosing the Right Collection Method
ERMI samples are dust samples, not air samples. There are two primary collection methods:
- Swiffer cloth method: Uses an unscented, dry Swiffer sweeper cloth to collect settled dust from a defined area. This is the most common consumer-grade method and is accepted by most certified ERMI labs.
- Vacuum cassette method (HEPA sock): A specially prepared vacuum filter cassette is used to vacuum a defined floor area. This method can collect more material and is sometimes preferred for larger homes or professional sampling.
Most at-home ERMI kits use the Swiffer method. Confirm with your chosen laboratory which collection tool is included and accepted before you start. Using the wrong collection device can invalidate the sample.
What You Need Before You Start
- ERMI sampling kit from a certified laboratory (includes collection cloth or vacuum cassette, chain-of-custody form, and a sealable collection bag)
- Clean nitrile gloves (one pair minimum)
- A permanent marker for labeling
- A tape measure (optional but helpful)
- The lab’s submission instructions, read them fully before touching anything
Do not use any cloth or bag that did not come directly from the lab kit. Outside materials can be pre-contaminated with mold spores or cleaning chemicals that interfere with qPCR analysis.
How to Collect an ERMI Sample Step by Step
Step 1: Do Not Pre-Clean the Area
This is the most common mistake. Do not vacuum, sweep, or mop the collection area for at least 24 hours before sampling, and ideally 48 to 72 hours. The goal is to collect settled dust that represents the cumulative mold burden in the space. If you clean immediately before sampling, you remove the very material the test needs.
Step 2: Select the Right Rooms
For a whole-home ERMI, the standard protocol calls for sampling from two rooms: the main living area (typically the living room) and one bedroom. Bedrooms are particularly important because occupants spend 6 to 8 hours there each night, and the settled dust reflects long-term exposure. Avoid sampling in bathrooms, kitchens, or garages unless your lab specifically instructs otherwise, as these areas can skew results with non-representative mold sources.
Step 3: Put on Gloves
Handle the collection cloth only while wearing clean gloves. Skin oils and any mold on your hands can contaminate the DNA analysis. Open the packaging carefully and avoid touching the collection surface of the cloth against anything other than the designated sampling area.
Step 4: Wipe the Sampling Area
For the Swiffer method, wipe the collection cloth across approximately 2 square meters (roughly 2 square feet x 10 feet, or a comparable area) of hard floor surface. Move the cloth in overlapping passes to pick up as much settled dust as possible. If floors are carpeted, press the cloth firmly down and slowly drag it to pull dust from the carpet fibers. For homes under about 2,000 square feet, one composite sample from the two designated rooms is typically sufficient.
Step 5: Handle Low-Dust Situations
If surfaces appear very clean or recently cleaned, wipe a slightly larger area to compensate. Labs require a minimum sample weight (often around 1 to 5 mg of dust) to run a valid qPCR analysis. If your sample weight is too low, the lab may report the result as insufficient and ask for a re-sample.
Step 6: Seal and Label the Sample
Fold the cloth inward so the collection surface faces itself and none of the collected dust can fall out. Place it immediately into the sealable bag provided by the lab. Write the sample date, location (e.g., “Living Room”), and any required sample ID directly on the bag with the permanent marker. Do not use tape over the seal unless the lab instructs you to.
Step 7: Complete the Chain-of-Custody Form
Fill out all required fields on the chain-of-custody (COC) form before shipping. Most labs require the sample date, address, sample type (Swiffer vs. vacuum), and whether the sample is for a pre-remediation or post-remediation assessment. A post-remediation ERMI is used to confirm that cleaning successfully reduced mold levels, so accurately noting the sample status matters for how results are interpreted.
Step 8: Ship Promptly
Send the sample to the lab as soon as possible, ideally within 24 to 48 hours of collection. Store the bagged sample at room temperature, away from direct sunlight and heat. Do not freeze or refrigerate the sample unless the lab specifically requires it. Most ERMI labs, including those using qPCR analysis, can receive samples shipped via standard overnight or two-day courier services.
Understanding Your ERMI Report
When your results arrive, you will see individual SE/mg values for all 36 species, a sum-of-logs figure for Group 1 and Group 2 separately, and a final ERMI score. Pay attention to the asterisk flags on individual species. A species marked with three asterisks (***) is present at levels 1,000-fold above the national geometric mean, that warrants close attention regardless of the overall ERMI score.
For example, in a post-remediation setting, finding Aspergillus niger at 4,485 SE/mg with a three-asterisk flag would indicate that species is still significantly elevated compared to reference levels, even if the building’s overall score falls in a moderate range. This kind of species-level detail is one of the key advantages of qPCR-based ERMI testing over spore-trap air samples.
To understand what happens after you receive a concerning result, read our overview of the mold removal process and our article on what to do after a high ERMI score.
Common Mistakes That Invalidate ERMI Samples
- Cleaning floors within 24 hours before sampling
- Touching the collection surface with bare hands
- Sampling in a room that was recently renovated or heavily disturbed
- Using a substitute cloth or bag not provided by the lab
- Leaving the COC form incomplete, causing the lab to hold the sample
- Collecting in a single small area rather than across the designated square footage
When to Hire a Professional Sampler
DIY ERMI sampling is appropriate for initial screening. However, if you are dealing with a documented water damage event, a history of health symptoms potentially linked to indoor air quality, a legal or real estate dispute, or a post-remediation verification, hiring a certified indoor environmental professional (IEP) is strongly recommended. Certified professionals follow the IICRC S520 Standard for Professional Mold Remediation and can pair ERMI results with a visual inspection, moisture mapping, and additional air or surface sampling for a complete picture.
For guidance on finding a qualified inspector, see our resource on professional mold testing services.
Cost and Turnaround
ERMI test kits typically range from $200 to $350 for the full 36-species qPCR analysis, depending on the laboratory. Rush or priority turnaround (3 to 5 business days versus standard 7 to 10 business days) often adds $50 to $100 to the base cost. If you need a certified professional to collect the sample on-site, expect to add a site visit fee of $150 to $400 depending on your region and the scope of the inspection. For context, a standard post-remediation ERMI report typically includes results from one composite sample with a written score interpretation.
If your ERMI results point to active mold growth requiring remediation, our mold remediation cost guide breaks down what to expect at each scale of work.
Frequently Asked Questions
How long should I wait after remediation before collecting a post-remediation ERMI sample?
Most certified professionals recommend waiting at least 24 to 72 hours after all remediation work is fully complete and the area has been cleaned and allowed to settle. This gives time for any disturbed dust to resettle on surfaces where it can be collected accurately. Sampling too soon after remediation, while surfaces are still wet or air scrubbers are running, can produce unrepresentative results.
Can I collect an ERMI sample from carpet?
Yes. Carpet is actually an excellent collection surface because it traps settled dust effectively. Press the Swiffer cloth firmly into the carpet pile and drag slowly across the defined area. The key is using enough pressure to pull dust from the fibers rather than just gliding across the surface. Some labs prefer hard floor sampling when both options are available, so check your specific lab’s instructions.
Is an ERMI test the same as an air quality test?
No. ERMI tests settled dust, which reflects cumulative mold deposition over weeks or months. Air sampling (such as spore trap or Air-O-Cell cassette testing) captures what is airborne at a specific moment. Both methods have their place. ERMI is generally considered better for identifying long-term mold burden, while air sampling can be more useful for identifying active disturbance or acute events. Many professionals use both together for a thorough assessment.
What ERMI score is considered safe for someone with mold sensitivity?
For the general population, scores in the Q1 range (below −4) are considered low relative moldiness. For individuals with conditions such as CIRS or known mold-related health concerns, many practitioners use a threshold of 2 or lower as a general safety benchmark. However, an ERMI score is one data point, not a definitive health determination. Always work with your physician and a certified indoor environmental professional to interpret results in the context of your specific health and building conditions. This article does not provide medical advice or diagnosis.
How many samples do I need for a complete home ERMI assessment?
The standard ERMI protocol uses a single composite sample collected from two rooms (typically the main living area and a bedroom), combined into one sample submitted to the lab. Some labs and professionals recommend separate samples from each room, particularly in larger homes over 2,500 square feet or in situations where mold contamination is suspected in a specific area. Separate room sampling increases cost but provides more location-specific data. Discuss the sampling strategy with your lab or IEP before you begin.
These statements have not been evaluated by the Food and Drug Administration. This information is not intended to diagnose, treat, cure, or prevent any disease. Content is for informational purposes only and is not medical advice; consult a qualified healthcare provider before starting any supplement. As an Amazon Associate we earn from qualifying purchases.