Mold on the Subfloor: What It Means and How to Deal With It
As an Amazon Associate I earn from qualifying purchases. This article contains affiliate links.
Finding mold on your subfloor can feel alarming. You pull back carpet, peel up tile, or expose a section of plywood during a renovation, and there it is: black or greenish growth spreading across the surface underneath. The good news is that surface mold on subflooring is almost always a DIY-level problem once you understand what you are dealing with. This guide covers when you can clean it, when you must cut it out, and exactly which products get the job done safely.
Is Mold on Subfloor Dangerous? Can You DIY It?
Not all mold on subfloor is toxic, but all mold should be treated with respect. The most common types found on plywood and OSB subflooring are Cladosporium, Penicillium, and Aspergillus. Black mold (Stachybotrys chartarum) is less common on subfloor because it needs sustained moisture and cellulose-rich material, but it can appear in long-term leak situations.
If the affected area is smaller than about 10 square feet, you can safely handle it yourself with the right PPE and an EPA-registered mold cleaner. The EPA and CDC both recommend DIY cleanup for small areas. Larger infestations, mold behind walls, or mold that has softened the wood to the point of structural weakness should be evaluated by a professional.
When to Stop and Call a Pro
- The subfloor feels spongy or soft when you walk on it
- Mold covers more than 10 continuous square feet
- You or someone in your home has asthma, allergies, or a compromised immune system
- The mold keeps returning after cleaning
- You suspect mold is also inside wall cavities or under cabinets
Why Mold Grows on Subfloor
Subfloor is usually plywood or oriented strand board (OSB), both of which are cellulose-rich materials that mold fungi digest. Mold needs three things to grow: moisture, a food source, and temperatures between 40 and 100 degrees Fahrenheit. A subfloor provides two of these by default. The only variable is moisture.

Common moisture sources include:
- Plumbing leaks from toilets, tubs, or supply lines that seep through the finished floor
- High humidity in crawl spaces or basements that condenses on the underside of the subfloor
- Flooding from storms, burst pipes, or appliance overflows that is not fully dried within 24-48 hours
- Inadequate ventilation under the house, especially in crawl spaces without a vapor barrier
Identifying and fixing the moisture source is the single most important step. Without it, any cleanup is temporary.
What You Will Need
Gather the right products and PPE before you start. Working without proper protection or the wrong cleaner can make the problem worse.
PPE (Personal Protective Equipment)
| Item | Why You Need It | Recommended Product |
|---|---|---|
| N95 or better respirator | Prevents inhaling mold spores during cleanup | 3M Half Facepiece Reusable Respirator 6300 |
| Safety goggles | Protects eyes from spores and cleaning chemicals | Any wrap-around safety goggles |
| Disposable gloves | Prevents skin contact with mold and cleaners | Nitrile or heavy-duty rubber gloves |
| Disposable coveralls (optional) | Keeps spores off your clothes | Tyvek suit or similar |
Cleaning Products
| Product | Best For |
|---|---|
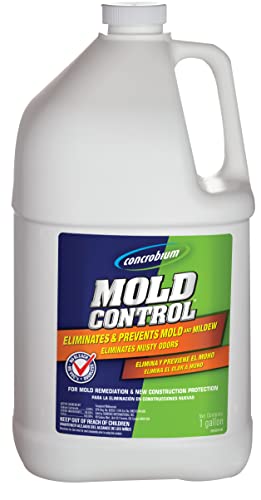
| Concrobium Mold Control Spray (32 oz) | General mold cleanup on plywood subfloor, EPA-registered, leaves no bleach residue |
| Concrobium Mold Control (1 Gallon) | Larger areas, best value for big jobs |
| Concrobium Mold Control Aerosol (14.1 oz) | Small spots and hard-to-reach areas |
| RMR-86 Instant Mold Stain Remover (32 oz) | Heavy staining, scrub-free formula, works in minutes |
Tools and Equipment
| Tool | Purpose | Recommended Product |
|---|---|---|
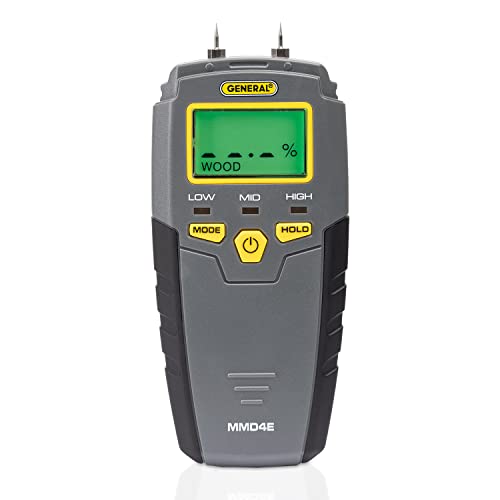
| Moisture meter | Confirms subfloor is dry enough before and after cleaning | General Tools MMD4E Moisture Meter |
| Shop vacuum with HEPA filter | Removes loose spores and debris without spreading them | Any wet/dry vac with HEPA-rated filter |
| Scrub brush or sponge | Agitates the mold cleaner into the wood grain | Stiff nylon brush |
| Dehumidifier | Dries the area after cleaning and prevents regrowth | Frigidaire 50 Pint Dehumidifier |
| Fans | Circulates air to speed drying | Any box fan or floor fan |
Step-by-Step Mold Removal from Subfloor
Step 1: Identify and Stop the Moisture Source
Before you clean a single spore, fix the leak or moisture problem. If the source is a plumbing leak, repair it. If it is high humidity in a crawl space, install a vapor barrier and address ventilation. Use your moisture meter to check the subfloor; any reading above 16-18% indicates the wood is still too wet and will grow mold again.
Step 2: Set Up Containment
Close off the room from the rest of the house to prevent spores from traveling into other living areas. Tape 4-6 mil plastic sheeting over all doorways, heating vents, and air return grilles. Seal the edges with painter’s tape. Turn off your HVAC system completely during cleanup to avoid drawing spores into the ductwork. Open windows in the work area if weather permits to create negative air pressure that pulls airborne particles outside. Place a box fan facing out of an open window to help exhaust the air.
Step 3: Suction-Clean Loose Debris
Use a shop vacuum with a HEPA filter to remove loose mold spores, dirt, and debris from the subfloor surface. Empty the vacuum outdoors or into a sealed bag. Do not use a standard household vacuum without a HEPA filter; it will blow spores back into the air.
Step 4: Apply an EPA-Registered Mold Cleaner
Spray Concrobium Mold Control (32 oz or 1-gallon size) generously onto the affected area, holding the nozzle about 6-8 inches from the surface. Apply enough to wet the mold completely without creating standing puddles that could soak into the wood. The solution works by encapsulating mold spores: the alkaline carbonates shrink and burst the cell walls of the mold, while the residual film left behind after drying resists future growth. Let it sit for 10-15 minutes. For heavy staining that has been present for a long time, use RMR-86 instead. RMR-86 is a faster-acting formula that starts working within seconds and does not require scrubbing on most surfaces. Test RMR-86 on a small hidden area first, as its active ingredients can lighten the color of some wood.
Step 5: Scrub the Area
Use a stiff nylon scrub brush to work the cleaner into the wood grain. Focus on visible mold spots. Do not oversaturate the subfloor; you want the cleaner on the surface, not soaking through the wood material itself. If the wood is already wet, use less liquid.
Step 6: Let It Dry Completely
Set up fans and a dehumidifier to dry the subfloor thoroughly. The target moisture reading is 12% or lower. This usually takes 24-72 hours depending on humidity levels. Do not cover the subfloor with new flooring until it is bone dry.
Step 7: Recheck and Seal
Inspect the cleaned area. If stains remain and the wood is sound, apply a second treatment of Concrobium. Once the wood is dry and clean, you can optionally apply a mold-inhibiting primer such as Zinsser Mold Killing Primer before installing new flooring. This adds an extra layer of protection.
When the Subfloor Must Be Replaced vs. Cleaned
Not every moldy subfloor can be saved. Here is how to decide:
| Condition | Action | Why |
|---|---|---|
| Surface mold only, wood is firm | Clean with Concrobium or RMR-86 | The wood structure is intact; mold has not penetrated deep enough to weaken it |
| Mold stains that remain after cleaning | Clean again; if stains persist, consider replacement | Cosmetic staining on non-structural areas is acceptable, but deep staining may indicate deeper mold penetration |
| Subfloor feels spongy, soft, or crumbles | Cut out and replace | Moisture has rotted the wood fibers; structural integrity is compromised |
| Mold on both sides of the subfloor | Replace | Mold has likely penetrated the full thickness of the panel |
| Black mold (Stachybotrys) on porous wood | Replace affected sections | Health authorities recommend removal of porous materials with this type of mold |
| Subfloor was wet for more than 5 days | Strongly consider replacement | Prolonged moisture allows mold and rot to establish below the surface |
How to Cut and Replace Subfloor Panels
If you need to remove a section, mark a rectangle on the subfloor that extends at least 12 inches past any visible mold growth in all directions. This ensures you are cutting into clean, dry wood. Use a circular saw set to the exact depth of the subfloor thickness (typically 5/8 inch or 3/4 inch; check by looking at an exposed edge or by drilling a small test hole). Cut along your marked lines, stopping at the edges of the joists so the new panel has full support.
Pry up the damaged panel using a flat bar. Vacuum any mold debris, dust, or dirt from the joists below. If mold is present on the joists themselves, treat them with Concrobium before installing the new subfloor. Cut a new plywood panel of matching thickness to fit the opening, leaving a 1/8 inch gap at all edges for expansion. Secure the new panel with deck screws or ring-shank nails every 6 inches along the joists. The finished surface should be flush with the surrounding subfloor so new flooring lies flat.
Preventing Mold from Coming Back
Prevention comes down to moisture control. Here are strategies that actually work:
- Keep humidity below 55%. In basements and crawl spaces, use a dehumidifier such as the Frigidaire 50 Pint model that runs continuously during humid months.
- Install a crawl space vapor barrier. A 6-mil polyethylene sheet over bare dirt can reduce moisture entering the subfloor from below by more than 90%.
- Ventilate crawl spaces. Ensure crawl space vents are open in summer and not blocked by insulation or debris. Consider adding a crawl space fan for active ventilation.
- Fix leaks fast. Any plumbing leak that reaches the subfloor should be dried within 24 hours. Keep a moisture meter handy to verify.
- Use mold-resistant products. When replacing subfloor, consider plywood treated with mold inhibitors or use a mold-killing primer before laying new flooring.
- Monitor trouble spots. Bathrooms, laundry rooms, and kitchens are the most common areas for subfloor mold. Check these rooms periodically, especially if you have had leaks before.

When to Call a Professional
Call a licensed mold remediation company if any of the following apply:
- The affected area is larger than 10 square feet
- The subfloor has structural damage that requires extensive replacement
- You have HVAC ducts that may be contaminated
- Mold is present in multiple rooms or on multiple levels
- You have health conditions that make mold exposure risky
- The mold returns within a few weeks of cleaning, indicating a hidden moisture source you cannot find
A professional will use HEPA air scrubbers, negative air pressure, and commercial-grade biocides. They can also test the air quality before and after remediation to confirm the problem is resolved. Mold remediation typically costs $500 to $3,000 for subfloor work, depending on the extent of damage.
Frequently Asked Questions
Can I use bleach to kill mold on subfloor?
Bleach is not a reliable fix for porous surfaces like plywood or OSB. On wood, bleach may not reach growth inside the material, and treated spores can recover and regrow, which is why mold often returns after bleaching. The EPA does not recommend biocides such as bleach as a routine part of mold cleanup. Concrobium is EPA-registered and leaves a residual film that inhibits regrowth, but a surface product is not shown to reach mold deep in wood, so replace plywood or OSB that is badly affected.
Does subfloor mold mean I have a structural problem?
Not automatically. Surface mold on solid subflooring is a cosmetic and air-quality issue, not a structural one. Only replace subfloor that has become soft, spongy, or delaminated due to rot. If the wood is firm and dries to below 16% moisture, cleaning is sufficient.

How long does it take for mold to grow on subfloor after a leak?
Mold can begin growing within 24 to 48 hours of a moisture event. This is why rapid drying is critical. If you can dry the subfloor to below 16% moisture within 2 days, visible mold growth can usually be prevented entirely.
What is the white powder I see on my subfloor?
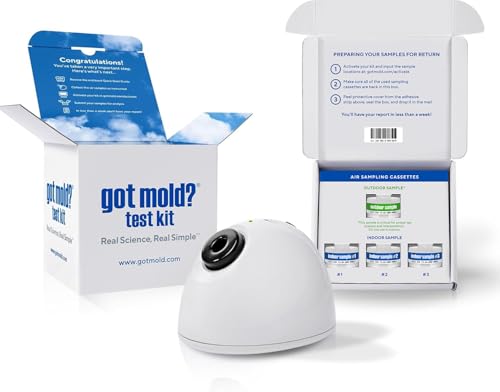
White powder on subfloor is usually efflorescence, a crystalline deposit of mineral salts that forms when moisture evaporates through the wood from concrete below. It can also be a bloom of mold inhibitors or fire retardants that were applied during manufacturing. In most cases it is not mold. To tell the difference, scrape a small sample onto a dark surface and add a drop of water. If the powder dissolves, it is a mineral deposit. If it smears like a stain or feels organic to the touch, test with a mold test kit or have a professional inspect it.
Do I need to treat the subfloor before laying new flooring?
Yes. After cleaning and drying the subfloor, apply a mold-inhibiting primer such as Zinsser Mold Killing Primer. This adds a fungicidal layer between the subfloor and the new floor covering. It is a small extra step that significantly reduces the chance of mold regrowth under new flooring.
These statements have not been evaluated by the Food and Drug Administration. This information is not intended to diagnose, treat, cure, or prevent any disease. Content is for informational purposes only and is not medical advice; consult a qualified healthcare provider before starting any supplement. As an Amazon Associate we earn from qualifying purchases.