How to Test for Mold Yourself
Affiliate Disclosure: This article contains affiliate links. If you buy through these links, we may earn a small commission at no extra cost to you. We only recommend products we have researched and verified for actual use in mold testing.
Short Answer: The 5-Minute Plan
You can test for mold yourself with a simple DIY test kit for about $10. Place a petri dish in a room you suspect has mold, leave it open for 1-2 hours to collect airborne spores, then seal it and wait 48 hours. If mold colonies grow in the dish, you have a mold problem. For faster results (and more accuracy), use a moisture meter first to find hidden damp spots before testing. Test kits detect the presence of mold spores, but they cannot tell you what type of mold it is or how dangerous it is without lab analysis. Start with a visual inspection and moisture check before you buy any test.
What You Will Need
Testing for mold yourself requires a few inexpensive tools. Here is what we recommend, based on actual product research and verified prices from Amazon at the time of writing.
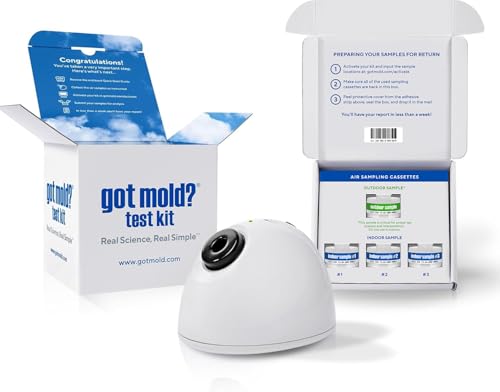
The Mold Test Kit
| Product | Price | Best For | Key Features |
|---|---|---|---|
| Mold Armor FG500 Test Kit | $9.98 | Quick single-room testing | Petri dish + growth medium, 3 test methods, optional lab analysis |
| Mold Armor FG500 (Pack of 2) | $19.96 | Multi-room testing | Two complete kits for testing 2 areas |
| Healthful Home Whole Home Pack | $74.98 | Whole home inspection | Tests 3 separate areas, expert consultation included |
The Mold Armor FG500 is the best starting point for most homeowners. It costs under $10 and uses the same settle-plate method that many professional mold inspectors use as a screening tool. Results are visible in 48 hours. The Healthful Home pack is a step up if you want to test multiple rooms at once and get professional lab support included.
PPE and Safety Gear
Before you disturb any potential mold, protect yourself with the right gear. Mold spores are microscopic and easily become airborne when you move furniture, open cabinets, or walk through an affected area.
- 3M Valved Respirator 8511 ($24.99 for a 10-pack). This is an N95 respirator rated for protection against mold spores. The valve makes breathing easier during longer testing sessions. Do not test mold without respiratory protection in enclosed spaces. A standard dust mask is not sufficient. You need a respirator rated N95 or higher to filter mold spores effectively.
- Nitrile gloves and safety glasses. Standard household nitrile gloves and any pair of safety glasses or goggles will protect your skin and eyes. You likely already own these. Wear them whenever you handle a mold test kit or touch any surface that may be contaminated.
Tools for Better Results
- ERICKHILL Pinless Moisture Meter ($26.99). This is the single most useful tool for mold detection, often more valuable than the test kit itself. It reads moisture levels in drywall, wood, and masonry without damaging the surface. You simply press it flat against the wall and read the percentage. A moisture reading above 15-20% in wallboard is a strong indicator that mold may be growing behind the surface. Use this tool before you commit to a test kit. It can confirm whether conditions are right for mold and guide where to place your petri dish for the best results.
How to Test for Mold: Step by Step
Step 1: Visual Inspection
Walk through your home and look for visible signs of mold. Check these areas carefully:
- Ceilings and walls with water stains or discoloration, especially near the corners
- Around windows where condensation collects during colder months
- Under sinks and around plumbing fixtures, including the cabinet floors
- Behind refrigerators and washing machines, where moisture and warmth collect
- In basements and crawl spaces, particularly after heavy rain
- Around HVAC vents and returns where dust and moisture combine
- In bathrooms, especially around showers, tubs, and toilet bases
- Behind furniture placed against exterior walls, where airflow is blocked
Visible mold looks like black, green, white, or orange spots or fuzzy growth. It may also appear as a slimy film. If you see it, you do not need a test kit to tell you mold is present. A test kit can still help determine the extent of airborne contamination and whether spores have spread to other areas of your home.
Step 2: Check for Moisture
Mold needs moisture to grow. This is the single most important fact in the entire mold testing process. Use your moisture meter to scan walls, floors, and ceilings in areas where you suspect a problem. Press the sensor flat against the surface and read the percentage. Move the meter around to get several readings in different spots. Any reading consistently above 16-20% in drywall indicates elevated moisture. Drywall in good condition typically reads 5-10%. A reading above 16% means the wallboard is holding enough water to support mold growth. This is where mold is most likely growing, even if you cannot see it yet. Mark these spots with painter’s tape so you can test them with the kit.
Scan baseboards, window sills, and the corners of closets. These are common spots where moisture collects unnoticed. If a reading stays high across multiple measurements, you have a moisture problem that needs fixing regardless of what the mold test shows.
Step 3: Set Up the Test Kit
Follow the kit instructions carefully. The Mold Armor FG500 is the most common kit and these instructions apply to it. Other kits follow a similar process.
- Remove the petri dish from the sealed package. Do not open the lid until you are in the room you want to test.
- Choose your test method:
- Indoor air quality test: This is the standard method. Place the dish on a flat surface 3-5 feet off the ground (table height). Remove the lid and let it sit undisturbed for 1-2 hours. Airborne spores will settle into the growth medium naturally.
- HVAC test: Place the open dish near a forced-air vent or return while the heating or cooling system is running. Leave it for 1 hour to sample circulating air. This method catches spores that may be growing in your ductwork.
- Surface test: If you see visible mold, use the included swab to gently collect a sample from the affected area. Rub the swab lightly across the surface, then streak it across the growth medium. Do not press hard enough to damage the gel surface.
- After the exposure period, seal the dish securely with the lid. Use the included tape or household tape to seal the edges so the dish stays closed during incubation.
- Place the sealed dish in a dark, room-temperature area (65-80 degrees F). A closet or cabinet works well. Leave it completely undisturbed for 48 hours.
- Do not shake, tilt, or open the dish during the incubation period. Moving it can cross-contaminate the sample or disturb growing colonies.
Step 4: Read the Results
After 48 hours, check the dish without opening it. Hold it up to light and look through the clear lid. Look for fuzzy, colored, or circular colonies growing on the surface of the medium. Compare what you see to the reference chart included with your kit.
- No growth. The clear gel remains unchanged. This suggests low or no airborne mold spores in the tested area.
- Small colonies (1-5 spots). Some mold spores were present but the level is likely normal for indoor air. Most homes have some background spore level. Monitor the area and retest if you notice musty smells.
- Moderate to heavy growth (many spots or fuzzy colonies covering a large area). Elevated mold levels. You need to investigate the moisture source and plan remediation.
Important: A DIY test kit tells you mold is present, not what kind it is or whether it is toxic. The colony colors visible in the dish (black, green, white, blue-green) give rough clues but are not reliable for identification. If you see heavy growth and someone in the home has respiratory symptoms, consider sending your sample to a lab for analysis. The Mold Armor kit includes instructions for mailing your sample to a certified lab for an additional fee (typically $40-$60). Lab results can identify specific mold species, which is the only way to know if you are dealing with something like Stachybotrys (black mold) or a less concerning variety like Cladosporium.
Tips for Stubborn Cases
- Test outdoors as a baseline. Set up a second kit outside your home at the same time you test indoors. Place it on a porch or deck away from direct rain. Compare the two dishes after 48 hours. If the indoor dish shows significantly more growth than the outdoor one, you have an indoor mold problem that needs addressing. If both dishes show similar growth, outdoor spore levels may be high and the indoor issue may be less urgent.
- Test over multiple days. One test only catches what was in the air during those 1-2 hours. Mold spore levels fluctuate with weather, HVAC usage, and human activity. If the first test is negative but you still smell mold or experience symptoms, test again on a different day. Consider testing after running the HVAC system for a few hours or after a rainstorm, when moisture levels are highest.
- Use the HVAC test method. Mold spores often circulate through ductwork. Testing near an air return or vent while the system is running can catch mold that is growing in the ductwork itself. This is a common blind spot for homeowners who only test room air.
- Check behind walls with the moisture meter. If you get a high moisture reading on a wall but no visible mold, the problem may be inside the wall cavity. The moisture meter can detect dampness through paint and wallpaper. A borescope (a small camera on a flexible arm, available for $30-$50) can be inserted through a small drilled hole to inspect visually. Look for dark spots, fuzzy growth, or water stains inside the cavity.
- Swab visible mold for faster results. If you can already see mold, the surface swab method gives results faster because you are placing mold directly into the dish rather than waiting for airborne spores to settle. Results may appear in 24-36 hours instead of the full 48.
What NOT to Do
- Do not touch mold with bare hands. Wear gloves and a mask when handling any material that may be moldy. Some people have allergic reactions to mold spores on skin contact, and prolonged exposure can cause respiratory irritation even in people without known allergies.
- Do not open the petri dish after incubation. Once mold has grown in the dish, opening it releases concentrated spores into your home air. The sealed dish contains a high-density spore cloud. Dispose of it sealed in your household trash.
- Do not use bleach on porous surfaces. Bleach cannot penetrate drywall, wood, or carpet. It kills surface mold but leaves the roots (hyphae) intact in the porous material, allowing regrowth within weeks. For porous surfaces, use a borate-based cleaner or replace the material entirely.
- Do not disturb large mold patches. If you find a patch of mold larger than 3 feet by 3 feet (about the size of a standard poster), do not touch it. Large mold colonies can release thousands of spores when disturbed. Close off the room and call a professional remediation company. The EPA recommends professional remediation for areas larger than 10 square feet.
- Do not rely on a single DIY test for a health diagnosis. DIY test kits cannot tell you whether the mold is toxic or allergenic. If someone in the home is experiencing chronic respiratory symptoms, nasal congestion, headaches, or fatigue that improve when they leave the house, consult a doctor and hire a professional mold inspector who uses spore trap sampling and lab analysis.
- Do not skip the moisture check. Testing for mold without first checking for moisture is like taking a fever reading without looking for the infection. A test kit only confirms what is already in the air. If you find mold but fix nothing, it will return. The root cause is always moisture.
- Do not test immediately after cleaning. If you recently cleaned or scrubbed a moldy area, wait at least a week before testing. Cleaning disturbs spores and creates a temporary spike that will give a false positive. Wait for conditions to return to normal before testing.
Prevention After Testing
Once you have tested and identified a mold problem, the real work begins: fixing the moisture source and preventing regrowth. Testing without action is just data collection. Here is what to do with the results.
Fix the Moisture
- Repair leaks in roofs, pipes, and windows immediately. A slow drip can keep drywall damp indefinitely.
- Improve ventilation in bathrooms, kitchens, and laundry rooms. Run exhaust fans for at least 30 minutes after showering or cooking. If you do not have exhaust fans, open a window.
- Keep indoor humidity below 50% year-round. A dehumidifier is essential for basements and crawl spaces. Measure humidity with a hygrometer (most hardware stores sell them for under $15).
- Ensure gutters and downspouts direct water at least 4-6 feet away from your foundation. Clogged gutgers are one of the most common causes of basement mold.
- Fix grading around your home. The ground should slope away from the foundation on all sides. Standing water near the foundation after rain is a problem.
Clean and Treat
- For small patches on non-porous surfaces (tile, glass, metal), scrub with detergent and water. A 1:8 ratio of white vinegar to water is also effective on smooth surfaces.
- For porous surfaces (drywall, wood, carpet), the affected material often needs to be cut out and replaced. Drywall is cheap. Cutting out a 2×2 foot section and patching it is straightforward. If the damage is minor and surface-level only, treat with a borate-based mold cleaner.
- Concrobium Mold Control ($13.48) is an EPA-registered, bleach-free spray that eliminates existing mold and leaves an invisible residue that prevents regrowth. It is odorless and contains no VOCs, making it safe to use in occupied spaces. Spray it on affected surfaces, let it dry, and the active ingredient forms a crystalline barrier that resists future mold growth.
Monitor Regularly
Test again 2-4 weeks after cleanup to confirm the problem is resolved. Keep your moisture meter handy and scan problem areas once a month. A spot that maintains a reading below 15% is dry and unlikely to support mold growth. If readings creep back up, investigate immediately. Early detection saves hundreds in remediation costs.
Frequently Asked Questions
Are DIY mold test kits accurate?
DIY test kits are accurate for detecting the presence of mold spores in the air. However, they have limitations. They cannot identify specific mold species, cannot measure spore concentration in precise numbers, and may produce false negatives if spore levels are low during the test window. For a definitive answer about mold type and concentration, send your sample to a lab or hire a professional mold inspector who uses a calibrated spore trap sampler.
What is the best mold test kit for home use?
The Mold Armor FG500 is the best value for most homeowners at $9.98. It is affordable, simple to use, and includes three testing methods. For larger homes or more thorough testing, the Healthful Home Whole Home Pack ($74.98) tests three separate areas and includes professional lab consultation. For professional-grade testing, the IAQ Pro 5-Minute Mold Test (10-test pack, $34.99) uses a different chemical technology that gives results in 5 minutes without the 48-hour incubation wait.
How long does a DIY mold test take?
The active part of the test takes 1-2 hours (the time the dish is open collecting spores). Then you wait 48 hours for mold colonies to grow visibly in the dish. Total turnaround time is about 2 days from start to result. The IAQ Pro test gives results in 5 minutes using a proprietary chemical reaction, but it costs more per test and each test set is single-use with no incubation period.
How much does it cost to test for mold yourself?
A single DIY mold test kit costs about $10. A moisture meter adds roughly $27, and an N95 respirator about $25 for a 10-pack. For a complete setup including all three, your total is about $62. Lab analysis, if you choose to mail in a sample, adds $40 to $60. Professional mold inspection typically costs $300 to $600, so DIY testing saves significant money for initial screening.

Can I test for mold without a kit?
You can use a moisture meter to detect the conditions where mold grows, but you cannot confirm mold is present without some form of sampling. Visual inspection is the first step: look for discoloration, water stains, and musty odors. If you find visible mold, you already know it is there and a test kit is not needed for confirmation. A test kit is useful for checking whether airborne spores are circulating beyond the visible patch, or for testing areas where you suspect hidden mold.


These statements have not been evaluated by the Food and Drug Administration. This information is not intended to diagnose, treat, cure, or prevent any disease. Content is for informational purposes only and is not medical advice; consult a qualified healthcare provider before starting any supplement. As an Amazon Associate we earn from qualifying purchases.