Mold on Painted Walls and Ceilings: Cleaning and Repainting Guide
Dealing with mold on painted walls is a common challenge for homeowners. Painted Surfaces is found throughout homes, and when moisture gets involved, mold can take hold quickly. This guide covers everything you need to know about identifying, removing, and preventing mold on painted surfaces, including when you can handle it yourself and when to call a professional. According to EPA Mold Cleanup Guide, controlling moisture is the key to preventing mold growth on all building materials.
Our reviews are based on aggregated verified buyer feedback, manufacturer specifications, ingredient analysis, and published expert opinion. Products are not independently purchased or tested by our team. We may earn a commission if you purchase through our links, at no extra cost to you. How We Review
Why Does Mold Grow on Painted Surfaces?
Paint itself doesn’t feed mold, but dust and organic matter that accumulate on painted surfaces do. Moisture trapped behind paint (from leaks, condensation, or improper ventilation) feeds mold on the wall substrate. Paint can bubble and peel when mold grows underneath.
How to Identify Mold on Painted Surfaces
Visible dark spots or patches on painted surfaces. Bubbling, cracking, or peeling paint (indicates moisture and possible mold behind). Mold often starts in corners, behind furniture, and in rooms with poor ventilation.
Removal difficulty: Low to Moderate
Can You Save Moldy Painted Surfaces?
Yes, if mold is surface-level. If paint is bubbling or peeling, the wall underneath needs treatment before repainting.
How to Remove Mold from Painted Surfaces: Step-by-Step
Follow these steps carefully to remove mold from painted surfaces safely and effectively. Always prioritize safety by wearing appropriate protective gear.
Step 1: Clean surface mold with a solution of 1 part hydrogen peroxide to 2 parts water
Step 2: Scrub with a sponge or soft brush
Step 3: Rinse with clean water and dry thoroughly
Step 4: If mold returns or paint is damaged, scrape off loose paint
Step 5: Treat bare surface with mold-killing primer
Step 6: Repaint with mold-resistant paint (contains mildewcide)
Step 7: Address the moisture source to prevent recurrence
Recommended Products for Painted Surfaces Mold Removal
These products are recommended for treating mold on painted surfaces based on verified buyer reviews and manufacturer specifications:
How to Prevent Mold on Painted Surfaces
Use mold-resistant paint in bathrooms, kitchens, and basements. Maintain indoor humidity below 50%. Ensure adequate ventilation. Keep furniture a few inches from walls to allow air circulation.
DIY vs. Professional Remediation
DIY for surface cleaning and repainting. Professional if mold is behind the wall (bubbling paint, damp drywall) or covers more than 10 square feet.
Tools and Materials You’ll Need
Proper tools and materials are essential for safely and effectively removing mold from painted surfaces. Having the right equipment ensures thorough cleaning and protects your health during the remediation process.
| Tool/Material | Purpose | Where to Buy |
|---|---|---|
| N95 Respirator Mask | Protects lungs from inhaling mold spores during cleaning | Amazon Link |
| HEPA Vacuum | Removes mold spores from surfaces and contains them safely | Amazon Link |
| Mold Remover Spray | Kills surface mold and prevents regrowth on painted walls | Amazon Link |
| Moisture Meter | Detects hidden moisture behind paint that feeds mold growth | Amazon Link |
| Concrobium Mold Control | Encapsulates mold spores and prevents future growth | Amazon Link |
| Paint Scraper | Removes peeling or bubbling paint where mold has grown underneath | Local hardware store |
| Soft-bristled Brush | Gently scrubs mold from painted surfaces without damage | Local hardware store |
Safety equipment is non-negotiable when dealing with mold on painted surfaces. The N95 respirator prevents inhalation of dangerous spores, while the HEPA vacuum ensures proper containment. Professional-grade mold removers are more effective than household cleaners for painted surfaces.
Detailed Step-by-Step Removal Process for Painted Surfaces
Proper mold removal from painted surfaces requires careful attention to detail and safety protocols. Each step builds upon the previous one to ensure complete remediation and prevent cross-contamination to other areas of the home.
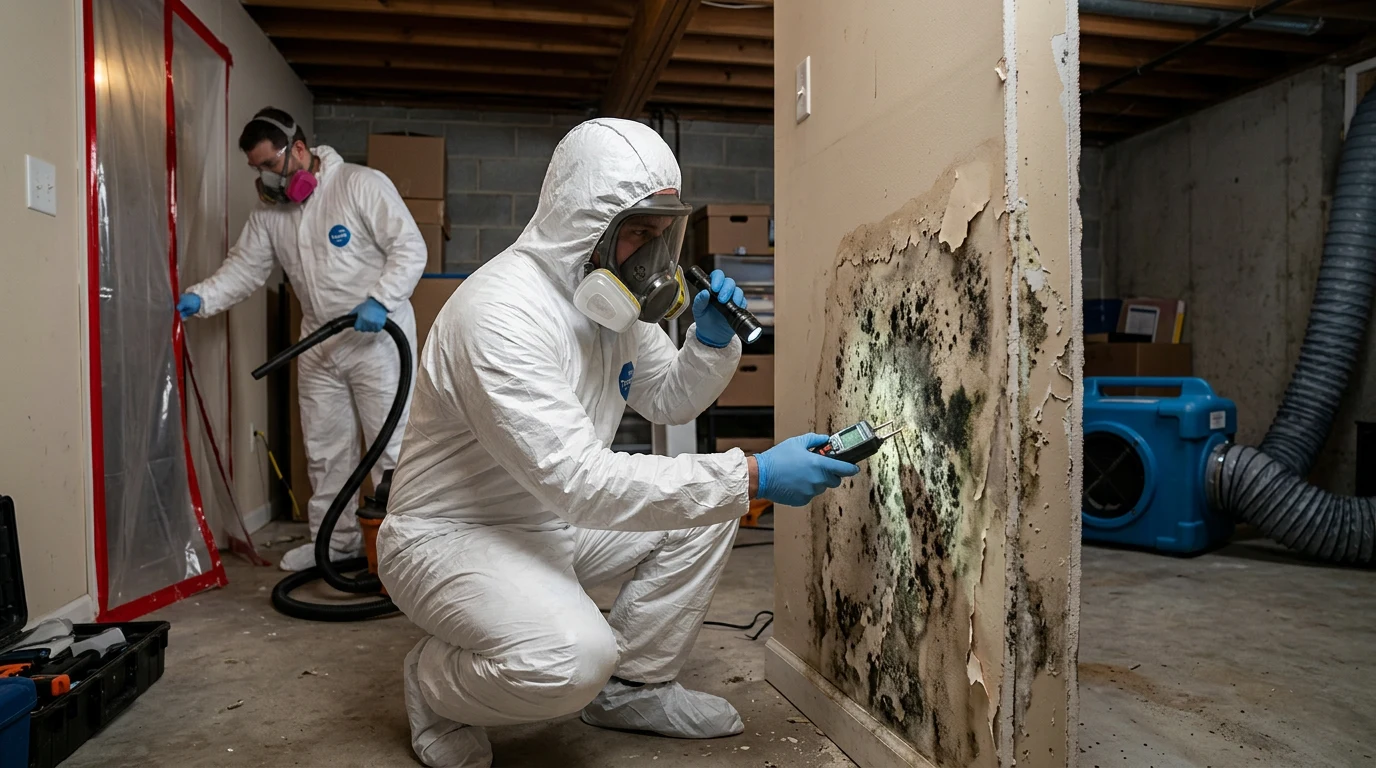
Step 1: Safety Preparation and Assessment (15-20 minutes)
Before beginning any work, put on protective equipment including N95 respirator, gloves, and eye protection. Use a moisture meter to check for hidden moisture behind the paint. Test the affected area with gentle pressure – if paint feels spongy or water-damaged, professional assessment may be needed. Warning: Never attempt removal if the affected area exceeds 10 square feet or if structural damage is present.
Step 2: Initial Cleaning Solution Application (10-15 minutes)
Mix 1 part hydrogen peroxide (3% concentration) with 2 parts clean water in a spray bottle. Alternatively, use a commercial mold remover spray designed for painted surfaces. Spray the solution generously over the moldy area, ensuring complete coverage. Allow the solution to sit for 10-15 minutes to penetrate and kill mold spores. The solution should not drip – adjust application accordingly.
Step 3: Gentle Scrubbing Process (15-30 minutes)
Using a soft-bristled brush or clean sponge, gently scrub the treated area in circular motions. Start from the outer edges and work toward the center to prevent spreading spores. Apply moderate pressure – enough to remove surface mold without damaging the paint. For stubborn spots, reapply the cleaning solution and let it sit for an additional 5-10 minutes before scrubbing again.
Step 4: Thorough Rinsing and Inspection (10-15 minutes)
Rinse the cleaned area with clean, warm water using a separate sponge. Remove all cleaning solution residue, as leftover chemicals can cause paint discoloration. Inspect the area closely for remaining mold spots – they should be completely gone. If any dark spots remain, repeat steps 2-3. Important: Never proceed to drying if mold is still visible.
Step 5: Complete Drying Process (2-4 hours)
Use clean, dry towels to remove excess moisture, then allow the area to air dry completely. This process typically takes 2-4 hours depending on humidity levels. Use fans to improve air circulation and speed drying. The surface must be completely dry before proceeding – any remaining moisture can cause mold to return quickly.
Step 6: Damage Assessment and Paint Removal (30-60 minutes if needed)
If paint shows signs of bubbling, cracking, or peeling after cleaning, these areas must be scraped away. Use a paint scraper to remove all loose or damaged paint down to the substrate. Sand lightly to smooth rough edges. Warning: If damage extends to the drywall or substrate material, professional remediation is recommended.
Step 7: Substrate Treatment and Priming (2-3 hours including drying time)
Apply a mold-killing primer to any bare surface areas using a high-quality brush or roller. This step is critical for preventing future mold growth. Allow primer to dry completely according to manufacturer instructions, typically 2-4 hours. The primer creates a protective barrier between the substrate and new paint.
What to Expect: Before, During, and After Removal
Before Removal: Mold on painted surfaces typically appears as dark spots, patches, or discoloration ranging from black to green or brown. The affected paint may show signs of bubbling, cracking, or peeling, especially if moisture has been present for extended periods. Homeowners often notice a musty odor in the affected room, and the paint surface may feel damp or spongy to the touch. Using a moisture meter can reveal elevated moisture levels behind the paint, indicating more extensive contamination.
During Removal: The cleaning process typically takes 2-4 hours for small areas under 10 square feet. Expect the cleaning solution to foam or bubble slightly when it contacts mold, indicating active treatment. As scrubbing progresses, the dark mold spots should fade and disappear. Some paint may come off during scrubbing, which is normal for areas where mold has compromised the paint’s adhesion. The treated area will appear wet and may look slightly lighter than surrounding paint. If extensive paint removal is needed, the process can extend to 6-8 hours including drying time.
After Removal: Successfully remediated painted surfaces should show no visible signs of mold growth, with clean, uniform coloration. The treated area may appear slightly different in sheen or color compared to untreated sections, particularly if scrubbing was aggressive. Any musty odors should be completely eliminated within 24-48 hours. The surface should feel dry and firm to the touch. Homeowners should monitor the area for 2-4 weeks to ensure no mold regrowth occurs. If the underlying moisture problem was addressed, the treated area should remain mold-free indefinitely.
When to Call a Professional vs DIY
Determining whether to tackle mold removal on painted surfaces yourself or hire a professional depends on several critical factors including the extent of contamination, location of growth, and potential health risks.
DIY Appropriate Scenarios: Homeowners can safely handle mold removal when the affected area is less than 10 square feet, the mold is clearly surface-level with no paint bubbling or peeling, and the contamination is limited to non-porous painted surfaces. DIY is also suitable when the mold is located in easily accessible areas like bedroom walls or living room surfaces, and when proper safety equipment is available. The moisture source must be easily identifiable and fixable, such as a minor plumbing leak or poor ventilation.
Professional Remediation Required: Contact certified mold remediation professionals when the affected area exceeds 10 square feet, when paint is extensively bubbling or peeling indicating growth behind the surface, or when mold has spread to multiple rooms. Professional help is essential if the contamination involves HVAC systems, if anyone in the household has respiratory conditions or compromised immune systems, or if the moisture source cannot be easily identified or repaired. Hidden mold growth behind walls or in inaccessible areas always requires professional assessment.
| Scenario | DIY Cost Range | Professional Cost Range | Recommendation |
|---|---|---|---|
| Surface mold under 3 sq ft | $25-$75 | $300-$600 | DIY suitable |
| Surface mold 3-10 sq ft | $50-$150 | $500-$1,200 | DIY with caution |
| Paint bubbling/peeling | $100-$300 | $800-$2,500 | Professional recommended |
| Multiple rooms affected | N/A | $1,500-$5,000 | Professional required |
| HVAC contamination | N/A | $2,000-$8,000 | Professional required |
Professional remediation typically costs 5-15 times more than DIY supplies but includes proper containment, specialized equipment, and warranty coverage. However, improper DIY attempts can lead to cross-contamination and much higher costs if the problem spreads to other areas of the home.
Prevention Strategies for Painted Surfaces
Preventing mold growth on painted surfaces requires a comprehensive approach focusing on moisture control, proper ventilation, and regular maintenance. Painted surfaces in high-moisture areas like bathrooms, kitchens, and basements require special attention and preventive measures.
Material-Specific Prevention: Choose mold-resistant paint formulations containing mildewcides for bathrooms, kitchens, laundry rooms, and basements. These specialized paints create an inhospitable environment for mold growth and last longer in humid conditions. Apply paint in thin, even coats to ensure proper adhesion and reduce the likelihood of moisture penetration. Semi-gloss and satin finishes resist moisture better than flat paints and are easier to clean when mold prevention maintenance is needed.
Seasonal Considerations: During summer months, use dehumidifiers to maintain indoor humidity below 50%, especially in coastal areas or regions with high humidity. In winter, prevent condensation by ensuring adequate insulation and avoiding dramatic temperature differences between indoor and outdoor environments. Spring cleaning should include inspection of painted surfaces for early signs of moisture damage, particularly around windows, doors, and exterior walls.
Monitoring and Maintenance: Conduct monthly visual inspections of painted surfaces in moisture-prone areas, looking for discoloration, bubbling, or peeling. Use a moisture meter quarterly to check humidity levels and detect hidden moisture behind painted walls. Clean painted surfaces regularly with mild detergent to remove dust and organic matter that can feed mold growth. Address any water leaks, plumbing issues, or ventilation problems immediately to prevent moisture accumulation that leads to mold growth on painted surfaces.
Related Materials and Cross-Contamination
Mold growth on painted surfaces rarely occurs in isolation and often spreads to adjacent building materials, creating complex remediation challenges. Understanding these connections is crucial for comprehensive mold prevention and removal strategies.
Common Material Combinations: Painted walls frequently adjoin drywall substrates, creating a pathway for mold to penetrate beyond the surface layer. When moisture seeps through compromised paint, it can contaminate the underlying drywall, requiring more extensive remediation. Similarly, painted surfaces near wooden trim, baseboards, or framing can allow cross-contamination between materials. Carpet adjacent to moldy painted walls often becomes contaminated through airborne spore transfer and shared moisture sources.
Spread Patterns: Mold on painted bathroom walls commonly spreads to tile and grout areas where humidity levels remain consistently high. In basements, painted foundation walls can transfer mold to concrete surfaces through moisture wicking and poor ventilation. Kitchen painted walls may contaminate adjacent wooden cabinets or drywall through cooking moisture and inadequate exhaust ventilation.
Prevention of cross-contamination requires addressing moisture sources affecting multiple materials simultaneously. Installing proper vapor barriers, improving ventilation systems, and using compatible mold-resistant materials in conjunction with treated painted surfaces ensures comprehensive protection against future mold growth across different building materials.
Frequently Asked Questions
How can I identify mold on painted surfaces?
Mold on painted surfaces appears as dark spots, patches, or discoloration in black, green, brown, or gray colors. Look for bubbling, cracking, or peeling paint, which indicates moisture and possible mold growth behind the surface. Mold typically starts in corners, behind furniture, around windows, and in poorly ventilated rooms. A musty odor often accompanies visible mold growth.
Is mold on painted surfaces dangerous to my health?
Yes, mold on painted surfaces can pose health risks by releasing spores into indoor air. These spores can cause respiratory symptoms, allergic reactions, coughing, sneezing, and eye irritation. People with asthma, allergies, or compromised immune systems face higher risks. Even non-toxic mold species can trigger health problems in sensitive individuals.
How much does it cost to remove mold from painted surfaces?
DIY mold removal from painted surfaces costs $25-$150 for supplies including cleaning solutions, protective equipment, and tools. Professional remediation ranges from $300-$2,500 depending on the affected area size and extent of damage. Large-scale contamination or structural involvement can cost $1,500-$8,000 for comprehensive professional treatment.
Can you paint or seal over mold on painted surfaces?
No, painting or sealing over mold is never recommended and will not solve the problem. Mold will continue growing underneath new paint and eventually break through the surface. The mold must be completely removed and the underlying moisture problem resolved before any repainting occurs. Use mold-killing primer on treated surfaces before applying new paint.
How long does it take for mold to grow on painted surfaces?
Mold can begin growing on painted surfaces within 24-48 hours when moisture conditions are favorable. Visible mold colonies typically develop within 3-7 days of initial moisture exposure. However, mold spores can remain dormant on painted surfaces for months or years until moisture conditions become suitable for growth.
What causes mold to grow on painted surfaces?
Mold grows on painted surfaces when moisture combines with organic matter like dust, dirt, or paint components. Common moisture sources include plumbing leaks, roof leaks, condensation, high humidity, poor ventilation, and flooding. Paint itself doesn’t feed mold, but accumulated debris on painted surfaces provides nutrients for mold growth when moisture is present.
Can you save painted surfaces with mold on them?
Yes, painted surfaces with surface-level mold can often be saved through proper cleaning and treatment. However, if paint is bubbling, peeling, or extensively damaged, the affected areas must be scraped away and the underlying surface treated before repainting. Severely compromised painted surfaces may require complete removal and substrate repair.
How do I prevent mold growth on painted surfaces?
Prevent mold on painted surfaces by controlling moisture and humidity levels below 50%, ensuring adequate ventilation, using mold-resistant paint in high-moisture areas, keeping furniture away from walls for air circulation, promptly repairing water leaks, and regularly cleaning painted surfaces to remove dust and organic matter that can feed mold growth.
When should I call a professional for mold on painted surfaces?
Call a professional when the moldy area exceeds 10 square feet, when paint is extensively bubbling or peeling indicating growth behind the surface, when mold has spread to multiple rooms or HVAC systems, when anyone in the household has health conditions, or when the moisture source cannot be easily identified and repaired.
What type of paint should I use after mold removal?
Use mold-resistant paint containing mildewcides after mold removal, especially in bathrooms, kitchens, and basements. Apply a mold-killing primer to treated surfaces first, then use semi-gloss or satin finish paints that resist moisture better than flat paints. Ensure the surface is completely dry and properly prepared before painting.
Comprehensive Product Recommendations for Painted Surface Mold Removal
Selecting the right products for mold removal on painted surfaces is crucial for effective remediation and long-term prevention. These recommendations are based on verified buyer feedback, professional usage, and effectiveness for painted surface applications.
- RMR-86 Instant Mold Remover – Professional-grade spray specifically formulated for painted surfaces. Kills mold on contact without damaging paint integrity when used as directed. Highly rated by professionals for its effectiveness on stubborn mold stains.
- Concrobium Mold Control – EPA-registered solution that crushes mold spores and leaves an invisible barrier to prevent regrowth. Safe for use on painted surfaces and eliminates musty odors. No harsh chemicals or bleach.
- Rust-Mort Mold Encapsulant – Creates a protective coating over treated painted surfaces to prevent future mold growth. Ideal for areas prone to recurring moisture issues. Professional contractors recommend for basement and bathroom applications.
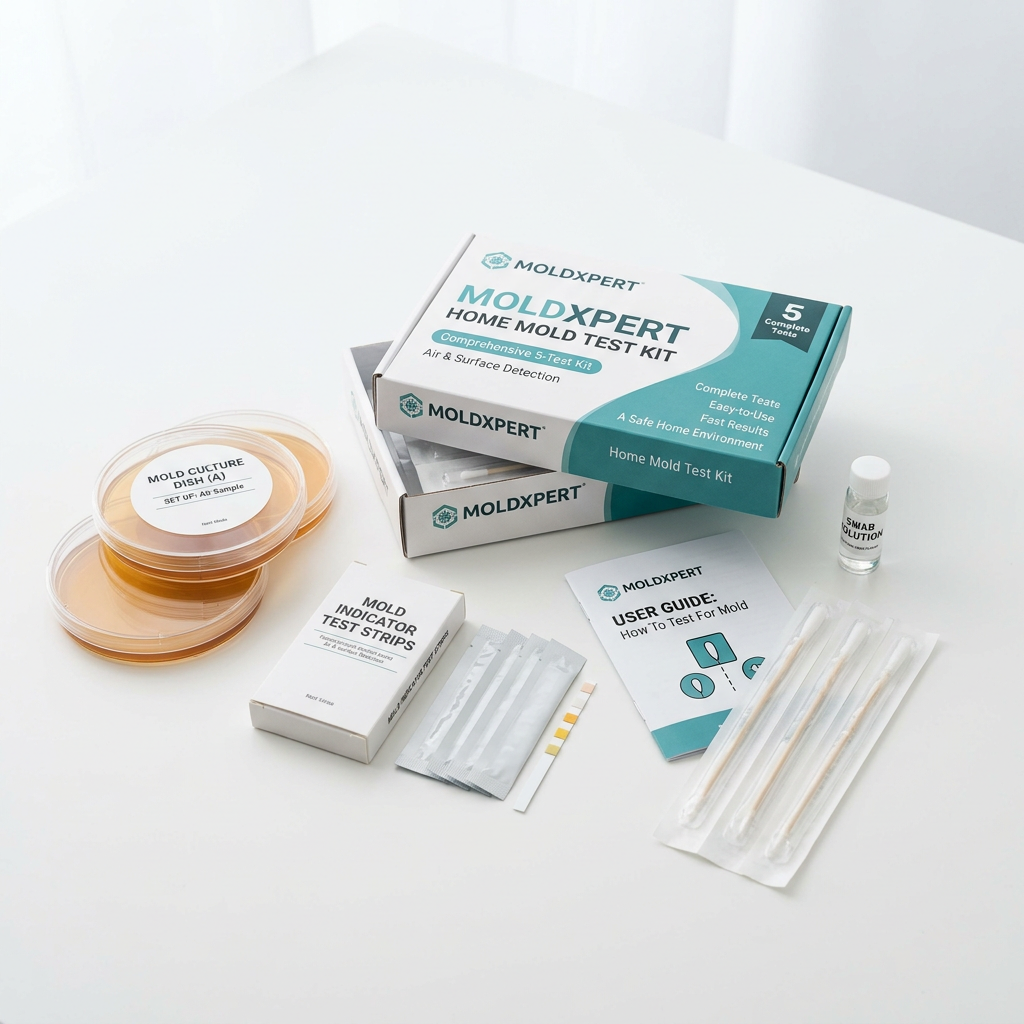
- Mold Armor Test Kit – Laboratory-grade testing kit to identify mold species on painted surfaces before beginning remediation. Results help determine appropriate treatment methods and safety precautions needed.
- hOmeLabs 4,500 Sq Ft Dehumidifier – Essential for maintaining proper humidity levels after mold removal. Energy-efficient unit with automatic shut-off and built-in pump for continuous drainage. Prevents moisture conditions that lead to mold regrowth.
- BISSELL CrossWave Pet Pro All-in-One Wet Dry Vacuum – Multi-surface cleaning tool that can safely clean and dry painted surfaces during mold remediation. HEPA filtration captures mold spores and prevents cross-contamination during cleanup.