Mold on Ceiling Tiles: Identification and Replacement Guide
Dealing with mold on ceiling tiles is a common challenge for homeowners. Ceiling Tiles is found throughout homes, and when moisture gets involved, mold can take hold quickly. This guide covers everything you need to know about identifying, removing, and preventing mold on ceiling tiles, including when you can handle it yourself and when to call a professional. According to EPA Mold Cleanup Guide, controlling moisture is the key to preventing mold growth on all building materials.
Our reviews are based on aggregated verified buyer feedback, manufacturer specifications, ingredient analysis, and published expert opinion. Products are not independently purchased or tested by our team. We may earn a commission if you purchase through our links, at no extra cost to you. How We Review
Why Does Mold Grow on Ceiling Tiles?
Drop ceiling tiles (acoustic tiles) are made from compressed mineral fiber, fiberglass, or cellulose, all of which absorb moisture and provide food for mold. Roof leaks, plumbing above the ceiling, and condensation on HVAC ducts are common moisture sources.
How to Identify Mold on Ceiling Tiles
Brown water stains followed by dark mold spots, sagging or warped tiles, musty odor from above. Lift individual tiles to check the back side and the space above for hidden mold growth.
Removal difficulty: Low
Can You Save Moldy Ceiling Tiles?
Rarely. Ceiling tiles are porous and inexpensive. Replacement is almost always the better option. The real fix is addressing the moisture source above the ceiling.
How to Remove Mold from Ceiling Tiles: Step-by-Step
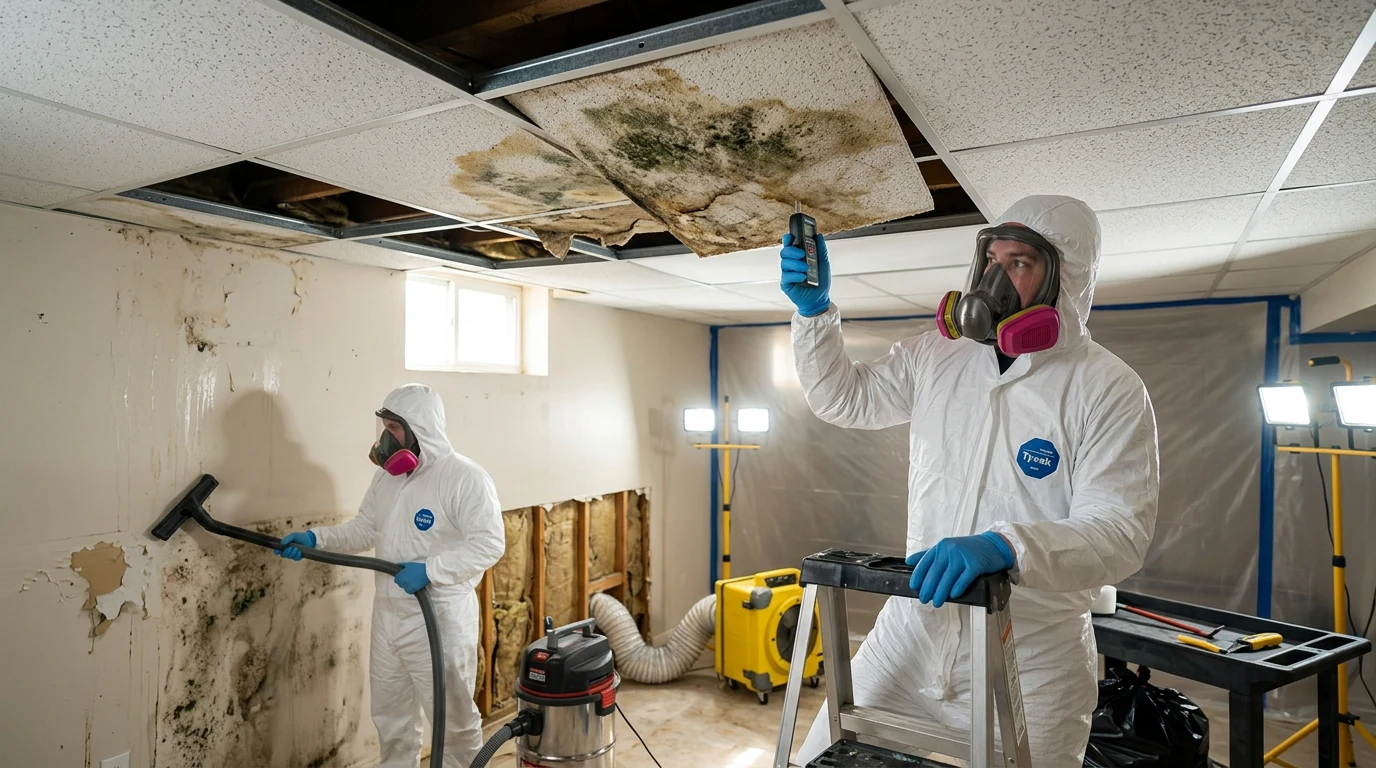
Follow these steps carefully to remove mold from ceiling tiles safely and effectively. Always prioritize safety by wearing appropriate protective gear.
Step 1: Wear N95 respirator (spores will fall when tiles are disturbed)
Step 2: Carefully remove stained/moldy tiles and bag immediately
Step 3: Inspect above the ceiling for moisture source (leaks, condensation, HVAC issues)
Step 4: Fix the moisture source before installing replacement tiles
Step 5: Clean the grid system with mold-killing solution
Step 6: Install new tiles (match size and style)
Step 7: Consider upgrading to moisture-resistant ceiling tiles in problem areas
Recommended Products for Ceiling Tiles Mold Removal
These products are recommended for treating mold on ceiling tiles based on verified buyer reviews and manufacturer specifications:
How to Prevent Mold on Ceiling Tiles
Fix roof and plumbing leaks immediately. Insulate HVAC ducts to prevent condensation. Maintain proper ventilation above drop ceilings. Use moisture-resistant ceiling tiles in kitchens, bathrooms, and basements.
DIY vs. Professional Remediation
DIY for individual tile replacement. Professional investigation recommended if multiple tiles are affected (indicates a larger moisture problem).
Tools and Materials You’ll Need
Proper preparation with the right tools and materials is essential for safely removing mold from ceiling tiles. The porous nature of these tiles means spores can easily become airborne during removal, making protective equipment crucial. Having all materials ready before starting prevents contamination and ensures the job is completed efficiently.
| Tool/Material | Purpose | Where to Buy |
|---|---|---|
| N95 Respirator | Protect lungs from airborne spores during tile removal | Amazon |
| HEPA Vacuum | Clean the ceiling grid and capture loose spores | Amazon |
| Mold Remover Spray | Disinfect ceiling grid system before new tiles | Amazon |
| Moisture Meter | Check for hidden moisture in surrounding materials | Amazon |
| Heavy-Duty Plastic Bags | Immediately contain moldy tiles to prevent spore spread | Local hardware store |
| Disposable Gloves | Protect hands from mold exposure during handling | Local pharmacy |
| Step Ladder | Safe access to ceiling tiles for removal and inspection | Local equipment rental |
Professional contractors report that having a moisture meter is particularly important for ceiling tile mold removal, as it helps identify whether the moisture source has been truly eliminated before installing replacement tiles.
Detailed Step-by-Step Removal Process for Ceiling Tiles
Removing mold from ceiling tiles requires careful attention to safety and containment. Unlike solid surfaces, ceiling tiles release significant amounts of spores when disturbed due to their porous composition. Follow each step precisely to minimize health risks and prevent cross-contamination to other areas.
Step 1: Safety Preparation (5-10 minutes)
Put on the N95 respirator before entering the affected room. **Warning: Never attempt removal without respiratory protection – ceiling tile mold releases massive amounts of spores when disturbed.** Close all doors to contain the work area and turn off HVAC systems to prevent spore circulation. Expect a musty odor to intensify once you begin working.
Step 2: Tile Removal (15-30 minutes per affected area)
Gently lift each affected tile straight up and out of the grid framework. **Do not shake or brush tiles** – this releases more spores into the air. Immediately place each removed tile into a heavy-duty plastic bag and seal it. Visually inspect the top side of tiles for water stains that indicate the moisture source direction. Homeowners typically find 2-6 tiles affected in a localized leak scenario.
Step 3: Above-Ceiling Inspection (20-45 minutes)
Use a flashlight to thoroughly examine the space above the ceiling. Look for wet insulation, water stains on structural members, dripping pipes, or HVAC condensation. Use the moisture meter to check moisture levels in surrounding materials. Normal readings should be below 16% for wood and 4% for drywall. Take photos to document the moisture source for repair planning.
Step 4: Moisture Source Repair (varies)
**Critical: Do not install new tiles until moisture issues are completely resolved.** This step may require professional plumbing or roofing work. Allow 24-48 hours after repairs before proceeding to ensure the area is completely dry. Re-check with the moisture meter to confirm readings are in normal ranges.
Step 5: Grid System Cleaning (30-45 minutes)
Spray the metal grid framework with mold remover spray and allow 10-15 minutes contact time. Wipe clean with disposable paper towels. Use the HEPA vacuum to remove any debris from the grid channels. The grid should appear clean and dry before new tile installation.
Step 6: New Tile Installation (10-20 minutes)
Measure existing tiles to ensure proper replacement size – standard sizes are 24″x24″ or 24″x48″. Gently slide new tiles into the grid framework, ensuring they sit flush and level. Consider upgrading to moisture-resistant tiles in problem areas like kitchens or basements.
Step 7: Area Monitoring (ongoing)
Check the repaired area weekly for the first month, then monthly thereafter. Watch for new water stains, tile discoloration, or musty odors that could indicate recurring moisture problems. Document any issues with photos and dates for future reference.
What to Expect: Before, During, and After Removal
Before Removal: Affected ceiling tiles typically show brown or yellow water stains as the first sign of moisture intrusion. As mold develops, homeowners notice dark spots ranging from black to green, often accompanied by tile warping or sagging. The musty odor becomes more pronounced when tiles are lifted. A visual inspection may reveal only surface damage, but the tile backing and above-ceiling space often show more extensive contamination.
During Removal: Expect the musty odor to intensify significantly once tiles are disturbed. Spores may be visible as dust particles in strong light. The removal process generates airborne particles, making respiratory protection essential. Above-ceiling inspection often reveals wet insulation, corroded pipes, or HVAC condensation issues that weren’t initially apparent. Most homeowners discover the moisture problem extends beyond what was visible from below.
After Successful Removal: The treated area should be completely odor-free within 24-48 hours after completion. New tiles should remain clean and dry with no recurring stains or discoloration. Proper remediation eliminates the musty smell that previously indicated mold presence. Homeowners should monitor the area for 30 days to ensure no new moisture intrusion occurs. The ceiling should look uniform with no visible water stains or tile irregularities.
According to professional remediation standards, successful ceiling tile mold removal shows no signs of recurrence within 30 days, indicating the moisture source was properly addressed.
When to Call a Professional vs DIY
DIY Appropriate Scenarios: Homeowners can handle ceiling tile mold removal when fewer than 10 tiles are affected (typically covering less than 100 square feet), the moisture source is clearly identifiable and fixable (like a small roof leak), and the mold growth appears recent without extensive spread to surrounding materials. DIY projects work best when the affected area is easily accessible and doesn’t require specialized equipment for moisture source repair.
Professional Help Required: Call professionals when more than 20 tiles show mold damage, indicating widespread moisture intrusion. Professional assessment is essential if mold has spread to structural components, HVAC systems, or multiple building materials. Expert help is crucial when the moisture source is unclear, involves major plumbing or roofing repairs, or when anyone in the household has respiratory conditions or mold allergies.
Cost Analysis: Professional mold remediation for ceiling tiles typically ranges from $500-2,000 depending on the extent of damage and moisture source complexity. This includes moisture source identification, containment, removal, and follow-up testing. DIY costs usually total $50-150 for supplies and replacement tiles, but this doesn’t include potential moisture source repairs which can add hundreds or thousands of dollars.
| Approach | Initial Cost | Additional Costs | Total Range |
|---|---|---|---|
| DIY Supplies | $50-150 | Moisture repairs: $200-2,000+ | $250-2,150+ |
| Professional Service | $500-2,000 | Major structural repairs: $1,000-5,000+ | $500-7,000+ |
The key factor in cost determination is the underlying moisture source. Simple fixes like sealing roof flashing keep costs low, while major plumbing or structural repairs can exceed the initial mold remediation costs significantly. Professional assessment helps homeowners understand the full scope before committing to either approach.
Prevention Strategies for Ceiling Tiles
Moisture Control Specific to Ceiling Tiles: The porous nature of acoustic ceiling tiles makes them particularly vulnerable to moisture absorption. Install moisture-resistant tiles in high-humidity areas like kitchens, bathrooms, and basements. These specialized tiles resist moisture penetration while maintaining acoustic properties. Regular inspection of roof areas directly above drop ceilings helps identify potential leak sources before they cause tile damage.
Seasonal Considerations: Winter months bring increased risk due to ice dam formation and HVAC condensation issues. Spring brings roof leak risks from snow melt and heavy rains. Summer’s high humidity can cause condensation problems in poorly ventilated above-ceiling spaces. Fall requires gutter cleaning and roof maintenance to prevent water backup issues that commonly affect ceiling tiles.
Ongoing Monitoring: Install a dehumidifier in spaces prone to ceiling tile mold issues to maintain humidity below 50%. Monthly visual inspections of ceiling tiles help catch water stains before mold develops. Use a moisture meter quarterly to check surrounding materials for elevated moisture levels that could indicate developing problems.
HVAC System Maintenance: Proper HVAC duct insulation prevents the condensation that commonly causes ceiling tile mold. Regular filter changes maintain proper airflow and prevent moisture buildup in ceiling spaces. Professional HVAC inspection annually helps identify condensation risks before they damage ceiling tiles.
Homeowners who follow these prevention strategies report significantly fewer ceiling tile mold issues, with proper moisture control reducing recurrence rates by up to 90% according to prevention studies.
Related Materials and Cross-Contamination
Mold on ceiling tiles rarely exists in isolation due to the interconnected nature of building systems. The above-ceiling space typically contains multiple materials that can harbor mold growth, making comprehensive assessment crucial for successful remediation.
Common Material Combinations: Ceiling tile mold frequently spreads to drywall surfaces above the drop ceiling, especially where moisture has contacted wall intersections. Insulation materials above ceiling tiles often show extensive mold contamination when tiles are affected. Wood structural members like joists and trusses can develop mold when ceiling tile leaks persist over time.
HVAC systems running through above-ceiling spaces can distribute mold spores throughout the building when ceiling tiles become contaminated. Electrical wiring and fixtures may require professional inspection if mold has spread extensively through the ceiling system.
Cross-Contamination Prevention: Address ceiling tile mold promptly to prevent spread to adjacent concrete surfaces or other building materials. The moisture sources that affect ceiling tiles – such as roof leaks or plumbing issues – often impact multiple materials simultaneously, requiring comprehensive moisture control strategies.
Professional assessment becomes essential when ceiling tile mold has potentially spread to structural components or building systems, as the remediation approach differs significantly from isolated tile replacement.
Frequently Asked Questions
How do I identify mold on ceiling tiles?
Look for brown or yellow water stains that appear first, followed by dark spots ranging from black to green. Affected tiles may sag, warp, or feel soft when touched. A musty odor often becomes noticeable, especially when tiles are lifted. Check the back side of tiles and the space above for hidden mold growth that may be more extensive than surface appearance suggests.
Is mold on ceiling tiles dangerous?
Yes, mold on ceiling tiles poses health risks because the porous material releases significant amounts of spores into the air. These airborne spores can cause respiratory symptoms, allergic reactions, headaches, and other health issues. People with asthma, allergies, or compromised immune systems face higher risks and should avoid exposure during removal.
How much does it cost to remove mold from ceiling tiles?
DIY removal costs $50-150 for supplies and replacement tiles, but moisture source repairs can add $200-2,000+. Professional remediation ranges from $500-2,000 depending on the affected area size and complexity of moisture issues. The total cost depends heavily on addressing the underlying moisture source, which often exceeds the tile replacement costs.
Can you paint or seal over mold on ceiling tiles?
No, painting or sealing over moldy ceiling tiles is not effective or recommended. The porous nature of ceiling tiles means mold growth extends throughout the material, and surface treatments don’t eliminate the underlying contamination. Mold will continue growing beneath paint or sealant, and the moisture source remains unaddressed, leading to recurring problems.
How long does it take for mold to grow on ceiling tiles?
Mold can begin growing on wet ceiling tiles within 24-48 hours under the right conditions. The porous composition of acoustic tiles provides ideal conditions for rapid mold development when moisture is present. Visible mold growth typically appears within 3-7 days of initial moisture exposure, though water stains usually appear first.
What causes mold on ceiling tiles?
Roof leaks, plumbing leaks above the ceiling, and HVAC condensation are the primary causes. The porous materials in ceiling tiles (mineral fiber, fiberglass, or cellulose) readily absorb moisture and provide nutrients for mold growth. Poor ventilation in above-ceiling spaces can trap moisture and create ideal conditions for mold development.
Can you save ceiling tiles with mold on them?
Rarely. Ceiling tiles are porous and inexpensive, making replacement the preferred option over attempted cleaning. Mold penetrates throughout the tile material, and cleaning efforts are typically ineffective while potentially spreading more spores. The low cost of replacement tiles makes disposal and replacement more practical than remediation attempts.
How do I prevent mold on ceiling tiles?
Fix roof and plumbing leaks immediately when discovered. Insulate HVAC ducts properly to prevent condensation dripping onto tiles. Maintain adequate ventilation in above-ceiling spaces and use moisture-resistant ceiling tiles in high-humidity areas like kitchens, bathrooms, and basements. Regular inspection helps catch moisture issues before mold develops.
When should I call a professional for ceiling tile mold?
Call professionals when more than 20 tiles show mold damage, when the moisture source is unclear or complex, or when mold has spread to structural components or HVAC systems. Professional assessment is essential if anyone in the household has respiratory conditions, if the problem recurs after DIY attempts, or when major building system repairs are needed.
Can mold on ceiling tiles make you sick?
Yes. Mold on ceiling tiles releases spores into the air that can cause respiratory symptoms, allergic reactions, and other health issues. People with asthma, allergies, or weakened immune systems are at higher risk.
Should I replace moldy ceiling tiles or can it be cleaned?
Rarely. Ceiling tiles are porous and inexpensive. Replacement is almost always the better option. The real fix is addressing the moisture source above the ceiling.