Mold on Caulk: How to Remove and When to Replace
Dealing with mold on caulk is a common challenge for homeowners. Caulk and Sealant is found throughout homes, and when moisture gets involved, mold can take hold quickly. This guide covers everything you need to know about identifying, removing, and preventing mold on caulk and sealant, including when you can handle it yourself and when to call a professional. According to EPA Mold Cleanup Guide, controlling moisture is the key to preventing mold growth on all building materials.
Our reviews are based on aggregated verified buyer feedback, manufacturer specifications, ingredient analysis, and published expert opinion. Products are not independently purchased or tested by our team. We may earn a commission if you purchase through our links, at no extra cost to you. How We Review
Why Does Mold Grow on Caulk and Sealant?
Silicone and latex caulk in bathrooms and kitchens is constantly exposed to moisture, warmth, and organic residues (soap, shampoo, food). Mold grows on the surface and can penetrate into the caulk material itself. Old, cracked caulk allows water behind it.
How to Identify Mold on Caulk and Sealant
Black, pink, or orange spots on caulk lines around tubs, showers, sinks, and toilets. Discoloration that doesn’t clean off indicates mold has penetrated the caulk.
Removal difficulty: Low
Can You Save Moldy Caulk and Sealant?
Surface mold can be cleaned, but if mold has penetrated into the caulk (dark staining that won’t come out), replacement is the best option. Caulk is inexpensive and easy to replace.
How to Remove Mold from Caulk and Sealant: Step-by-Step
Follow these steps carefully to remove mold from caulk and sealant safely and effectively. Always prioritize safety by wearing appropriate protective gear.
Step 1: Try cleaning first: spray with hydrogen peroxide or mold-specific cleaner
Step 2: Let sit 15 minutes, scrub with old toothbrush
Step 3: If staining persists, remove old caulk with a caulk removal tool
Step 4: Clean the joint thoroughly with rubbing alcohol
Step 5: Let dry completely (24 hours)
Step 6: Apply new mold-resistant caulk (look for ‘mold-resistant’ or ‘kitchen & bath’ formulas)
Step 7: Smooth with a wet finger or caulk tool
Step 8: Allow 24 hours cure time before water exposure
Recommended Products for Caulk and Sealant Mold Removal
These products are recommended for treating mold on caulk and sealant based on verified buyer reviews and manufacturer specifications:
How to Prevent Mold on Caulk and Sealant
Use mold-resistant caulk from the start. Squeegee after showers. Run exhaust fan during and 20 minutes after bathing. Re-caulk every 1-2 years as preventive maintenance.
DIY vs. Professional Remediation
Always DIY. Caulk replacement is one of the simplest home maintenance tasks.
Tools and Materials You’ll Need
Having the right tools and materials makes caulk mold removal safer and more effective. Professional remediation specialists recommend specific equipment for proper safety and optimal results when dealing with moldy caulk and sealant.
| Tool/Material | Purpose | Where to Buy |
|---|---|---|
| N95 Respirator | Protect lungs from mold spores during removal | Amazon |
| Moisture Meter | Check moisture levels in surrounding areas | Amazon |
| Mold Remover Spray | Kill surface mold before removal | Amazon |
| HEPA Vacuum | Remove loose caulk debris and spores | Amazon |
| Caulk Removal Tool | Safely scrape away old caulk | Local hardware store |
| Mold-Resistant Caulk | Replacement caulk with antimicrobial properties | Local hardware store |
| Rubber Gloves | Protect hands from chemicals and mold | Local store |
| Plastic Sheeting | Contain debris during removal process | Local hardware store |
Safety equipment is non-negotiable when removing moldy caulk. The N95 respirator prevents inhalation of mold spores, while the moisture meter helps identify underlying moisture issues that could cause mold to return. Professional remediators emphasize that proper containment and ventilation are crucial for successful DIY mold removal.
Detailed Step-by-Step Removal Process for Caulk and Sealant
This comprehensive process ensures thorough mold removal while minimizing health risks and preventing cross-contamination to adjacent materials like tile and grout or drywall.
Step 1: Safety Preparation (10 minutes)
Put on N95 respirator mask, rubber gloves, and eye protection. Open windows and run exhaust fans to improve ventilation. Lay plastic sheeting on floors to catch debris. WARNING: Never attempt mold removal without proper respiratory protection. Mold spores become airborne during removal and can cause severe respiratory reactions.
Step 2: Initial Cleaning Attempt (20 minutes)
Spray mold remover directly onto affected caulk lines. Use 3-4 pumps per linear foot of caulk. The solution should completely saturate the moldy areas and remain visibly wet on the surface. This initial treatment kills active mold growth and makes removal safer.
Step 3: Dwell Time and Scrubbing (15 minutes active, 15 minutes waiting)
Allow the mold remover to work for exactly 15 minutes – timing is crucial for chemical effectiveness. After dwell time, scrub with an old toothbrush using circular motions. Apply moderate pressure to work the solution into caulk pores. Surface mold should lift away easily; persistent staining indicates penetrated mold requiring caulk replacement.
Step 4: Assessment and Removal Decision (5 minutes)
Rinse with clean water and evaluate results. If dark staining remains or caulk feels soft/spongy, complete removal is necessary. Do not attempt to paint or seal over penetrated mold – it will continue growing underneath and return within weeks.
Step 5: Caulk Removal (30-45 minutes)
Score along both edges of the caulk line with a utility knife, cutting 1/8 inch deep. Use a caulk removal tool to pry away old caulk in continuous strips when possible. Work systematically from one end to the other. Use the HEPA vacuum to immediately capture debris and prevent spore dispersal.
Step 6: Deep Cleaning (20 minutes)
Clean exposed joint surfaces with 70% isopropyl alcohol using a clean cloth. Pay special attention to corners and crevices where mold often hides. The alcohol should remain on surfaces for 30 seconds minimum before wiping. This step eliminates residual spores that could contaminate new caulk.
Step 7: Drying Period (24 hours)
Allow joints to dry completely before applying new caulk. Use fans to accelerate drying and check with a moisture meter – readings should be below 15% before proceeding. Moisture trapped under new caulk creates ideal conditions for mold return.
Step 8: New Caulk Application (45 minutes)
Cut caulk tube tip at 45-degree angle, creating 1/4-inch opening. Apply steady pressure while moving at consistent speed – approximately 6 inches per 10 seconds. Smooth with a wet finger or caulk tool within 5 minutes of application. Remove excess immediately as cured caulk is difficult to trim cleanly.
Step 9: Final Curing (24 hours)
Keep area dry and well-ventilated during curing. Avoid water exposure for minimum 24 hours, though 48 hours is optimal for high-moisture areas like shower surrounds. Proper curing ensures maximum mold resistance and longevity.
What to Expect: Before, During, and After Removal
Understanding the mold removal process timeline helps homeowners set realistic expectations and recognize successful remediation results.
Before Removal: Moldy caulk typically appears as black, pink, or orange discoloration along caulk lines, most commonly around tubs, showers, and sinks. The affected caulk may feel soft or spongy when pressed, indicating structural compromise. A musty odor often accompanies visible mold growth. Assessment should include checking adjacent tile grout and surrounding areas for signs of spread. Use a moisture meter to check moisture levels – readings above 20% indicate ongoing moisture issues requiring attention.
During Removal: The initial cleaning phase typically removes 70-80% of surface mold within 15-20 minutes of treatment. Homeowners should expect some mold spores to become airborne during scrubbing – this is normal and why respiratory protection is essential. If chemical cleaning fails to eliminate discoloration, expect 2-3 hours for complete caulk removal and joint cleaning. The process generates moderate debris that requires immediate containment. Professional remediators report that proper ventilation prevents overwhelming chemical odors during the process.
After Successful Removal: Properly remediated caulk areas should show no visible discoloration, soft spots, or musty odors. New mold-resistant caulk maintains flexibility and clean appearance when properly applied. The treated area should remain mold-free for 12-24 months with proper maintenance. Monitor for the first 30 days – any rapid mold return indicates incomplete removal or underlying moisture issues requiring professional mold remediation assessment.
When to Call a Professional vs DIY
Most caulk mold situations are ideal for DIY removal, but specific circumstances warrant professional intervention for safety and effectiveness reasons.
DIY Criteria: Handle mold removal personally when affected caulk lines total less than 10 linear feet, mold is limited to surface growth only, and no structural damage exists to surrounding materials. DIY is appropriate when homeowners can identify and control the moisture source, have proper safety equipment, and the mold species appears to be common bathroom varieties (black or pink discoloration). The project should be manageable within a weekend timeframe with basic hand tools.
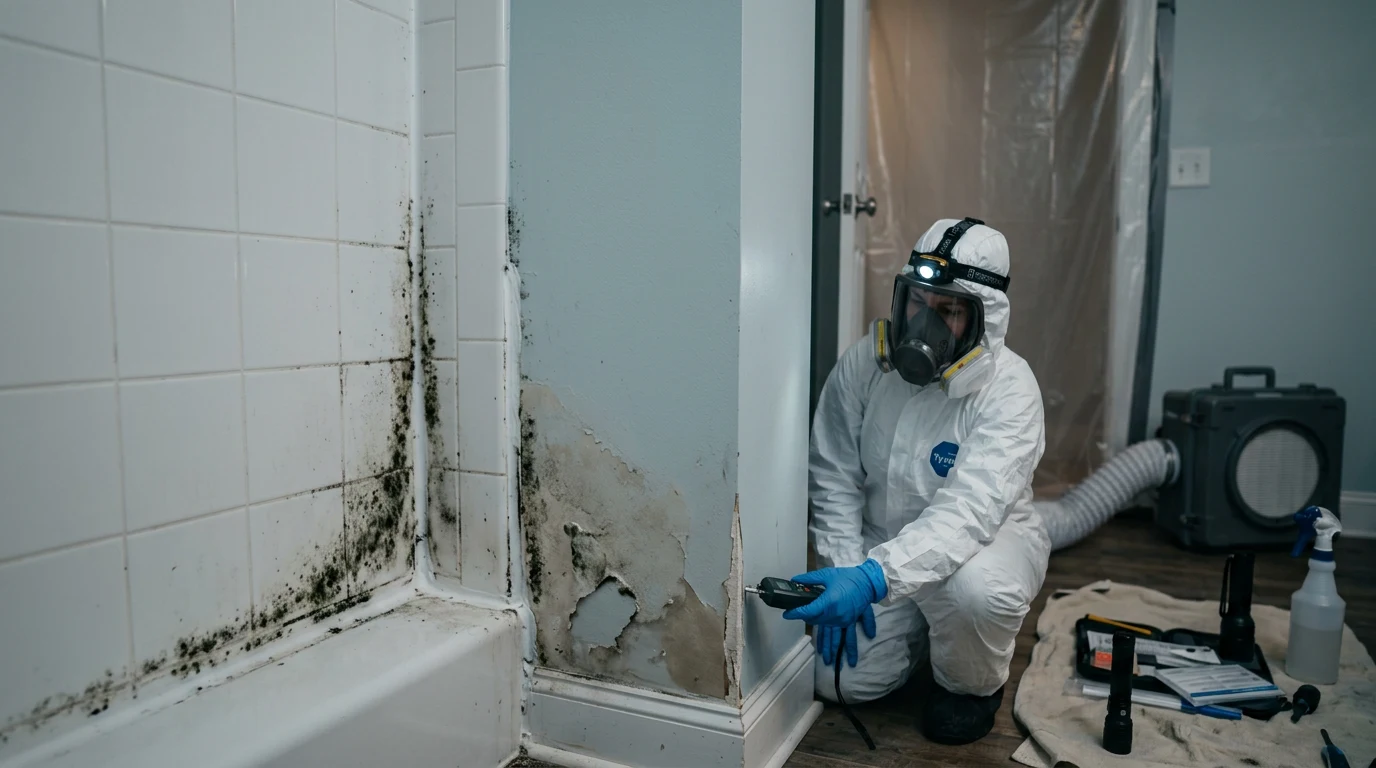
Professional Required When: Contact certified mold remediation specialists if mold covers more than 10 linear feet total, has spread to adjacent drywall or wood framing, or appears in unusual colors suggesting toxic species. Professional help is essential when homeowners have respiratory conditions, immune system compromise, or allergies to mold. Additionally, if moisture source cannot be identified or controlled, or if mold returns rapidly after DIY removal attempts, professional assessment is necessary.
Cost Analysis: Professional mold remediation for caulk-specific issues typically costs significantly more than DIY approaches, though comprehensive solutions may be more cost-effective long-term.
| Approach | Cost Range | Time Investment | Success Rate |
|---|---|---|---|
| DIY Supplies | $75-150 | 4-6 hours | 85-90% |
| Professional Service | $300-800 | 1-2 days | 95-98% |
| Partial DIY/Pro Consult | $150-300 | 6-8 hours | 90-95% |
DIY costs include mold remover spray, replacement caulk, safety equipment, and basic tools. Professional services include assessment, containment, removal, cleaning, and warranty coverage. Many homeowners find the middle approach most effective – DIY removal with professional moisture assessment and recommendations.
Prevention Strategies for Caulk and Sealant
Preventing mold growth on caulk requires addressing moisture control, material selection, and ongoing maintenance practices specific to high-humidity environments.
Material Selection: Choose mold-resistant caulk formulations specifically labeled for kitchen and bathroom applications. Silicone-based caulks generally outperform latex varieties in moisture resistance, though hybrid formulations offer easier application and cleanup. Premium mold-resistant caulks contain antimicrobial additives that actively prevent mold growth for 2-3 years. Avoid bargain caulks in moisture-prone areas – the cost savings disappear quickly when early replacement becomes necessary.
Moisture Management: Install and properly use exhaust fans rated for room size – bathrooms require 1 CFM per square foot minimum. Run fans during water use and continue for 20-30 minutes afterward to remove residual humidity. Squeegee shower walls and doors after each use to minimize water contact with caulk lines. Consider installing a dehumidifier in chronically humid bathrooms where ventilation alone proves insufficient.
Seasonal Considerations: Summer months require extra vigilance as higher humidity levels promote faster mold growth. Winter heating can create temperature differentials that promote condensation around windows and exterior walls. Spring cleaning should include caulk inspection and resealing as needed. Fall preparation should focus on ensuring proper ventilation systems before heating season begins.
Monitoring and Maintenance: Inspect caulk lines monthly for early signs of mold growth, cracking, or shrinkage. Use a moisture meter quarterly to check moisture levels around caulked joints – readings consistently above 16% indicate potential problems. Re-caulk proactively every 18-24 months rather than waiting for failure. Keep Concrobium mold control spray available for immediate treatment of minor mold spots before they establish colonies.
Related Materials and Cross-Contamination
Mold on caulk rarely exists in isolation – understanding how contamination spreads helps homeowners address comprehensive remediation needs and prevent recurring problems.
Common Contamination Pathways: Mold spores easily transfer from compromised caulk to adjacent tile and grout surfaces through moisture wicking and air circulation. Bathroom caulk mold frequently spreads to nearby drywall when moisture penetrates behind failed caulk lines. Kitchen caulk issues often coincide with wood cabinet mold where sink splash creates persistent moisture conditions.
Material Combinations Requiring Coordinated Treatment: Shower surrounds typically require simultaneous attention to caulk, grout, and potentially drywall behind tile installations. Window caulk problems often involve adjacent concrete or wood trim materials. Kitchen sink areas frequently need coordinated treatment of caulk, cabinet bases, and sometimes flooring materials where water damage extends beyond visible caulk issues.
Prevention Strategy: Address mold growth comprehensively rather than treating individual materials in isolation. When removing moldy caulk, inspect and test adjacent surfaces for hidden contamination. Consider professional mold testing when multiple materials show signs of mold growth, as this may indicate systemic moisture problems requiring broader remediation approaches.
Frequently Asked Questions
How do I identify mold on caulk and sealant?
Mold on caulk appears as black, pink, orange, or green discoloration along caulk lines, most commonly around bathtubs, showers, sinks, and toilets. Unlike dirt or soap residue, mold staining doesn’t clean off with regular household cleaners. The affected caulk may feel soft, spongy, or sticky when touched, and often produces a musty odor. Use a moisture meter to check surrounding areas – elevated moisture readings above 20% often accompany mold growth.
Is mold on caulk and sealant dangerous?
Yes, mold on caulk poses health risks by releasing airborne spores that can cause respiratory symptoms, allergic reactions, skin irritation, and eye problems. People with asthma, allergies, or compromised immune systems face higher risks of severe reactions. Common bathroom molds like Stachybotrys and Aspergillus species can produce mycotoxins that cause more serious health effects with prolonged exposure. According to mold health risk data, even small amounts of bathroom mold can trigger symptoms in sensitive individuals.
How much does it cost to remove mold from caulk and sealant?
DIY mold removal from caulk costs $75-150 for supplies including mold remover spray, safety equipment, removal tools, and replacement caulk. Professional remediation services charge $300-800 for caulk-specific mold removal, depending on linear footage affected and complexity of surrounding damage. Most homeowners successfully handle caulk mold removal themselves, making professional services unnecessary unless mold has spread to adjacent materials or underlying structural issues exist.
Can you paint or seal over mold on caulk and sealant?
No, never paint or seal over mold on caulk – this creates a false solution that allows mold to continue growing underneath the coating. Mold will eventually break through paint or sealant, often returning worse than the original contamination. Even mold encapsulant products are not recommended for caulk applications because they don’t address the underlying moisture and structural issues. Complete removal and replacement is the only effective long-term solution for moldy caulk.
How long does it take for mold to grow on caulk and sealant?
Mold can begin growing on caulk within 24-48 hours under ideal conditions of moisture, warmth, and organic matter availability. Visible mold colonies typically appear within 3-7 days in bathrooms and kitchens where caulk remains consistently damp. Standard latex and silicone caulks provide organic compounds that feed mold growth, while soap residue and body oils accelerate the process. Mold-resistant caulk formulations can delay growth for several months but eventually succumb without proper moisture control.
What causes mold on caulk and sealant?
Mold grows on caulk due to persistent moisture exposure, inadequate ventilation, and organic matter accumulation from soap, shampoo, and food residues. Poor ventilation in bathrooms and kitchens creates humid conditions that promote mold growth, while failed or aging caulk allows water penetration that creates ideal growing conditions. Temperature fluctuations cause condensation that keeps caulk surfaces damp, and inadequate cleaning allows organic residues to build up as mold food sources.
Can you save caulk and sealant with mold on it?
Surface mold on caulk can sometimes be cleaned successfully with mold remover spray and thorough scrubbing, but penetrated mold requires complete caulk replacement. If mold staining persists after aggressive cleaning, or if caulk feels soft or compromised, replacement is the only reliable solution. Given that caulk is inexpensive and easy to replace, most professionals recommend removal and replacement over attempting to save moldy caulk, especially in high-moisture areas where recontamination is likely.
How do I prevent mold on caulk and sealant?
Prevent mold on caulk by using mold-resistant formulations designed for kitchens and bathrooms, maintaining proper ventilation with exhaust fans, and implementing daily moisture control practices like squeegeeing after showers. Run exhaust fans during water use and for 20-30 minutes afterward, keep humidity levels below 50% with dehumidifiers if necessary, and perform regular cleaning with mold-preventive products. Proactive re-caulking every 18-24 months prevents mold establishment in aging caulk materials.
When should I test for mold on caulk and sealant?
Test for mold when discoloration appears on caulk, musty odors persist after cleaning, or family members experience respiratory symptoms that worsen in bathrooms or kitchens. Use mold test kits when mold growth extends beyond visible caulk areas or when unusual colors suggest potentially toxic mold species. Professional testing becomes necessary when mold covers large areas, affects multiple rooms, or returns rapidly after remediation attempts, as these situations may indicate systemic moisture problems requiring comprehensive assessment.
Can mold on caulk and sealant make you sick?
Yes. Mold on caulk and sealant releases spores into the air that can cause respiratory symptoms, allergic reactions, and other health issues. People with asthma, allergies, or weakened immune systems are at higher risk.
Should I replace moldy caulk and sealant or can it be cleaned?
Surface mold can be cleaned, but if mold has penetrated into the caulk (dark staining that won’t come out), replacement is the best option. Caulk is inexpensive and easy to replace.
When should I call a professional for caulk and sealant mold?
Always DIY. Caulk replacement is one of the simplest home maintenance tasks.