Mold in Carpet: Signs, Removal, and When to Replace
Dealing with mold in carpet is a common challenge for homeowners. Carpet is found throughout homes, and when moisture gets involved, mold can take hold quickly. This guide covers everything you need to know about identifying, removing, and preventing mold on carpet, including when you can handle it yourself and when to call a professional. According to EPA Mold Cleanup Guide, controlling moisture is the key to preventing mold growth on all building materials.
Our reviews are based on aggregated verified buyer feedback, manufacturer specifications, ingredient analysis, and published expert opinion. Products are not independently purchased or tested by our team. We may earn a commission if you purchase through our links, at no extra cost to you. How We Review
Why Does Mold Grow on Carpet?
Carpet fibers and padding trap moisture, dust, and organic debris that feed mold. The carpet pad (especially foam-backed) absorbs water like a sponge and is nearly impossible to fully dry. Wall-to-wall carpet over concrete slabs is especially vulnerable.
How to Identify Mold on Carpet
Musty odor is often the first sign. Visible signs include discoloration (dark spots on carpet surface or backing), damp or squishy feel underfoot, allergy symptoms that worsen indoors. Pull back a corner to check the pad and subfloor.
Removal difficulty: High (usually replacement is necessary)
Can You Save Moldy Carpet?
Rarely. If the carpet pad got wet, it almost always needs replacement. Surface-only mold on the carpet fibers (no pad involvement) can sometimes be cleaned, but success rate is low.
How to Remove Mold from Carpet: Step-by-Step
Follow these steps carefully to remove mold from carpet safely and effectively. Always prioritize safety by wearing appropriate protective gear.
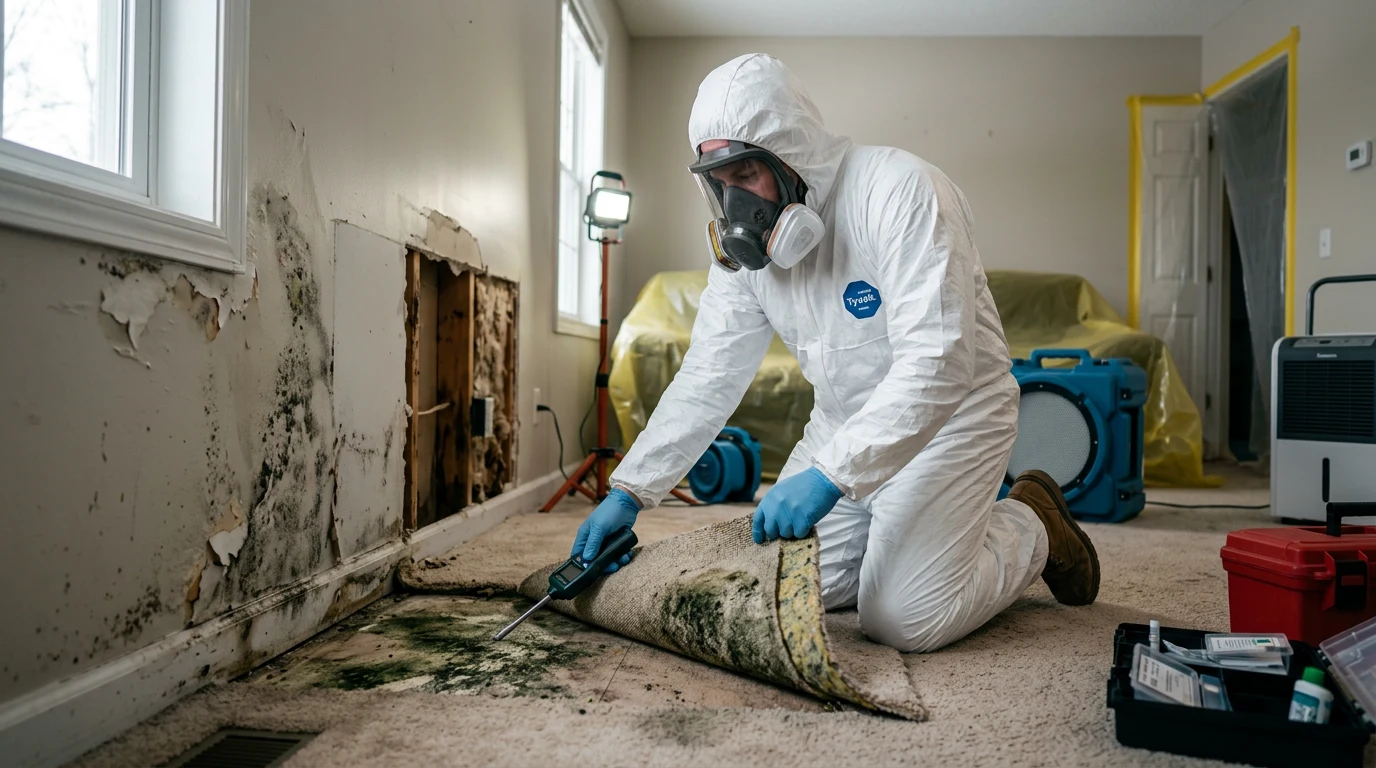
Step 1: Wear N95 respirator and gloves (disturbing carpet mold releases spores)
Step 2: Cut carpet into manageable sections for removal
Step 3: Remove and discard carpet pad (it cannot be salvaged if moldy)
Step 4: HEPA vacuum the subfloor thoroughly
Step 5: Clean subfloor with mold-killing solution
Step 6: Allow subfloor to dry completely (48-72 hours with fans and dehumidifier)
Step 7: Address the moisture source before installing new flooring
Step 8: Consider non-carpet alternatives in moisture-prone areas (tile, vinyl plank, sealed concrete)
Recommended Products for Carpet Mold Removal
These products are recommended for treating mold on carpet based on verified buyer reviews and manufacturer specifications:
How to Prevent Mold on Carpet
Avoid carpet in basements, bathrooms, and kitchens. Clean spills immediately. Use a dehumidifier in carpeted basement areas. Have carpets professionally cleaned annually. Consider carpet tiles that can be individually replaced.
DIY vs. Professional Remediation
DIY carpet removal is feasible, but if mold has reached the subfloor, professional remediation is recommended to ensure complete treatment.
Tools and Materials You’ll Need
Proper equipment is essential for safe and effective carpet mold removal. The right tools protect both the homeowner and prevent mold spores from spreading throughout the home. Each tool serves a specific purpose in the remediation process.
| Tool/Material | Purpose | Where to Buy |
|---|---|---|
| N95 Respirator | Protects against inhaling mold spores during removal | Amazon |
| HEPA Vacuum | Captures microscopic mold spores from subfloor and surfaces | Amazon |
| Mold Remover Spray | Kills remaining mold on subfloor and adjacent surfaces | Amazon |
| Moisture Meter | Verifies complete drying before new flooring installation | Amazon |
| Dehumidifier | Accelerates drying process and maintains proper humidity | Amazon |
| Utility Knife | Cuts carpet into manageable sections for removal | Local hardware store |
| Heavy-duty trash bags | Contains moldy carpet materials during disposal | Local hardware store |
Professional-grade equipment ensures thorough remediation. According to IICRC standards, proper containment and filtration prevent cross-contamination during carpet mold removal projects.
Detailed Step-by-Step Removal Process for Carpet
Complete carpet mold removal requires systematic execution to ensure safety and effectiveness. Each step builds upon the previous one, and skipping steps often results in incomplete remediation or health risks.
Step 1: Safety Preparation (15-20 minutes)
Don an N95 respirator and disposable gloves before entering the affected area. Warning: Disturbing moldy carpet releases thousands of spores into the air. Seal off the work area with plastic sheeting if possible. Open windows for ventilation but avoid cross-drafts that spread spores to other rooms.
Step 2: Document and Test (10-15 minutes)
Photograph the affected areas for insurance purposes. Use a moisture meter to check moisture levels in the carpet and subfloor. Readings above 16% indicate excessive moisture that will require extended drying time.
Step 3: Carpet Sectioning (30-45 minutes)
Using a sharp utility knife, cut the carpet into 6-foot by 6-foot sections starting from the cleanest area and working toward the most contaminated. Roll each section tightly with the moldy side inward to minimize spore release. Do not shake or beat the carpet sections.
Step 4: Carpet Pad Removal (20-30 minutes)
Remove all carpet padding, as it cannot be salvaged once mold contamination occurs. The padding typically adheres to the subfloor with staples or adhesive. Scrape thoroughly to remove all padding residue. Double-bag all materials immediately.
Step 5: Subfloor Assessment and Cleaning (45-60 minutes)
Inspect the subfloor for discoloration, soft spots, or visible mold growth. Use a HEPA vacuum with a brush attachment to remove all debris. Vacuum in overlapping patterns, spending extra time in corners and seams where spores accumulate.
Step 6: Chemical Treatment (20-30 minutes application, plus contact time)
Apply mold remover spray generously to the entire subfloor surface. Allow the specified contact time (typically 10-15 minutes) before wiping with disposable cloths. For severe contamination, consider applying a mold encapsulant after cleaning.
Step 7: Drying Protocol (48-72 hours minimum)
Position fans and a dehumidifier to create airflow across the subfloor. Target humidity levels below 50% and subfloor moisture content below 12% before proceeding. Monitor conditions with your moisture meter twice daily.
Step 8: Final Inspection and Moisture Source Correction
Address the underlying moisture problem (leaky pipes, poor ventilation, foundation issues) before installing new flooring. Without moisture control, mold will return within weeks of new installation.
What to Expect: Before, During, and After Removal
Before Removal: Moldy carpet typically exhibits a strong musty odor that intensifies when the carpet is disturbed. Visual inspection may reveal dark spots, discoloration, or fuzzy growth on carpet fibers. The carpet backing often shows more extensive contamination than the surface. Water damage may have caused carpet separation from tack strips or visible buckling.
During Removal: Expect the musty odor to intensify significantly once removal begins. Visible mold spores may become airborne, appearing as dust particles in sunlight. The process typically takes 4-6 hours for a standard room, depending on contamination severity. Homeowners commonly experience mild respiratory irritation even with proper protection, which is normal but indicates the importance of containment.
After Removal: The treated space should have no musty odors within 24-48 hours if remediation was successful. The subfloor should appear clean and dry, with moisture readings below 12%. Air quality improvements typically become noticeable within 2-3 days. Some homeowners report improved sleep quality and reduced allergy symptoms within a week of successful remediation.
Failed remediation often becomes apparent through persistent odors or visual mold regrowth within 2-4 weeks. Professional testing may be warranted if symptoms persist after DIY remediation attempts.
When to Call a Professional vs DIY
DIY Appropriate For: Surface mold covering less than 10 square feet, no structural involvement, homeowner comfort with power tools and safety equipment, and adequate ventilation in work area. DIY projects work best when the moisture source is obvious and easily correctable, such as a small plumbing leak or isolated spill.
Professional Required For: Mold contamination exceeding 10 square feet, suspected black mold (Stachybotrys), involvement of HVAC systems, structural damage to subfloors, or immune-compromised household members. Professional intervention is essential when the moisture source is unknown or involves building envelope failures.
Health considerations also dictate professional involvement. Homeowners with respiratory conditions, pregnant women, or young children in the household should avoid DIY mold remediation regardless of contamination size.
| Approach | Average Cost Range | Time Investment | Success Rate |
|---|---|---|---|
| DIY Removal | $200-$500 | 6-12 hours | 70-80% |
| Professional Remediation | $1,500-$4,000 | 2-3 days | 95-98% |
| DIY + Professional Consultation | $400-$800 | 8-14 hours | 85-90% |
Professional remediation includes post-treatment testing, warranty coverage, and insurance documentation that DIY approaches cannot provide. However, homeowners with appropriate skills and equipment can successfully handle small-scale carpet mold issues with proper preparation and execution.
Prevention Strategies for Carpet
Effective carpet mold prevention focuses on moisture control and regular maintenance. Carpet installation location plays a crucial role in preventing future mold issues. Basements, bathrooms, and kitchens present the highest risk environments for carpet mold growth.
Seasonal Considerations: Spring brings increased humidity that requires enhanced dehumidification in carpeted basements. Summer air conditioning creates condensation risks near HVAC ducts. Fall and winter heating can mask moisture problems that manifest as mold growth in spring.
Ongoing Monitoring: Monthly moisture checks using a moisture meter help identify problems before visible mold appears. Professional carpet cleaning every 12-18 months removes accumulated organic debris that feeds mold growth. Immediate response to spills prevents moisture penetration into carpet padding.
Product Recommendations: Strategic placement of dehumidifiers maintains optimal humidity levels below 50%. Carpet tiles offer replacement flexibility when isolated contamination occurs. Moisture-resistant carpet padding provides additional protection in high-risk areas.
Air circulation improvements through ceiling fans or HVAC upgrades significantly reduce mold risk. Regular HVAC maintenance prevents humidity imbalances that contribute to carpet mold growth throughout the home.
Related Materials and Cross-Contamination
Carpet mold rarely exists in isolation. The extensive surface area and porous nature of carpet systems often harbor mold that spreads to adjacent building materials. Understanding these connections helps homeowners address comprehensive remediation needs.
Common contamination patterns include drywall wicking moisture from carpet padding, creating mold growth behind baseboards. Wood subfloors absorb moisture from carpet systems, leading to structural mold issues that compromise flooring integrity.
Concrete slabs beneath carpet often develop surface mold that remains hidden until carpet removal. This contamination requires specialized treatment beyond standard carpet remediation protocols.
HVAC systems connected to carpeted areas can distribute mold spores throughout the home. Air handler contamination often occurs when carpet mold problems persist unaddressed. Professional duct cleaning may be necessary following extensive carpet mold remediation projects.
Adjacent tile and grout areas frequently show mold growth when carpet moisture problems exist. The transition zones between different flooring materials create vulnerability points where moisture accumulates and mold spreads between surfaces.
Frequently Asked Questions
Can mold on carpet make you sick?
Yes. Mold on carpet releases spores into the air that can cause respiratory symptoms, allergic reactions, and other health issues. People with asthma, allergies, or weakened immune systems are at higher risk.
Should I replace moldy carpet or can it be cleaned?
Rarely. If the carpet pad got wet, it almost always needs replacement. Surface-only mold on the carpet fibers (no pad involvement) can sometimes be cleaned, but success rate is low.
How do I prevent mold on carpet?
Avoid carpet in basements, bathrooms, and kitchens. Clean spills immediately. Use a dehumidifier in carpeted basement areas. Have carpets professionally cleaned annually. Consider carpet tiles that can be individually replaced.
When should I call a professional for carpet mold?
DIY carpet removal is feasible, but if mold has reached the subfloor, professional remediation is recommended to ensure complete treatment.
How much does it cost to remove mold from carpet?
DIY carpet mold removal typically costs $200-$500 for supplies and equipment. Professional remediation ranges from $1,500-$4,000 depending on contamination extent and room size. This includes carpet replacement, subfloor treatment, and moisture control measures.
Can you seal over mold on carpet?
No. Unlike hard surfaces, carpet cannot be effectively sealed or encapsulated. The porous nature of carpet fibers and padding requires complete removal when mold contamination occurs. Attempting to seal moldy carpet will trap moisture and worsen the problem.
How long does it take for mold to grow on carpet?
Mold can begin growing on wet carpet within 24-48 hours under favorable conditions. Visible mold growth typically appears within 3-7 days. Carpet padding accelerates this timeline due to its moisture-retaining properties and organic composition that feeds mold growth.
What causes mold on carpet?
Excess moisture is the primary cause of carpet mold. Common sources include flooding, plumbing leaks, high humidity levels, poor ventilation, and spills that aren’t properly dried. Carpet installed over concrete slabs is particularly vulnerable to moisture problems.
How do I identify mold on carpet?
Look for musty odors, visible discoloration or dark spots, damp or squishy feel underfoot, and worsening allergy symptoms indoors. Pull back a corner of the carpet to inspect the padding and subfloor for hidden mold growth, which is often more extensive than surface contamination.
Is black mold on carpet dangerous?
All mold types on carpet pose health risks, but black mold (Stachybotrys) can produce mycotoxins that cause severe health effects. Professional identification and remediation are essential for suspected black mold. Never attempt DIY removal of extensive black mold contamination.
Recommended Products for Carpet Mold Removal
Selecting the right products ensures effective carpet mold remediation while protecting homeowner health. These recommendations are based on proven performance in carpet mold situations and positive user feedback.
- Concrobium Mold Control – Non-toxic formula that kills mold and prevents regrowth on subfloors and adjacent surfaces. Particularly effective on wood and concrete substrates.
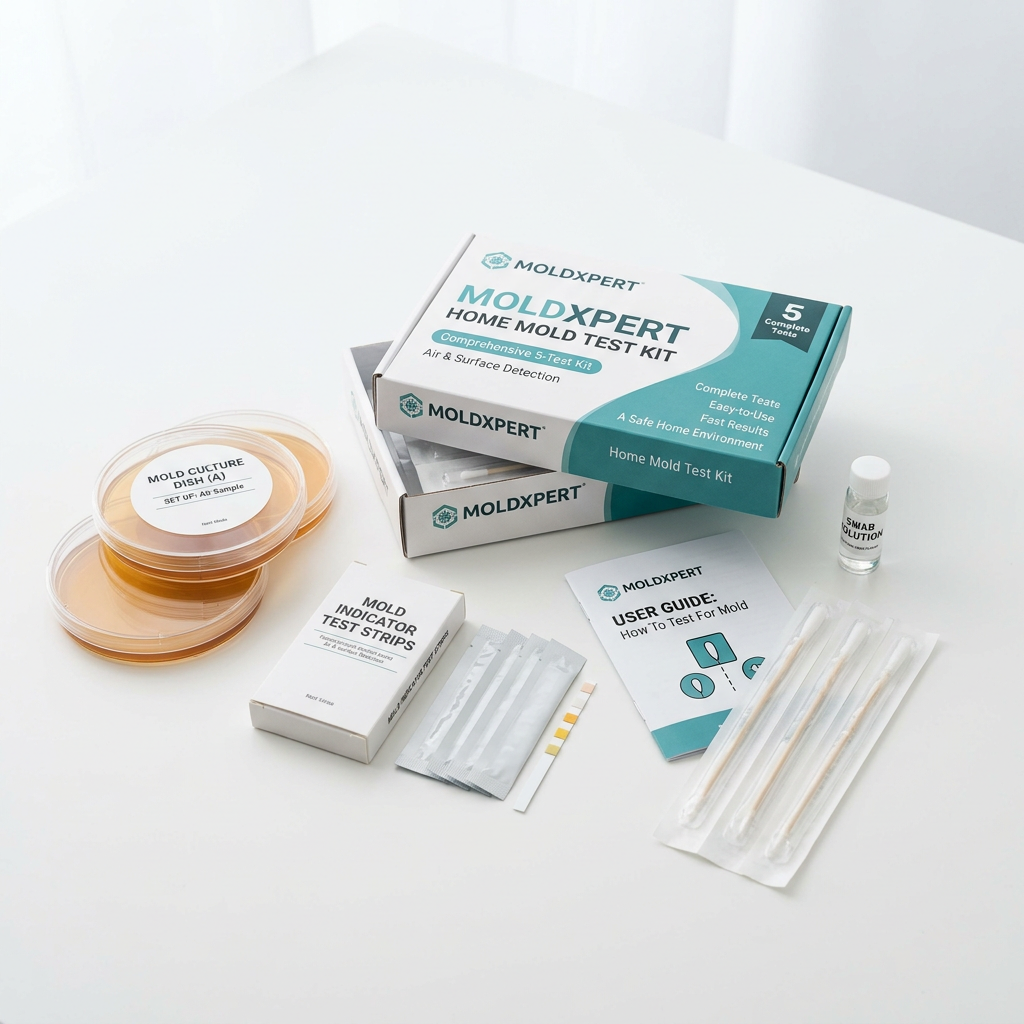
- Professional Mold Test Kit – Verifies mold species and concentration levels before and after remediation. Essential for documenting successful treatment.
- HEPA Vacuum – Hospital-grade filtration captures 99.97% of mold spores during cleanup. Prevents cross-contamination during remediation.
- Commercial Dehumidifier – Removes excess moisture from air during and after remediation. Maintains optimal humidity levels to prevent mold regrowth.
- Mold Encapsulant – Seals subfloor surfaces after cleaning to prevent future mold growth. Provides long-term protection for porous substrates.
- Pin-Type Moisture Meter – Accurately measures moisture content in subfloors and adjacent materials. Essential for verifying complete drying before new flooring installation.