Basement mold removal ranks among the most critical remediation challenges a homeowner can face. Basements sit below grade, surrounded by soil that pushes moisture through foundation walls and floor slabs through a process called hydrostatic pressure. As a remediation contractor who has worked on hundreds of basement mold projects over the past 15 years, the pattern is remarkably consistent: water finds a way in, humidity climbs, and within 48 to 72 hours, mold colonies begin establishing on drywall, framing lumber, stored belongings, and any cellulose-based material in the space. This guide covers every phase of basement mold remediation, from identifying the moisture source to executing a proper containment and removal protocol, to preventing recurrence through proven waterproofing and mold elimination strategies.
Our reviews are based on aggregated verified buyer feedback, manufacturer specifications, ingredient analysis, and published expert opinion. Products are not independently purchased or tested by our team. We may earn a commission if you purchase through our links, at no extra cost to you. How We Review
Understanding Why Basements Grow Mold
Before starting any basement mold removal project, identifying the moisture source is essential. Remediation without addressing the underlying moisture problem guarantees recolonization, often within weeks. The IICRC S520 Standard for Professional Mold Remediation specifically states that mold remediation is not complete until the moisture source has been identified and controlled. Basements face three primary categories of moisture intrusion, and many homes deal with more than one simultaneously.
Hydrostatic Pressure and Groundwater Intrusion
Hydrostatic pressure is the force exerted by groundwater against foundation walls and floor slabs. When the water table rises (after heavy rainfall, snowmelt, or seasonal shifts), that pressure pushes water through any crack, gap, joint, or porous section of the concrete. The most common entry points are the cove joint where the floor meets the wall, tie rod holes from the original concrete pour forms, and cracks that develop as the foundation settles over time. Foundation cracks wider than 1/16 inch are particularly problematic because they act as channels that direct water flow directly into the basement interior.
Homes built before the 1980s frequently lack exterior waterproofing membranes, making them especially vulnerable. Even newer construction can develop hydrostatic moisture issues if the exterior drainage tile system becomes clogged with sediment or root intrusion. A sump pump system with battery backup is the standard defense against hydrostatic pressure, collecting water before it reaches the living space. French drains (interior perimeter drainage systems) channel water from the cove joint to the sump pit, providing a managed path rather than allowing water to spread across the floor.
Condensation and Humidity
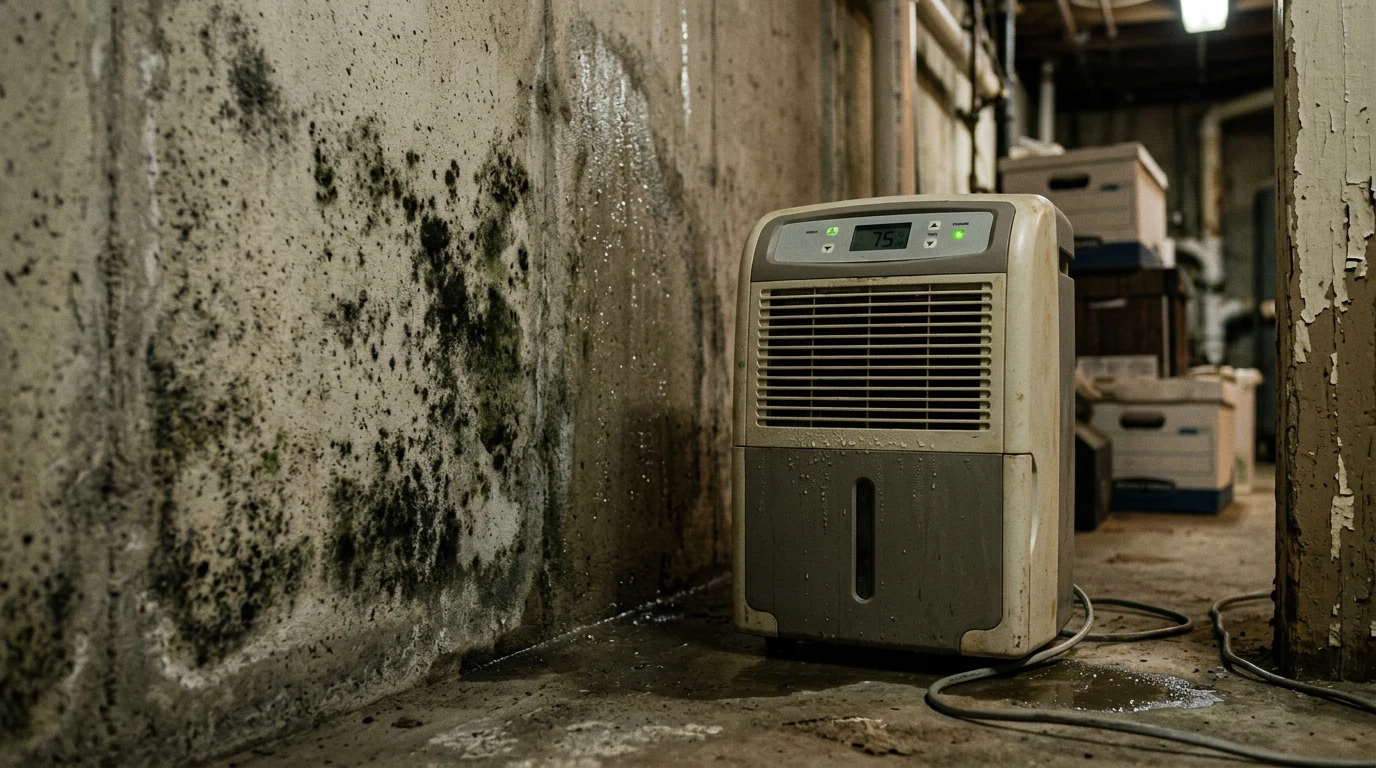
Condensation forms when warm, humid air contacts cooler basement surfaces. In summer months, outdoor air at 85 degrees and 70% relative humidity enters the basement (through windows, doors, or HVAC return air paths) and meets concrete walls and floors sitting at 55 to 60 degrees. The temperature differential pushes the air past its dew point, depositing liquid water on surfaces. This creates a persistent moisture film that mold colonies exploit aggressively. Many homeowners mistake condensation dripping from cold water pipes or pooling at the base of foundation walls for an active leak, when the real problem is uncontrolled humidity.
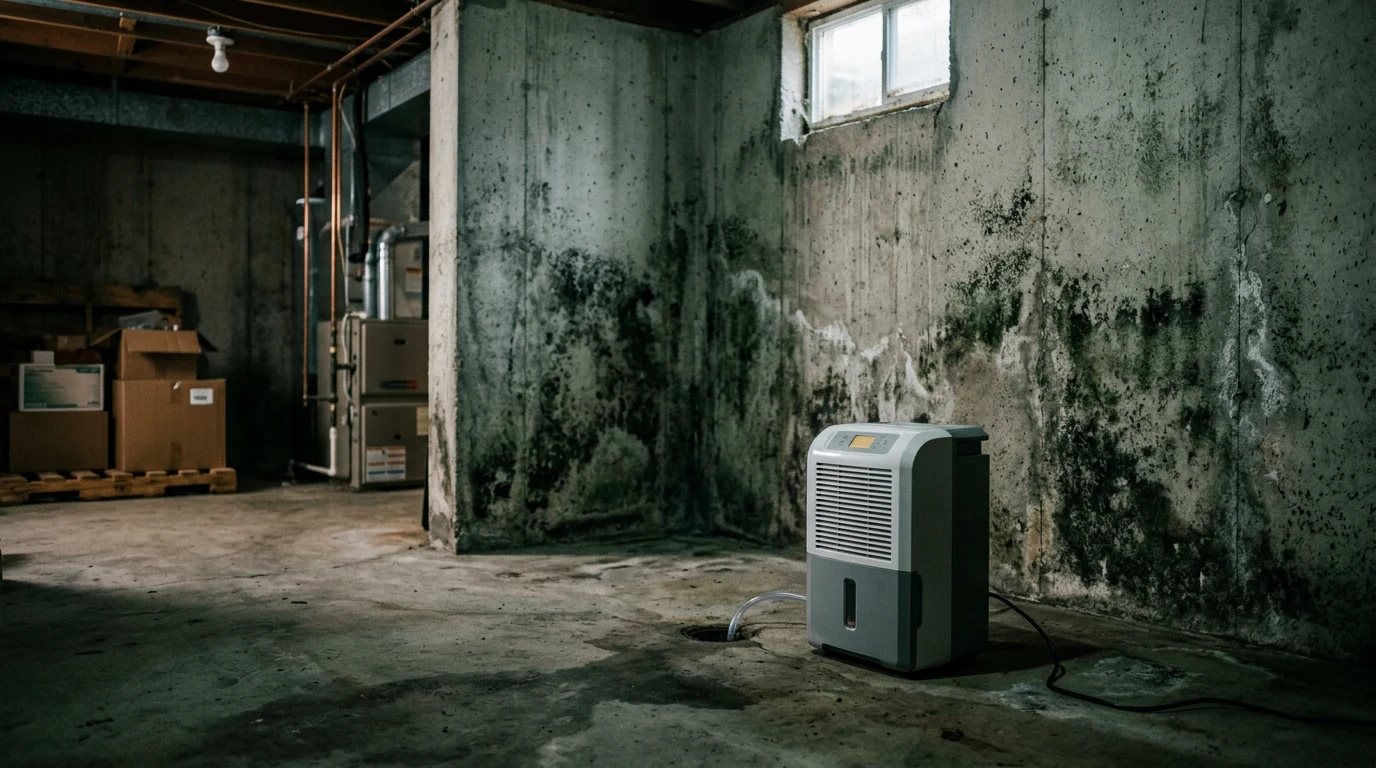
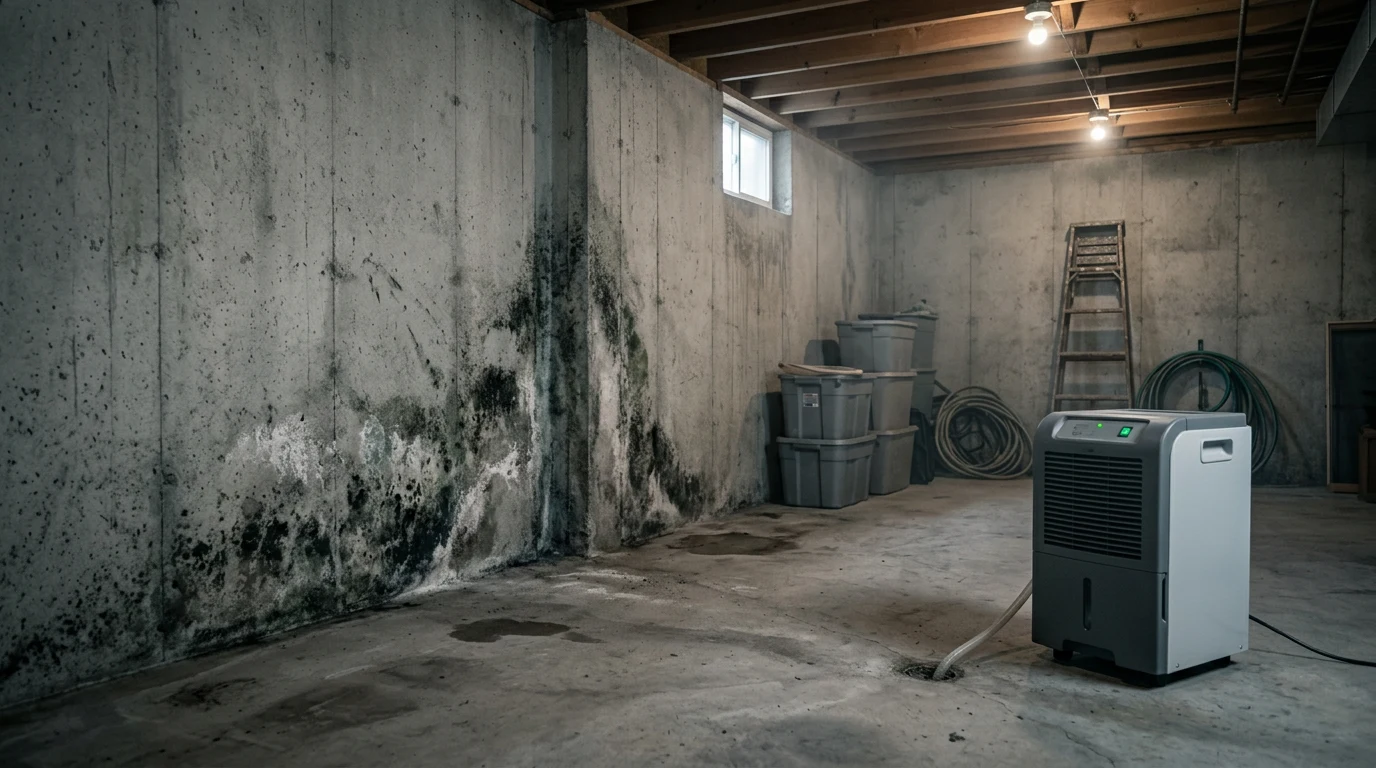
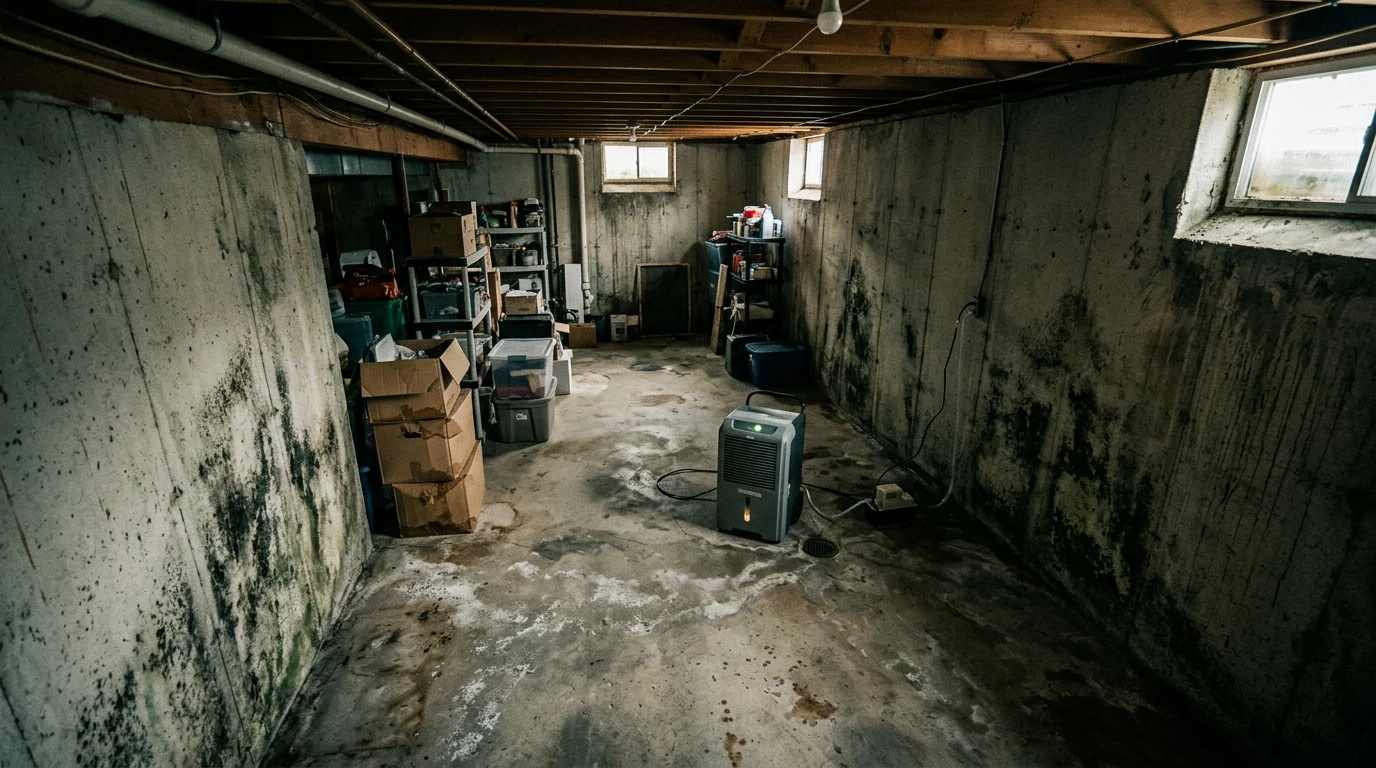
Maintaining basement relative humidity below 50% (ideally 30 to 50%) is critical. A properly sized dehumidifier is the primary tool for condensation control. Dehumidification sizing depends on the square footage, baseline humidity level, and the number of moisture sources present. For a 1,000-square-foot basement with moderate moisture, a unit rated for 50 to 70 pints per day is typical. Severely wet basements may require commercial-grade dehumidifiers pulling 100+ pints daily. A quality moisture meter allows accurate monitoring of both relative humidity and material moisture content throughout the remediation process.
Plumbing Leaks and Internal Water Sources
Plumbing leaks are the third major basement moisture source and the most straightforward to resolve. Supply line drips, slow drain leaks, water heater failures, washing machine connections, and condensation on uninsulated cold water pipes all contribute moisture. The challenge is that many plumbing leaks in basements go unnoticed for months because they occur behind finished walls or above drop ceilings. By the time visible mold appears, the affected area is often significantly larger than what is visible on the surface. A thorough plumbing inspection should precede any remediation work.
Recognizing Basement Mold: Types and Warning Signs
Basement mold presents in several common species, each with distinct characteristics. Stachybotrys chartarum (often called black mold) thrives on chronically wet cellulose materials like drywall paper and cardboard storage boxes. It appears dark greenish-black with a wet or slimy texture. Aspergillus species are among the most common basement molds, appearing in various colors from green to white to yellow. Penicillium often shows as blue-green fuzzy patches and spreads rapidly once established. Cladosporium is another frequent basement colonizer, typically appearing on wood framing and painted surfaces.
A musty, earthy odor is often the first indication of hidden basement mold. Other warning signs include visible discoloration on walls or ceilings, peeling paint or wallpaper, warping of baseboards, standing water or persistent dampness, and health symptoms such as nasal congestion, coughing, or eye irritation that worsen when spending time in the basement. White crystalline deposits on concrete walls (efflorescence) are frequently confused with mold but are actually mineral salt deposits left behind as water evaporates through concrete. Efflorescence indicates a moisture problem but is not mold itself.
When Professional Mold Testing Is Necessary
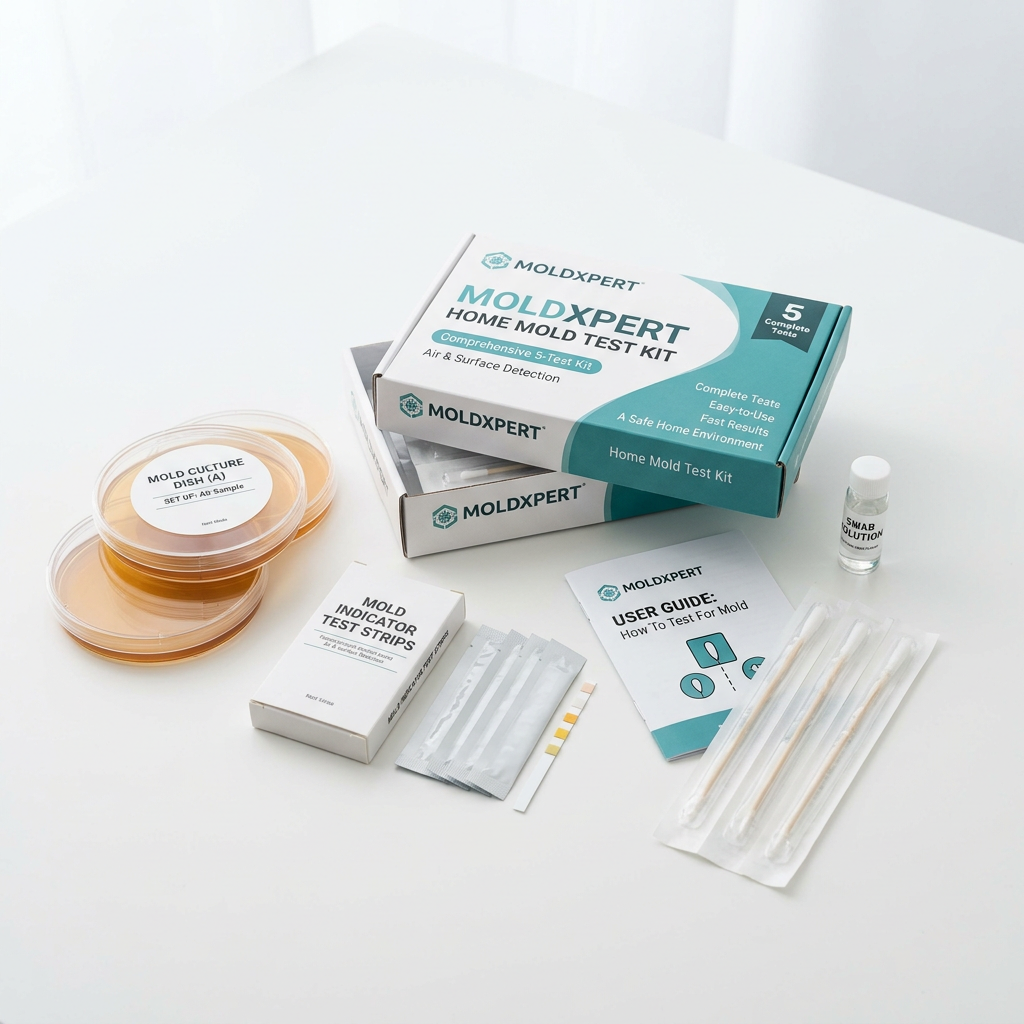
Not every basement mold situation requires professional mold testing, but several scenarios make it strongly advisable. If the affected area exceeds 10 square feet (the EPA’s threshold for professional remediation), if occupants report persistent health symptoms, if the mold is hidden behind walls or above ceilings and the full extent is unknown, or if there is a real estate transaction involved, testing provides documentation that supports informed decision-making. Air sampling establishes baseline spore counts, while surface sampling identifies the specific species present. Post-remediation clearance testing confirms that the work was successful.
Basement Mold Remediation: Step-by-Step Protocol
Professional basement mold removal follows a structured protocol developed from the IICRC S520 Standard and EPA guidelines. Whether handling the work independently or hiring a remediation contractor, the sequence of steps remains the same. Skipping steps, particularly containment and source control, is the most common reason basement mold returns after remediation.
Step 1: Safety Preparation and Personal Protective Equipment
Before disturbing any mold growth, proper personal protective equipment (PPE) is mandatory. At minimum, this includes an N95 respirator (P100 half-face respirator for larger projects), non-vented safety goggles, disposable nitrile gloves, and disposable coveralls or old clothing that can be discarded afterward. OSHA guidelines specify that workers should not eat, drink, or smoke in the work area, and all PPE should be donned before entering the containment zone and removed before exiting.
For projects involving Stachybotrys or any area larger than 30 square feet, a full-face P100 respirator with organic vapor cartridges is the professional standard. Disposable Tyvek suits with hood, boot covers, and taped seams prevent spore contamination of clothing and skin. Taking these precautions seriously is not overcautious; disturbing mold releases millions of spores into the air in seconds, and respiratory exposure at those concentrations can cause significant health effects.
Step 2: Containment Setup
Containment prevents mold spores from spreading to unaffected areas of the home during remediation. This is arguably the most important step in the process and the one most often skipped in DIY projects. The IICRC S520 defines three levels of containment based on project scope:
| Containment Level | Area Size | Requirements |
|---|---|---|
| Minimum | Under 10 sq ft | Dust suppression misting, limited isolation |
| Limited | 10 to 100 sq ft | Polyethylene sheeting enclosure, single layer, HEPA air scrubber |
| Full | Over 100 sq ft | Double-layer poly barrier, airlock entry, negative air pressure, HEPA air scrubber, decontamination chamber |
For most basement remediation projects (which tend to be 10+ square feet), limited or full containment applies. Containment barriers are constructed from 6-mil polyethylene sheeting secured to walls, floors, and ceilings with painter’s tape and spray adhesive. All HVAC registers, return air grilles, and ductwork openings within the containment area must be sealed to prevent spore migration through the forced air system.
Negative air pressure is established using a HEPA-filtered negative air machine (air scrubber) that exhausts filtered air outside the containment zone. This creates a slight vacuum inside the work area, ensuring that any spores released during demolition and cleaning flow into the air scrubber rather than escaping into the rest of the home. The HEPA filter captures 99.97% of particles at 0.3 microns, which is well within the size range of mold spores (typically 2 to 100 microns).
Step 3: Source Removal and Demolition
Porous materials with mold penetration cannot be cleaned and must be removed. This includes drywall (both the paper face and gypsum core absorb moisture and support mold), carpet, carpet padding, ceiling tiles, fiberglass insulation, cardboard, paper products, and any fabric materials. Semi-porous materials like wood framing can often be cleaned and treated if the mold growth is surface-level and the wood is structurally sound.
During demolition, misting with a light water spray suppresses dust and airborne spore release. Removed materials should be double-bagged in 6-mil poly contractor bags, sealed with duct tape, and removed from the containment through the designated exit path. Never carry open bags of contaminated material through clean areas of the home. The air scrubber should run continuously during all demolition and cleaning activities.
Step 4: HEPA Vacuuming All Surfaces
After removing contaminated materials, every surface within the containment zone must be HEPA vacuumed. This includes exposed framing, concrete walls, the floor slab, electrical boxes, pipes, ductwork, and any remaining fixtures. A true HEPA vacuum with sealed filtration is essential. Standard shop vacuums blow mold spores directly through the motor housing and back into the air, dramatically worsening contamination rather than reducing it.
HEPA vacuuming should follow a systematic pattern: start at the highest point and work down, then work from the back of the containment toward the exit. Overlap vacuum strokes by at least 50% to ensure complete coverage. Pay particular attention to joints, corners, ledges, and any rough surfaces where spores accumulate.
Step 5: Antimicrobial Treatment and Cleaning
After HEPA vacuuming, remaining surfaces are cleaned with an antimicrobial agent. The choice of antimicrobial treatment depends on the surface material and the scope of contamination. For concrete and masonry, a professional-grade mold remover spray designed for porous substrates is effective. For wood framing, a combination of cleaning followed by application of a registered antimicrobial prevents regrowth on treated surfaces.
Bleach is not recommended for porous surfaces. While bleach kills surface mold on non-porous materials (glass, tile, metal), its water content actually feeds mold roots (hyphae) embedded in porous materials like wood and concrete. The EPA does not recommend bleach for mold remediation on porous surfaces for this reason. Quaternary ammonium compounds, hydrogen peroxide-based products, and botanical antimicrobials are more effective options for porous substrate treatment.
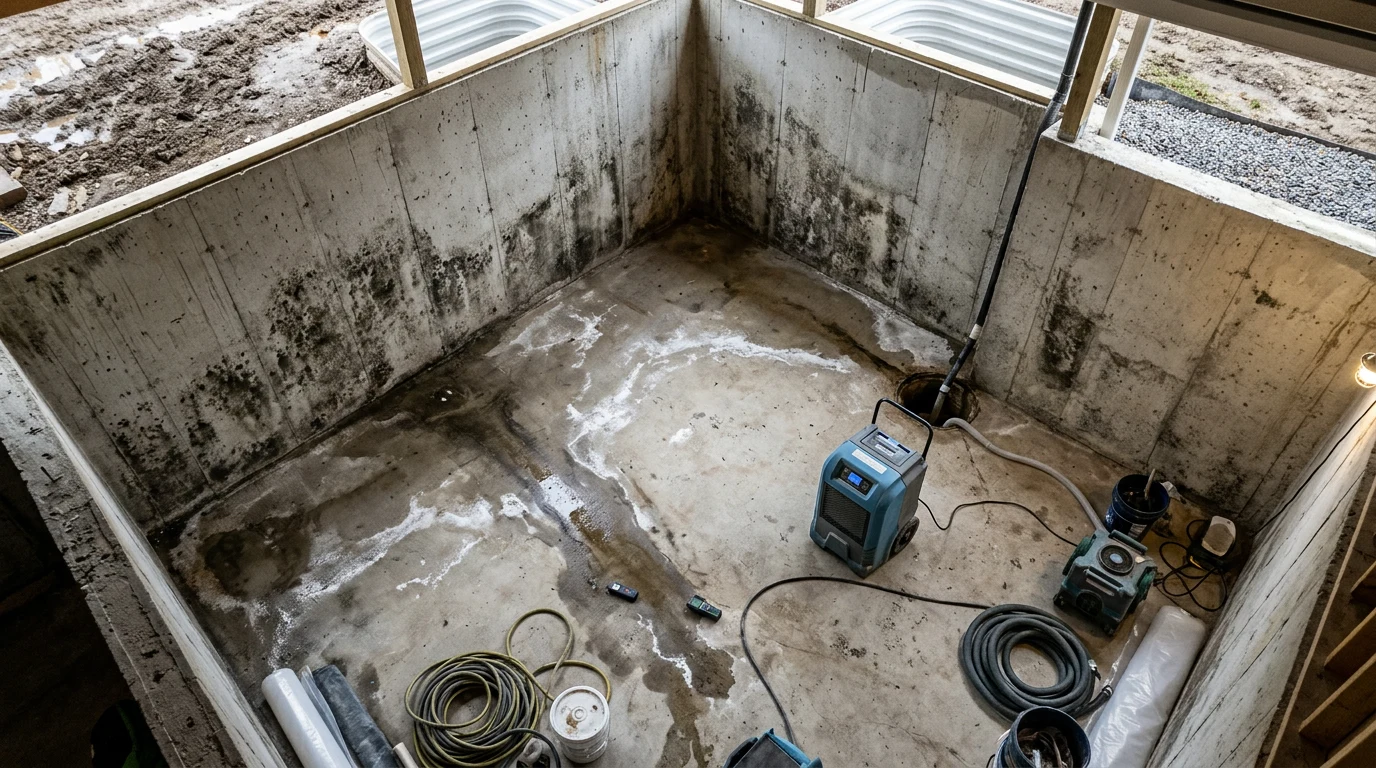
After antimicrobial treatment, all cleaned surfaces should be allowed to dry completely. Drying equipment including commercial air movers and dehumidifiers accelerate this process. Target moisture content for wood framing should be below 15% (measured with a pin-type moisture meter), and relative humidity in the space should be below 50% before any reconstruction begins.
Step 6: Encapsulation (When Applicable)
Encapsulation involves applying a specialized coating to cleaned surfaces that seals them against future mold growth. A mold encapsulant creates a durable barrier over concrete, wood, and other substrates. Encapsulation is particularly valuable on concrete block walls (which are porous and difficult to fully decontaminate), exposed wood framing that tested clean after treatment, and in crawl spaces connected to the basement where full encapsulation is part of the moisture control strategy.
Encapsulation is not a substitute for proper cleaning and should never be applied over active mold growth. The surface must be clean, dry, and treated with antimicrobial before the encapsulant is applied. When done correctly, encapsulation adds a long-term protective layer that resists moisture absorption and prevents spore colonization even if future humidity spikes occur temporarily.
Step 7: Post-Remediation Clearance Testing
Post-remediation clearance testing verifies that the remediation was successful. This typically involves both visual inspection and air sampling performed by an independent third party (not the same company that performed the remediation). The IICRC S520 Standard establishes clearance criteria: the remediated area must pass visual inspection with no visible mold growth, moisture readings must be within acceptable ranges, and airborne spore counts inside the remediated area should be comparable to or lower than outdoor baseline levels.
Clearance testing is not optional for professional projects and is increasingly required by insurance companies and real estate transactions. For DIY projects, hiring an independent inspector for clearance testing provides peace of mind and documentation that the work was done correctly. The cost of clearance testing (typically $300 to $600 for air sampling and visual inspection) is minimal compared to the cost of redoing failed remediation.
DIY vs Professional Basement Mold Remediation
The decision between handling basement mold removal independently or hiring a professional remediation contractor depends on several factors. The EPA establishes 10 square feet as the general threshold: areas smaller than 10 square feet are generally manageable for a capable homeowner, while larger areas warrant professional involvement. However, area size is not the only consideration.
When DIY Remediation Is Appropriate
- Affected area is under 10 square feet of visible growth
- The mold is on non-porous or semi-porous surfaces (concrete, wood framing)
- The moisture source has been clearly identified and resolved
- No occupants have compromised immune systems or severe mold allergies
- The mold is accessible without extensive demolition
- Proper PPE and a HEPA vacuum are available
When Professional Remediation Is Necessary
- Affected area exceeds 10 square feet
- Mold is present in HVAC ductwork or behind finished walls
- Stachybotrys (black mold) has been identified or is suspected
- Occupants are experiencing health symptoms related to mold exposure
- Sewage or contaminated water caused the moisture event (Category 3 water)
- The moisture source is unresolved or unclear
- Insurance claim documentation is needed
- Real estate transaction requires certified remediation
Choosing a Remediation Contractor
When hiring a professional, verify IICRC certification in Applied Microbial Remediation (AMRT) or Water Damage Restoration (WRT). Request proof of insurance (both general liability and pollution liability), check references from recent projects, and confirm that the company uses independent third-party clearance testing rather than self-certifying their own work. A reputable contractor will provide a detailed scope of work document before beginning, including containment plans, removal specifications, antimicrobial protocols, and clearance testing arrangements.
Basement Mold Remediation Cost Factors
Basement mold removal costs vary significantly based on the scope of contamination, the moisture source, accessibility, and geographic location. Understanding the cost structure helps homeowners evaluate contractor quotes and budget appropriately.
| Project Scope | Typical Cost Range | What’s Included |
|---|---|---|
| Small area (under 30 sq ft) | $500 to $1,500 | Containment, removal, HEPA vacuum, antimicrobial treatment |
| Medium area (30 to 100 sq ft) | $1,500 to $5,000 | Full containment, negative air, demolition, disposal, antimicrobial, clearance testing |
| Large area (100+ sq ft) | $5,000 to $15,000+ | Full containment, airlock, extensive demolition, structural drying, encapsulation, clearance testing |
| Whole basement (severe) | $10,000 to $30,000+ | Complete strip-out, structural assessment, full remediation, encapsulation, reconstruction |
These ranges cover the remediation itself and do not include waterproofing (interior French drain and sump pump installation averages $5,000 to $12,000), reconstruction (new drywall, flooring, and finishing), or the cost of the initial mold inspection and testing. Insurance coverage for mold remediation varies widely. Many homeowner policies exclude mold or cap coverage at $5,000 to $10,000. Some policies cover mold only when it results from a “sudden and accidental” covered peril (like a burst pipe) but exclude mold from long-term moisture issues (like foundation seepage).
Preventing Basement Mold After Remediation
Successful remediation is only half the equation. Without addressing the conditions that allowed mold to grow in the first place, recolonization is inevitable. Prevention focuses on three pillars: moisture control, humidity management, and material selection.
Moisture Control and Basement Waterproofing
Exterior grading should direct water away from the foundation with a minimum slope of 6 inches over the first 10 feet. Gutters and downspouts should discharge at least 6 feet from the foundation wall, and extensions or underground drain pipes should carry the water even farther in problem areas. Foundation cracks should be repaired with hydraulic cement or polyurethane injection, depending on whether the crack is actively leaking or dormant.

For basements with chronic groundwater intrusion, an interior perimeter drainage system (French drain) combined with a sump pump is the standard solution. The French drain sits in a channel cut into the floor along the perimeter, collecting water that enters at the cove joint or through the wall, and directing it to the sump pit. A primary sump pump with a battery backup ensures continuous operation even during power outages (which frequently coincide with the heavy storms that cause the most groundwater intrusion).
Exterior waterproofing (excavation, membrane application, and drainage tile installation) provides the most comprehensive protection but costs significantly more ($10,000 to $30,000+ depending on home size and depth). It is typically reserved for severe cases where interior drainage alone is insufficient.
Humidity Control and Dehumidification
A properly sized dehumidifier rated for basement use is the single most important piece of equipment for long-term mold prevention. Basements need units with continuous drain capability (gravity drain or condensate pump) so the unit runs unattended without filling a collection bucket that overflows when forgotten. Set the target humidity to 45% and verify performance with a separate hygrometer, as built-in dehumidifier sensors are often inaccurate by 5 to 10 percentage points.
Vapor barriers on basement walls and floors reduce the amount of moisture vapor passing through concrete. Wall vapor barriers range from simple polyethylene sheeting to rigid foam insulation panels with built-in vapor retarders. Floor vapor barriers installed under new flooring prevent moisture wicking up through the concrete slab. In crawl spaces connected to the basement, full encapsulation (6-mil or thicker poly on walls, floor, and piers, sealed at all seams) is the gold standard for moisture control.
Mold-Resistant Materials for Basement Reconstruction
When rebuilding after remediation, material choices significantly impact long-term mold resistance. Standard paper-faced drywall should never be used in basements below grade. Alternatives include paperless drywall (fiberglass-faced), cement board, and mold-resistant drywall products rated specifically for high-moisture applications. Metal studs or pressure-treated lumber resist mold better than standard SPF framing. Flooring choices like luxury vinyl plank, porcelain tile, or sealed concrete eliminate the moisture-trapping problem of carpet in below-grade applications.
Insulation selection matters as well. Fiberglass batts are problematic in basements because they absorb moisture, sag, and become mold food. Closed-cell spray foam insulation creates a continuous vapor barrier while insulating, making it the preferred choice for basement walls. Rigid foam board (XPS or polyiso) is another effective option when properly sealed at seams and edges.
Air Quality During and After Remediation
Air quality management is critical during active remediation and remains important in the post-remediation period. During work, HEPA air scrubbers run continuously inside the containment zone, and the air exchange rate should turn over the contained volume at least 4 times per hour. After remediation is complete and clearance testing passes, transitioning to long-term air quality management protects against future issues.
A HEPA air purifier rated for basement square footage captures residual airborne spores and other particulates. HEPA filtration captures 99.97% of particles at 0.3 microns, which includes mold spores, dust, and many allergens. For basements, look for units with activated carbon pre-filters that also address the musty odors associated with dampness and mold. Running an air purifier continuously in a finished basement provides an ongoing layer of protection.
Radon Considerations During Basement Work
Radon, a naturally occurring radioactive gas, enters basements through many of the same pathways as moisture: foundation cracks, cove joints, and sump pits. When performing basement remediation that involves sealing cracks and installing drainage systems, radon interaction should be considered. Sealing foundation cracks improves both moisture control and radon mitigation, but installing a sump pump creates a new potential entry point unless the sump pit is covered with a sealed, airtight lid. If the home has elevated radon levels (4 pCi/L or higher), coordinate remediation and radon mitigation to avoid creating new problems while solving the mold issue.
Timeline: What to Expect During Basement Mold Remediation
Understanding the typical timeline helps homeowners plan around the disruption. Basement mold remediation is not a single-day project in most cases.
| Phase | Duration | Activities |
|---|---|---|
| Inspection and testing | 1 to 3 days | Visual assessment, moisture mapping, air and surface sampling, lab analysis |
| Containment setup | 0.5 to 1 day | Poly barriers, negative air machine, sealing HVAC, staging equipment |
| Demolition and removal | 1 to 3 days | Drywall removal, carpet removal, insulation removal, disposal |
| Cleaning and treatment | 1 to 2 days | HEPA vacuuming, antimicrobial application, encapsulation |
| Structural drying | 3 to 5 days | Air movers, dehumidifiers, daily moisture monitoring |
| Clearance testing | 1 to 2 days | Third-party air sampling, visual inspection, lab results |
| Reconstruction | 3 to 10 days | New insulation, drywall, flooring, painting (if applicable) |
Total project duration for a medium-sized basement remediation typically runs 10 to 21 days from start of containment to completion of reconstruction. The structural drying phase cannot be rushed; attempting to rebuild before materials reach target moisture levels sets the stage for immediate recolonization. Drying equipment (air movers and dehumidifiers) should run 24 hours a day during this phase, with daily moisture readings documented to track progress.
Essential Equipment and Products for Basement Mold Removal
Having the right equipment separates effective remediation from efforts that spread contamination or leave behind enough spores for rapid regrowth. The following list covers the essentials for a thorough basement mold removal project.
Safety and PPE
- N95 or P100 respirator: Minimum N95 for small projects, P100 half-face or full-face for anything over 10 square feet
- Safety goggles: Non-vented to prevent spore contact with eyes
- Nitrile gloves: Disposable, change frequently
- Disposable coveralls: Tyvek or equivalent, discard after each session
Containment and Filtration
- 6-mil polyethylene sheeting: For containment barriers and waste bagging
- HEPA air scrubber / negative air machine: Maintains negative pressure and filters airborne spores
- HEPA vacuum: True sealed HEPA, not a standard vacuum with a “HEPA” label
Cleaning and Treatment
- Professional mold remover: Quaternary ammonium or hydrogen peroxide-based formula
- Mold encapsulant: For sealing cleaned surfaces post-treatment
- Antimicrobial solution: For wood framing and concrete treatment
Moisture Control
- Basement dehumidifier: 50 to 70 pint capacity minimum, continuous drain capable
- Moisture meter: Pin-type for material moisture, pinless for scanning, or combination unit
- Commercial air movers: For structural drying phase
Frequently Asked Questions About Basement Mold Removal
How much does basement mold remediation cost?
Basement mold remediation costs range from $500 to $1,500 for small areas (under 30 square feet) up to $10,000 to $30,000 for whole-basement projects with severe contamination. The primary cost drivers are the square footage affected, whether HVAC contamination is involved, the type of containment required, and whether structural repairs or waterproofing are needed. Get at least three quotes from IICRC-certified contractors, and verify that each quote includes the same scope of work for accurate comparison.
Can basement mold be removed permanently?
Mold spores are ubiquitous in the environment and cannot be eliminated entirely. The goal of remediation is to remove active mold growth, bring spore levels back to normal background concentrations, and eliminate the conditions (moisture and humidity) that allowed colonization. With proper moisture control, a functioning sump pump system, continuous dehumidification below 50% relative humidity, and appropriate building materials, basement mold will not return. Remediation fails when the moisture source is not fully resolved.
How long does basement mold remediation take?
Small projects (under 30 square feet) can be completed in 2 to 4 days. Medium projects (30 to 100 square feet) typically take 7 to 14 days including structural drying time. Large or whole-basement projects can extend to 2 to 4 weeks. The structural drying phase is the longest single step and cannot be accelerated without risking premature reconstruction on still-damp materials. Clearance testing adds 1 to 2 business days for lab analysis.
Is it safe to stay in the house during basement mold remediation?
For small, contained projects in an isolated basement, remaining in the home is generally acceptable as long as the containment barriers are properly installed and the HVAC system in the work area is sealed. For larger projects, particularly those involving Stachybotrys or extensive demolition, temporarily relocating is recommended, especially for households with children, elderly occupants, anyone with asthma or respiratory conditions, or individuals with compromised immune systems. The remediation contractor should advise based on the specific project scope.
Does homeowner insurance cover basement mold removal?
Coverage depends entirely on the policy and the cause of the mold. Most standard homeowner policies cover mold resulting from a “sudden and accidental” covered event, such as a burst pipe or water heater failure. Long-term moisture issues like foundation seepage, condensation, and poor drainage are typically excluded. Many policies cap mold coverage at $5,000 to $10,000 regardless of actual remediation costs. Review the specific policy language, document the moisture source thoroughly, and file claims promptly. Some policies require notification within a specific timeframe after discovery.
What is the difference between mold removal and mold remediation?
The terms are often used interchangeably, but technically “mold removal” refers only to physically removing mold growth, while “mold remediation” encompasses the complete process: moisture source identification, containment, removal, cleaning, treatment, drying, clearance testing, and prevention. The IICRC uses “remediation” because simply removing visible mold without addressing moisture, airborne spores, and prevention measures does not solve the problem. A contractor advertising “mold removal” should still be following the full remediation protocol.
Can a dehumidifier alone prevent basement mold?
A dehumidifier is an essential component of basement mold prevention but is rarely sufficient as the sole control measure. If liquid water is entering the basement through foundation cracks or plumbing leaks, a dehumidifier cannot overcome that volume of moisture. A dehumidifier manages ambient humidity and condensation effectively but must be paired with proper drainage, waterproofing, and leak repair to provide comprehensive protection. Think of the dehumidifier as the last line of defense, not the only one.
The Bottom Line on Basement Mold Remediation
Basement mold removal, when executed properly, follows a predictable and proven process. Identify the moisture source. Fix it. Contain the work area. Remove contaminated materials. Clean and treat remaining surfaces. Dry everything thoroughly. Verify with clearance testing. Rebuild with mold-resistant materials. Maintain humidity control going forward. Every step matters, and shortcuts in any phase compromise the entire project. The IICRC S520 Standard exists because decades of field experience have demonstrated that this systematic approach works, while partial measures consistently fail. Whether tackling a small patch independently or hiring a certified contractor for a major project, following the protocol protects both the home and the health of everyone living in it.