Dealing with mold in drywall is a common challenge for homeowners. Drywall is found throughout homes, and when moisture gets involved, mold can take hold quickly. This guide covers everything you need to know about identifying, removing, and preventing mold on drywall, including when you can handle it yourself and when to call a professional. According to EPA Mold Cleanup Guide, controlling moisture is the key to preventing mold growth on all building materials.
Our reviews are based on aggregated verified buyer feedback, manufacturer specifications, ingredient analysis, and published expert opinion. Products are not independently purchased or tested by our team. We may earn a commission if you purchase through our links, at no extra cost to you. How We Review
Why Does Mold Grow on Drywall?
Drywall (gypsum board) has a paper facing that is highly organic and absorbs moisture readily. Once wet, drywall becomes a prime food source for mold. The paper backing is especially vulnerable because it’s hidden behind the finished surface.
How to Identify Mold on Drywall
Look for discoloration (yellow, brown, or dark spots), bubbling or peeling paint, warping, soft spots when pressed, and musty odor. Black or green patches on the surface indicate advanced growth. Water stains often precede visible mold by days or weeks.
Removal difficulty: Moderate to High
Can You Save Moldy Drywall?
Only if surface mold on painted side and moisture exposure was brief (<48 hours). Drywall with mold on the paper backing or mold that has penetrated the gypsum core must be cut out and replaced.
How to Remove Mold from Drywall: Step-by-Step
Follow these steps carefully to remove mold from drywall safely and effectively. Always prioritize safety by wearing appropriate protective gear.
Step 1: Seal the room with plastic sheeting and run a HEPA air scrubber
Step 2: Wear N95 respirator, goggles, and gloves

Step 3: Cut out affected drywall 12-24 inches beyond visible mold (mold extends beyond what you see)
Step 4: Bag and dispose of contaminated drywall immediately
Step 5: Inspect and treat wall studs and insulation behind the drywall
Step 6: Dry the cavity completely (dehumidifier + fans for 24-48 hours)
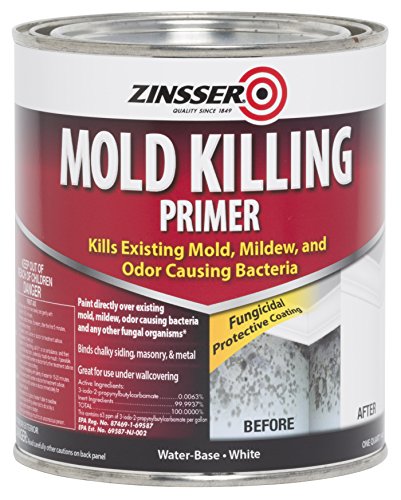
Step 7: Apply mold-resistant primer to studs before installing new drywall
Step 8: Install new mold-resistant drywall (paperless or fiberglass-faced)
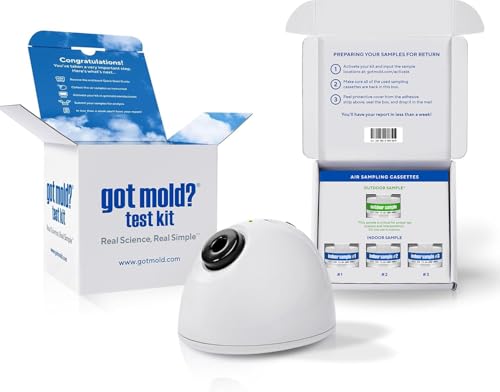
Recommended Products for Drywall Mold Removal
These products are recommended for treating mold on drywall based on verified buyer reviews and manufacturer specifications:
How to Prevent Mold on Drywall
Use mold-resistant (paperless) drywall in bathrooms, kitchens, and basements. Maintain indoor humidity below 50%. Fix leaks within 24 hours. Ensure proper ventilation in enclosed spaces.

DIY vs. Professional Remediation
DIY for small areas (<10 sq ft) with surface mold. Professional remediation for large areas, mold behind walls, or if mold extends into wall cavities.
Tools and Materials You’ll Need
Proper tools and materials are essential for safe and effective drywall mold removal. Having the right equipment helps ensure thorough remediation while protecting homeowners from mold exposure during the process.
| Tool/Material | Purpose | Where to Buy |
|---|---|---|
| N95 Respirator | Prevents inhalation of mold spores during removal | Amazon |
| Moisture Meter | Detects hidden moisture in drywall and framing | Amazon |
| HEPA Vacuum | Removes spores and debris without spreading contamination | Amazon |
| Mold Remover Spray | Treats surface mold on surrounding areas | Amazon |
| Dehumidifier | Dries wall cavities completely after removal | Amazon |
| Utility Knife | Cuts drywall cleanly around affected areas | Local hardware store |
| Plastic Sheeting | Seals work area to prevent spore spread | Local hardware store |
| Heavy-Duty Trash Bags | Contains contaminated drywall for disposal | Local store |
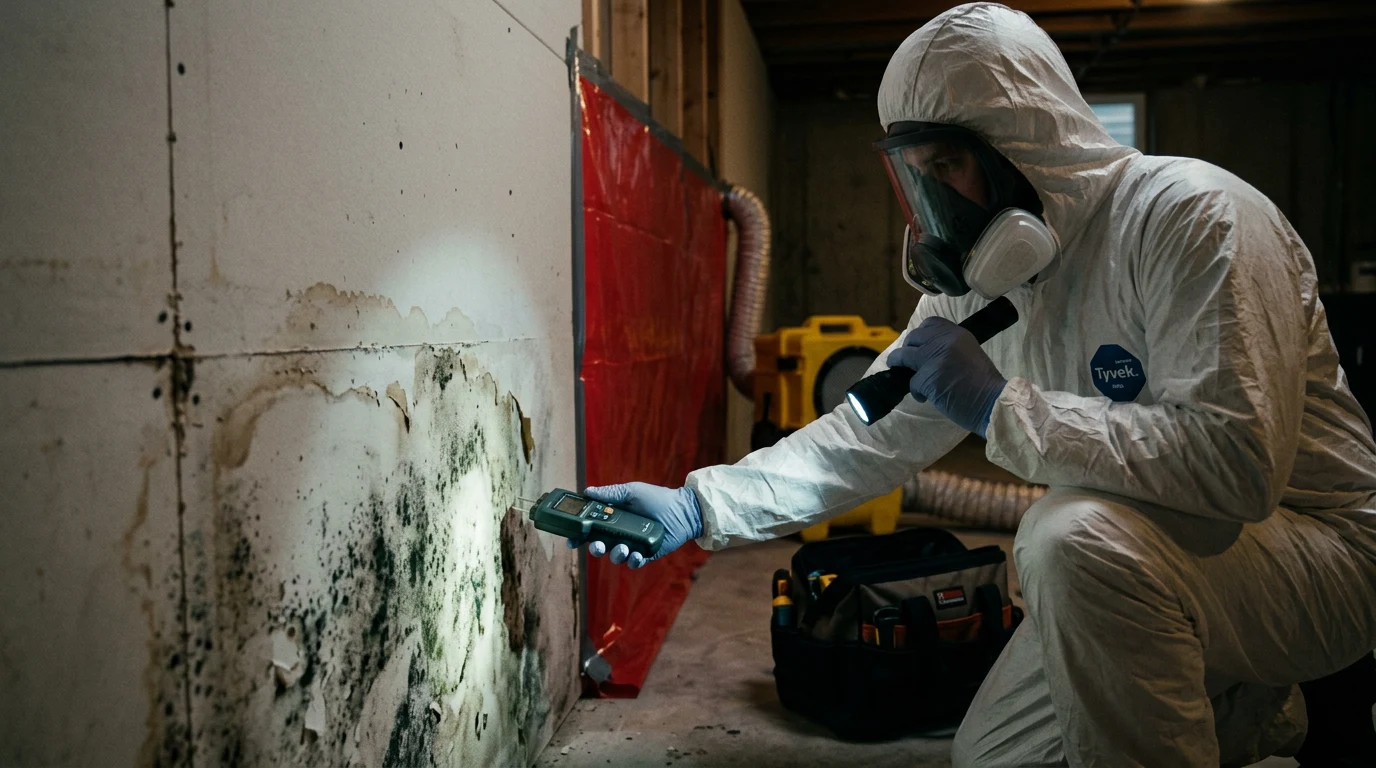
Professional-grade moisture meters help identify all areas requiring attention, while HEPA vacuums ensure spores don’t become airborne during cleanup. Quality protective equipment is non-negotiable when dealing with mold-contaminated drywall.
Detailed Step-by-Step Removal Process for Drywall
This comprehensive removal process ensures safe and effective mold remediation from drywall surfaces. Each step builds on the previous one to create a thorough remediation approach.
Step 1: Containment Setup (30-45 minutes)
Seal the affected room completely with 6-mil plastic sheeting, securing all seams with duct tape. Set up a HEPA air scrubber to create negative pressure, pulling air out of the work area. This prevents mold spores from spreading to other parts of the home. Warning: Skipping containment can contaminate your entire house.
Step 2: Personal Protection (5 minutes)
Don full protective gear including an N95 respirator, safety goggles, and disposable coveralls. Ensure the respirator fits snugly with no gaps. Tape glove cuffs to coverall sleeves to prevent spore contact with skin. Never enter the work area without complete protection.
Step 3: Assessment and Marking (15-20 minutes)
Use a moisture meter to locate all affected areas, including hidden moisture behind visible mold. Mark cut lines 12-24 inches beyond all visible contamination using chalk. Mold roots extend far beyond what appears on the surface, making generous cutting essential for complete removal.
Step 4: Strategic Cutting and Removal (45-90 minutes)
Cut along marked lines using a sharp utility knife, scoring multiple times for clean breaks. Start from the top and work downward to prevent debris from falling on clean areas. Immediately place cut sections into heavy-duty trash bags without shaking or dropping. Double-bag all contaminated material immediately.
Step 5: Cavity Inspection and Treatment (30-60 minutes)
Examine exposed wall studs, insulation, and adjacent materials with a flashlight and moisture meter. Remove any contaminated insulation completely. Treat wooden framing with mold remover spray and allow to dry. Replace any structural materials showing extensive contamination.
Step 6: Complete Drying Phase (24-48 hours)
Position a dehumidifier and fans to circulate air through the wall cavity continuously. Measure moisture levels every 12 hours until they drop below 15%. This step prevents future mold growth by eliminating all residual moisture from the affected area.
Step 7: Primer Application (1-2 hours)
Apply mold-resistant primer to all exposed wood framing using a brush or sprayer. This creates a protective barrier that prevents future mold growth on structural elements. Allow primer to cure completely according to manufacturer specifications before proceeding.
Step 8: Installation and Finishing (2-4 hours)
Install new mold-resistant drywall (paperless or fiberglass-faced varieties) using proper fastening techniques. Apply joint compound, sand, and finish as normal. The new installation should be indistinguishable from existing surfaces when complete.
What to Expect: Before, During, and After Removal
Before Removal: Mold-damaged drywall typically shows obvious visual signs including dark staining, paint bubbling or peeling, and surface discoloration. The affected area may feel soft or spongy when pressed, indicating the paper backing has been compromised. A musty odor often accompanies visible damage, and water stains frequently appear before mold becomes visible. Homeowners should assess the scope carefully, measuring the total affected area to determine if professional help is needed.
During Removal: Expect the process to take 2-3 days for small areas, with most time spent on drying rather than active removal. The work area will be completely sealed off and may be noisy due to fans and dehumidifiers running continuously. Some debris and dust are normal despite containment efforts. The musty odor may initially intensify as materials are disturbed, then gradually dissipate. Progress is measured by moisture meter readings dropping consistently over the drying period.
After Removal: Successfully remediated areas show no visible mold, musty odors, or moisture readings above normal levels. The new drywall installation should blend seamlessly with existing surfaces. Air quality typically improves within 24-48 hours after containment removal. Homeowners should monitor the area for 30 days, checking for any signs of moisture or mold recurrence. Professional mold testing can confirm successful remediation for peace of mind.

When to Call a Professional vs DIY
DIY Appropriate Scenarios: Homeowners can handle surface mold on painted drywall covering less than 10 square feet, provided the contamination hasn’t penetrated the paper backing. DIY works best when the moisture source is clearly identified and eliminated, and when mold growth occurred recently (within 48-72 hours). The affected area should be easily accessible without requiring extensive demolition or electrical work.
Professional Remediation Required: Contact certified mold remediation specialists for areas exceeding 10 square feet, mold growth behind walls or in HVAC systems, or contamination affecting structural elements. Professional help is essential when health issues are present, multiple rooms are affected, or when sewage or contaminated water caused the initial moisture problem. Recurring mold growth despite previous remediation attempts also requires professional intervention.
Cost Considerations: Professional drywall mold remediation typically costs $500-$1,500 per affected room, depending on the extent of damage and local market rates. Severe cases requiring structural work can reach $3,000-$6,000 per room. DIY costs range from $100-$400 for tools, materials, and replacement drywall for small areas.
| Scenario | DIY Cost | Professional Cost | Best Choice |
|---|---|---|---|
| Small surface mold (<10 sq ft) | $100-$250 | $500-$800 | DIY |
| Medium area (10-50 sq ft) | $250-$400 | $800-$1,500 | Professional |
| Large area or structural damage | $400+ | $1,500-$6,000 | Professional |
| Health concerns present | N/A | $1,000-$3,000 | Professional |
Professional remediation includes containment, proper disposal, air quality testing, and warranty coverage that DIY approaches cannot provide. The investment often pays for itself through thorough remediation that prevents costly recurrence.
Prevention Strategies for Drywall
Material-Specific Prevention: Install mold-resistant drywall (paperless or fiberglass-faced) in high-moisture areas including bathrooms, kitchens, laundry rooms, and basements. These products eliminate the organic paper facing that feeds mold growth. Apply mold-resistant primer and paint to standard drywall in moderate-risk areas. Ensure proper installation with adequate spacing from floors and moisture barriers behind the drywall in below-grade applications.
Environmental Controls: Maintain indoor humidity levels between 30-50% using dehumidifiers and proper ventilation. Install exhaust fans in bathrooms and kitchens, ensuring they vent outside rather than into attics or crawl spaces. Address leaks within 24 hours and dry affected areas completely. Use moisture meters regularly to monitor problem areas.
Seasonal Considerations: Spring and fall require extra attention as temperature fluctuations create condensation conditions. Summer humidity control becomes critical in air-conditioned spaces. Winter heating can dry indoor air excessively, causing drywall cracking that allows moisture penetration. Regular inspection during seasonal transitions helps catch problems early.
Ongoing Monitoring: Check areas with previous water damage monthly using visual inspection and moisture meters. Look for new staining, paint changes, or musty odors that indicate moisture intrusion. Consider annual professional inspections in high-risk areas or homes with previous mold issues.

Related Materials and Cross-Contamination
Mold on drywall rarely occurs in isolation, often spreading to adjacent materials through direct contact or airborne spore distribution. Understanding these relationships helps homeowners address the complete contamination scope rather than treating only visible symptoms.
Common Material Combinations: Drywall mold frequently coincides with wood framing contamination, as both materials absorb moisture from the same source. Carpet installed against affected drywall often develops mold at the base trim area. Wall-to-wall tile installations can hide drywall mold behind shower surrounds until extensive damage occurs.
Basement drywall mold commonly affects adjacent concrete walls and foundation materials. Brick exterior walls with interior drywall finishing create complex remediation scenarios requiring specialized approaches. Insulation between studs becomes contaminated simultaneously with drywall, requiring removal of both materials for complete remediation.
Spore Migration Patterns: Airborne spores from drywall mold settle on all horizontal surfaces within the affected room, potentially establishing new colonies on furniture, clothing, and other organic materials. HVAC systems can distribute spores throughout the entire home when return air vents are located in contaminated areas. This cross-contamination explains why professional remediation includes air scrubbing and comprehensive cleaning beyond the primary affected area.
Frequently Asked Questions
Can mold on drywall make you sick?
Yes. Mold on drywall releases spores into the air that can cause respiratory symptoms, allergic reactions, and other health issues. People with asthma, allergies, or weakened immune systems are at higher risk.
Should I replace moldy drywall or can it be cleaned?
Only if surface mold on painted side and moisture exposure was brief (<48 hours). Drywall with mold on the paper backing or mold that has penetrated the gypsum core must be cut out and replaced.
How do I prevent mold on drywall?
Use mold-resistant (paperless) drywall in bathrooms, kitchens, and basements. Maintain indoor humidity below 50%. Fix leaks within 24 hours. Ensure proper ventilation in enclosed spaces.

When should I call a professional for drywall mold?
DIY for small areas (<10 sq ft) with surface mold. Professional remediation for large areas, mold behind walls, or if mold extends into wall cavities.
How much does it cost to remove mold from drywall?
Professional remediation costs $500-$1,500 per room for typical cases, while DIY removal costs $100-$400 for tools and materials. Severe structural damage can increase professional costs to $3,000-$6,000 per room.
Can you paint or seal over mold on drywall?
No. Painting over mold provides only temporary concealment while the underlying problem continues to grow. Mold will eventually bleed through most paints and continue releasing spores. Complete removal and replacement is the only effective solution for moldy drywall.
How long does it take for mold to grow on drywall?
Mold can begin growing on wet drywall within 24-48 hours under favorable conditions. Visible colonies typically appear within 3-7 days, while extensive damage develops over 2-4 weeks of continuous moisture exposure.
What causes mold on drywall?
Moisture exposure combined with the organic paper facing creates ideal mold growing conditions. Common causes include plumbing leaks, roof leaks, flooding, high humidity, condensation, and poor ventilation. The paper backing absorbs water quickly and provides nutrients for mold growth.
How do I know if mold has spread behind drywall?
Use a moisture meter to detect elevated readings behind apparently clean surfaces. Signs include musty odors without visible mold, water stains larger than the visible damage, and soft spots when pressing on the wall. Professional mold testing can confirm hidden growth.
Is black mold on drywall dangerous?
All mold growth on drywall poses health risks regardless of color or species. While some people are more sensitive than others, any mold contamination should be addressed promptly. Professional identification may be needed for extensive contamination, but removal procedures remain the same for all mold types.
Enhanced Product Recommendations for Drywall Mold Removal
These professional-grade products are specifically recommended for drywall mold remediation based on effectiveness, safety ratings, and verified customer feedback from real remediation projects.

- Concrobium Mold Control – EPA-registered fungicide that eliminates mold roots and prevents regrowth without toxic chemicals. Ideal for treating wooden framing after drywall removal.
- Professional Mold Remover Spray – Hospital-grade formula that kills mold spores on contact. Essential for treating adjacent surfaces during drywall remediation projects.
- Digital Moisture Meter – Professional-grade meter with deep-wall probes for detecting hidden moisture behind drywall surfaces. Critical for preventing future mold growth.
- Mold Encapsulant Sealer – Specialized primer that locks in any residual mold spores on wooden framing while creating a moisture-resistant barrier.
- Professional Mold Test Kit – Laboratory analysis kit for confirming successful remediation and identifying specific mold species for insurance or health purposes.
- Commercial Dehumidifier – High-capacity unit designed for remediation work, capable of drying wall cavities completely within 24-48 hours of operation.
Each product serves a specific role in the comprehensive drywall mold remediation process. Using professional-grade materials ensures thorough treatment and reduces the likelihood of recurrence. Homeowners report higher success rates when using these complete system approaches rather than single-product solutions.
Related Guides
Frequently Asked Questions
How can I tell if the discoloration on my drywall is mold?
Mold on drywall often appears as fuzzy or slimy patches in shades of black, green, brown, or even pink and orange. Unlike dirt, mold tends to spread in irregular patterns and may have an earthy, musty odor.
What are the common causes of mold growth specifically in drywall?
Mold in drywall is typically caused by persistent moisture from sources like leaky pipes, roof leaks, high humidity, or flooding. The paper facing and gypsum core of drywall provide an ideal food source for mold spores once moisture is introduced.
Is it safe to clean mold off drywall myself, or should I call a professional?
For small areas of surface mold (less than 10 square feet) on drywall, DIY cleaning with appropriate safety gear can be attempted. However, if the mold has penetrated the drywall, covers a large area, or you have health concerns, professional remediation is recommended to ensure complete removal and prevent recurrence.
What is the best way to remove mold from drywall once it's identified?
For mold that has penetrated drywall, the affected sections must be cut out and removed, as cleaning the surface will not eliminate spores within the material. The surrounding area should then be thoroughly dried, cleaned with a mold-killing solution, and new drywall installed.
After removing moldy drywall, how can I prevent it from coming back?
Preventing mold recurrence involves addressing the original moisture source, such as repairing leaks or improving ventilation. Additionally, consider using mold-resistant drywall in areas prone to dampness and ensure proper sealing and painting of new drywall sections.
What health risks are associated with mold in drywall?
Exposure to mold in drywall can trigger allergic reactions, respiratory issues, and asthma attacks in sensitive individuals. Prolonged exposure may also lead to irritation of the eyes, skin, and throat, emphasizing the importance of timely removal.
These statements have not been evaluated by the Food and Drug Administration. This information is not intended to diagnose, treat, cure, or prevent any disease. Content is for informational purposes only and is not medical advice; consult a qualified healthcare provider before starting any supplement. As an Amazon Associate we earn from qualifying purchases.