Mold in Insulation: When to Remove and Replace
Dealing with mold in insulation is a common challenge for homeowners. Insulation is found throughout homes, and when moisture gets involved, mold can take hold quickly. This guide covers everything you need to know about identifying, removing, and preventing mold on insulation, including when you can handle it yourself and when to call a professional. According to EPA Mold Cleanup Guide, controlling moisture is the key to preventing mold growth on all building materials.
Our reviews are based on aggregated verified buyer feedback, manufacturer specifications, ingredient analysis, and published expert opinion. Products are not independently purchased or tested by our team. We may earn a commission if you purchase through our links, at no extra cost to you. How We Review
Why Does Mold Grow on Insulation?
Fiberglass batt insulation itself doesn’t feed mold, but it traps moisture and the paper facing is highly mold-susceptible. Cellulose insulation (blown-in) absorbs moisture like a sponge. Spray foam resists mold but can trap moisture against other surfaces.
How to Identify Mold on Insulation
Discolored or wet insulation, musty smell in walls or attic, visible mold on paper facing of fiberglass batts. Compressed or sagging insulation indicates moisture damage. Cellulose insulation that’s clumped or heavy is saturated.
Removal difficulty: Moderate to High
Can You Save Moldy Insulation?
Fiberglass batts with surface mold on unfaced side may be salvageable if dried quickly. Paper-faced batts with mold should be replaced. Wet cellulose insulation almost always needs replacement.
How to Remove Mold from Insulation: Step-by-Step
Follow these steps carefully to remove mold from insulation safely and effectively. Always prioritize safety by wearing appropriate protective gear.
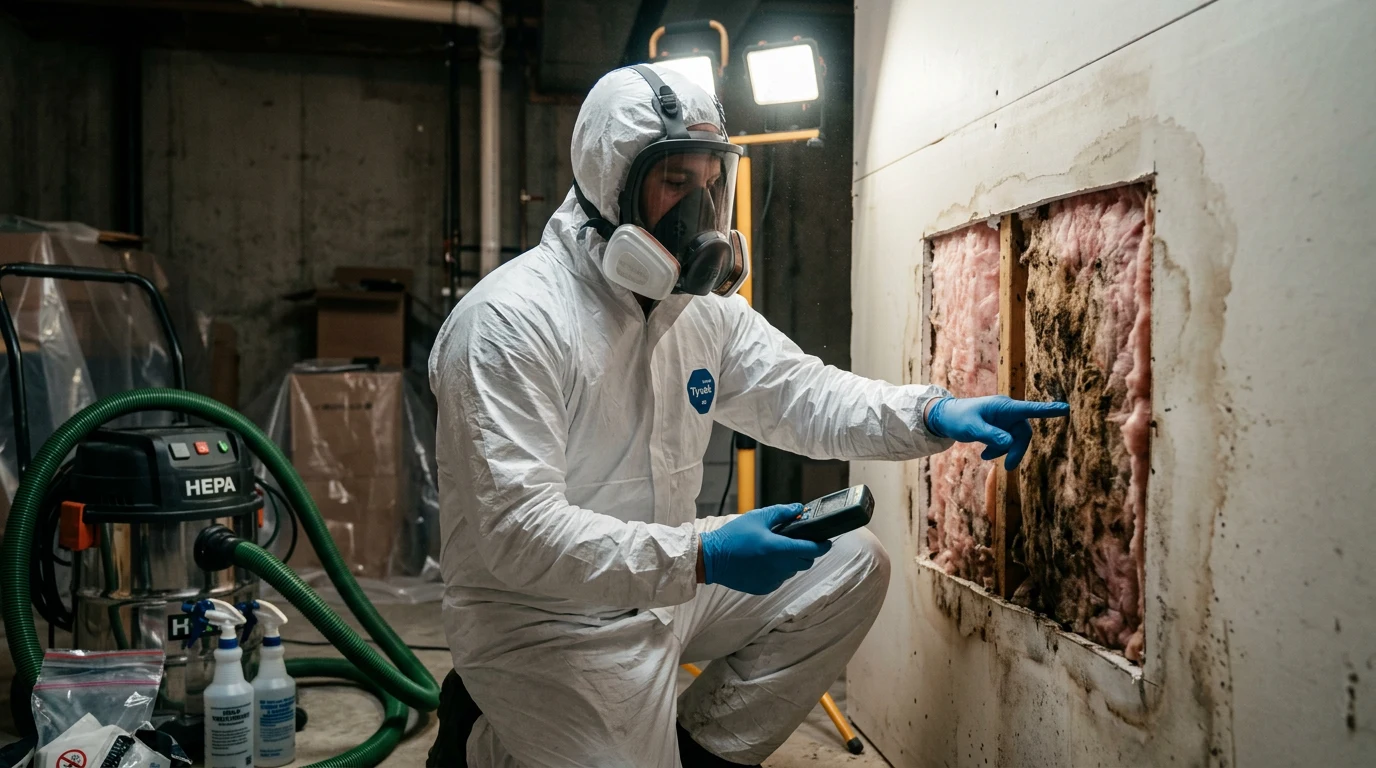
Step 1: Full PPE required: N95 respirator, goggles, gloves, disposable coveralls
Step 2: Set up containment (plastic sheeting) to prevent spore spread
Step 3: Remove and bag contaminated insulation
Step 4: HEPA vacuum exposed cavities
Step 5: Treat exposed framing with mold-killing solution
Step 6: Identify and fix moisture source
Step 7: Allow complete drying (48-72 hours)
Step 8: Install new insulation (consider unfaced fiberglass or closed-cell spray foam)
Recommended Products for Insulation Mold Removal
These products are recommended for treating mold on insulation based on verified buyer reviews and manufacturer specifications:
How to Prevent Mold on Insulation
Use unfaced fiberglass or closed-cell spray foam in moisture-prone areas. Ensure proper attic ventilation. Install vapor barriers on the warm side of insulation. Fix roof and wall leaks immediately.
DIY vs. Professional Remediation
Professional recommended for most insulation mold. The work involves confined spaces, extensive PPE, and proper waste disposal.
Tools and Materials You’ll Need
Proper tools and materials are essential for safe and effective insulation mold removal. The confined spaces and loose fibers create unique challenges that require specialized equipment. Having the right gear protects both health and ensures thorough remediation.
| Tool/Material | Purpose | Where to Buy |
|---|---|---|
| N95 Respirator | Prevents inhalation of mold spores and insulation fibers | Amazon |
| HEPA Vacuum | Removes mold spores and debris from cavities | Amazon |
| Mold Remover Spray | Treats exposed framing and surfaces | Amazon |
| Moisture Meter | Confirms complete drying before reinstallation | Amazon |
| Disposable Coveralls | Protects skin and prevents spore spread to clothing | Local hardware store |
| Safety Goggles | Eye protection from airborne fibers and spores | Local hardware store |
| Plastic Sheeting (6-mil) | Creates containment barriers to prevent contamination | Local hardware store |
| Contractor Bags | Disposal of contaminated insulation materials | Local hardware store |
Professional-grade equipment may be necessary for extensive mold damage. Never attempt removal without proper respiratory protection. Insulation fibers combined with mold spores create particularly dangerous airborne particles that can cause serious respiratory irritation and long-term health issues.
Detailed Step-by-Step Removal Process for Insulation
Removing mold from insulation requires careful attention to safety and proper technique. The process differs significantly depending on insulation type, but safety protocols remain constant throughout. Never rush this process – thorough preparation prevents health risks and cross-contamination.
Step 1: Safety Preparation (30-45 minutes)
Don complete protective equipment including N95 respirator, safety goggles, nitrile gloves, and disposable coveralls. Ensure the respirator creates a proper seal by performing a fit test. Check that all PPE is intact without tears or gaps. Warning: Never work in insulation areas without respiratory protection – mold spores and fibers create a dangerous combination.
Step 2: Containment Setup (45-60 minutes)
Install 6-mil plastic sheeting to create a containment barrier around the work area. Seal all openings including vents, doorways, and access points with tape and plastic. Set up negative air pressure using fans to direct airflow away from living spaces. The contained area should be at least 3 feet larger than the affected insulation area on all sides.
Step 3: Insulation Removal (1-3 hours depending on area)
Remove fiberglass batts slowly to minimize fiber release into the air. For cellulose insulation, use a HEPA vacuum with extended hose to avoid direct contact. Place contaminated material directly into contractor bags – never stack or temporarily store exposed insulation. Spray foam removal requires cutting and scraping with proper ventilation.
Step 4: Cavity Cleaning (45-90 minutes)
HEPA vacuum all exposed wall and ceiling cavities, paying special attention to corners and crevices where spores accumulate. Use vacuum attachments to reach behind wiring and plumbing. Vacuum surfaces twice, allowing 15 minutes between passes for disturbed spores to settle.
Step 5: Surface Treatment (30-60 minutes plus drying time)
Apply mold remover spray to all exposed framing, sheathing, and surfaces. Allow product to dwell according to manufacturer instructions (typically 10-15 minutes). For porous wood surfaces, use a brush to work solution into the grain. Ensure adequate ventilation during chemical application.
Step 6: Moisture Source Investigation (1-2 hours)
Use a moisture meter to identify elevated moisture levels in surrounding materials. Check for leaks in roofing, plumbing, or HVAC systems. Document moisture readings and photograph any damage for insurance purposes. Address all moisture sources before proceeding to drying phase.
Step 7: Complete Drying (48-72 hours minimum)
Monitor humidity levels and moisture readings daily. Maintain humidity below 60% using dehumidifiers if necessary. All surfaces must read below 20% moisture content before new insulation installation. Rushing the drying process leads to recurring mold problems.
Step 8: New Insulation Installation (2-4 hours)
Select appropriate insulation type based on location and moisture risk. Install unfaced fiberglass batts or closed-cell spray foam in high-moisture areas. Ensure proper R-value ratings and complete coverage without compression. Restore vapor barriers and air sealing as needed.
What to Expect: Before, During, and After Removal
Before Removal: Moldy insulation typically appears discolored (black, green, or brown spots), feels damp or heavy, and produces a musty odor. Paper-faced fiberglass shows obvious mold growth on the kraft paper backing. Cellulose insulation becomes clumped and may show color changes from its original gray appearance. Use a moisture meter to confirm elevated moisture levels above 20%. Document the extent of damage with photos for insurance claims and future reference.
During Removal: Expect the process to take 6-12 hours for a typical room, depending on insulation type and mold severity. Air quality may temporarily worsen despite containment measures – this is normal. Fiberglass removal releases particles that settle within 2-3 hours. Cellulose insulation creates more dust but settles faster. The musty odor intensifies during removal but should diminish once contaminated material is bagged. Plan for multiple contractor bags – moldy insulation expands when loose and requires more disposal space than anticipated.
After Removal: Successfully remediated areas show no visible mold growth, musty odors, or moisture readings above 20%. Exposed framing should appear clean and dry with no discoloration. Air quality improves noticeably within 24-48 hours after completion. New insulation should maintain consistent R-values and proper coverage. Monitor the area monthly for the first year, checking for moisture return or new mold growth. Professional mold testing can confirm successful remediation if concerns persist.
When to Call a Professional vs DIY
DIY Suitable Conditions: Homeowners can handle insulation mold removal when the affected area is less than 30 square feet, easily accessible, and limited to surface growth on unfaced fiberglass batts. The work area should have adequate ventilation and safe access without requiring ladders or crawling in tight spaces. Moisture source must be clearly identified and easily repairable (such as a minor roof leak or condensation issue).
Professional Required Conditions: Call professionals for areas exceeding 30 square feet, extensive cellulose insulation contamination, or mold growth throughout wall cavities. Professional remediation is essential when HVAC systems are involved, structural damage is present, or the moisture source is complex (foundation issues, major leaks, recurring condensation problems). Properties with immunocompromised residents should always use professional services regardless of area size.
| Scope | DIY Cost | Professional Cost | Time Required |
|---|---|---|---|
| Single room (100 sq ft) | $200-400 | $800-1,500 | DIY: 8-12 hours | Pro: 4-6 hours |
| Attic space (500 sq ft) | $400-800 | $2,000-4,000 | DIY: 16-24 hours | Pro: 8-12 hours |
| Whole house insulation | $800-1,500 | $5,000-12,000 | DIY: 40+ hours | Pro: 2-3 days |
| Crawl space remediation | $300-600 | $1,500-3,500 | DIY: 12-16 hours | Pro: 6-8 hours |
Professional services include proper waste disposal, industrial-grade equipment, insurance coverage, and warranties on work performed. Consider professional help when health risks outweigh cost savings. Many contractors offer free assessments to help determine the best approach. Professional mold remediation follows IICRC standards and provides documentation for insurance claims.
Prevention Strategies for Insulation
Effective insulation mold prevention focuses on moisture control and proper installation techniques. Choose unfaced fiberglass batts or closed-cell spray foam in basements, crawl spaces, and other moisture-prone areas. Paper-faced insulation should only be used in consistently dry locations with proper vapor barrier installation on the warm side of the wall assembly.
Seasonal Prevention: Inspect insulation during spring and fall when temperature changes create condensation risks. Winter heating and summer cooling create pressure differentials that drive moisture into wall cavities. Monitor humidity levels and maintain indoor relative humidity between 30-50% year-round. Address ice dam formation immediately as it drives moisture directly into insulation.
Ongoing Monitoring: Use a moisture meter to check insulation areas monthly, especially after storms or plumbing issues. Install humidity monitors in attics and basements to track conditions. Any moisture reading above 20% requires immediate investigation. Document readings to establish baseline conditions and identify gradual changes over time.
Maintain proper ventilation with adequate attic ventilation (1 square foot of ventilation per 150 square feet of attic space), functioning exhaust fans in bathrooms and kitchens, and proper HVAC system operation. Seal air leaks around electrical outlets, pipe penetrations, and rim joists to prevent warm, moist air from contacting cold surfaces. Regular maintenance prevents mold-friendly conditions from developing.
Related Materials and Cross-Contamination
Mold on insulation rarely exists in isolation – it typically spreads to adjacent building materials through moisture migration and spore dispersal. Drywall behind moldy insulation frequently shows contamination, especially paper-faced drywall that provides excellent mold food sources. Wooden framing members often develop mold growth when insulation fails to control moisture properly.
Common material combinations requiring simultaneous treatment include insulation with wood framing, drywall, and subflooring. Carpet and padding below moldy insulation typically require replacement as spores settle and moisture wicks upward. Concrete foundation walls behind insulation may harbor mold growth that continues spreading even after insulation replacement.
Prevent cross-contamination by addressing all affected materials simultaneously rather than treating insulation in isolation. HVAC systems can distribute spores throughout the building if not properly filtered during remediation. Crawl space insulation problems often affect multiple floor systems and require comprehensive treatment approaches. Always inspect adjacent materials when discovering insulation mold to determine the full scope of contamination.
Frequently Asked Questions
How do I identify mold on insulation?
Look for discolored or wet insulation, musty smells in walls or attic areas, and visible mold growth on paper facing of fiberglass batts. Compressed or sagging insulation indicates moisture damage. Cellulose insulation that appears clumped, heavy, or has changed color from its original gray appearance is likely contaminated. Use a moisture meter to confirm readings above 20%.
Is mold on insulation dangerous?
Yes, mold on insulation poses serious health risks. It releases spores into indoor air that can cause respiratory symptoms, allergic reactions, and other health issues. People with asthma, allergies, or weakened immune systems face higher risks. The combination of mold spores and insulation fibers creates particularly dangerous airborne particles that can cause severe respiratory irritation.
How much does it cost to remove mold from insulation?
DIY removal costs $200-800 depending on area size, while professional remediation ranges from $800-12,000. A single room typically costs $200-400 for DIY supplies or $800-1,500 professionally. Whole-house insulation removal can cost $800-1,500 DIY or $5,000-12,000 professionally. Costs include removal, disposal, treatment, and new insulation installation.
Can you paint or seal over mold on insulation?
No, you cannot paint or seal over mold on insulation. Unlike hard surfaces, insulation is porous and traps mold growth throughout its structure. Sealing products cannot penetrate deeply enough to kill embedded mold, and the contamination will continue spreading. Moldy insulation must be removed and replaced – there are no effective sealing solutions for this material.
How long does it take for mold to grow on insulation?
Mold can begin growing on insulation within 24-48 hours of moisture exposure, with visible growth appearing within 3-7 days under ideal conditions. Paper-faced fiberglass develops mold faster than unfaced varieties. Cellulose insulation shows contamination quickly due to its organic composition and moisture-absorbing properties. Temperature, humidity, and air circulation affect growth speed significantly.
What causes mold on insulation?
Moisture is the primary cause of mold on insulation. Common sources include roof leaks, plumbing leaks, condensation from temperature differences, poor ventilation, high humidity levels, and water intrusion from storms or flooding. Inadequate vapor barriers, air leaks, and improper installation create conditions where warm, moist air contacts cold surfaces, leading to condensation and mold growth.
Can you save insulation with mold on it?
Limited situations allow saving moldy insulation. Unfaced fiberglass batts with surface mold may be salvageable if dried quickly and thoroughly cleaned. However, paper-faced batts with any mold growth should always be replaced. Wet or heavily contaminated cellulose insulation almost always requires complete replacement. When in doubt, replacement is safer than attempting to save contaminated material.
How do I prevent mold on insulation?
Use unfaced fiberglass or closed-cell spray foam in moisture-prone areas. Ensure proper attic ventilation with adequate intake and exhaust vents. Install vapor barriers correctly on the warm side of insulation. Fix roof and wall leaks immediately. Maintain indoor humidity between 30-50% and address condensation sources. Regular inspection and moisture monitoring help catch problems early.
When should I call a professional for insulation mold?
Call professionals for areas exceeding 30 square feet, extensive cellulose contamination, or when HVAC systems are involved. Professional help is essential for structural damage, complex moisture sources, or properties with immunocompromised residents. Consider professional services when confined spaces, multiple materials, or specialized equipment are required for safe and effective remediation.
Recommended Products for Insulation Mold Removal
Based on verified buyer reviews and manufacturer specifications, these products provide the most effective solutions for insulation mold removal. Professional-grade equipment ensures thorough remediation while protecting health and safety throughout the process.
- Concrobium Mold Control – EPA-registered fungicide that kills and prevents mold growth on wood framing and surfaces. Effective on porous materials and safe for occupied spaces after application.
- HEPA Vacuum with Extension Hose – Essential for removing spores and debris from wall cavities and tight spaces. True HEPA filtration captures 99.97% of particles 0.3 microns and larger.
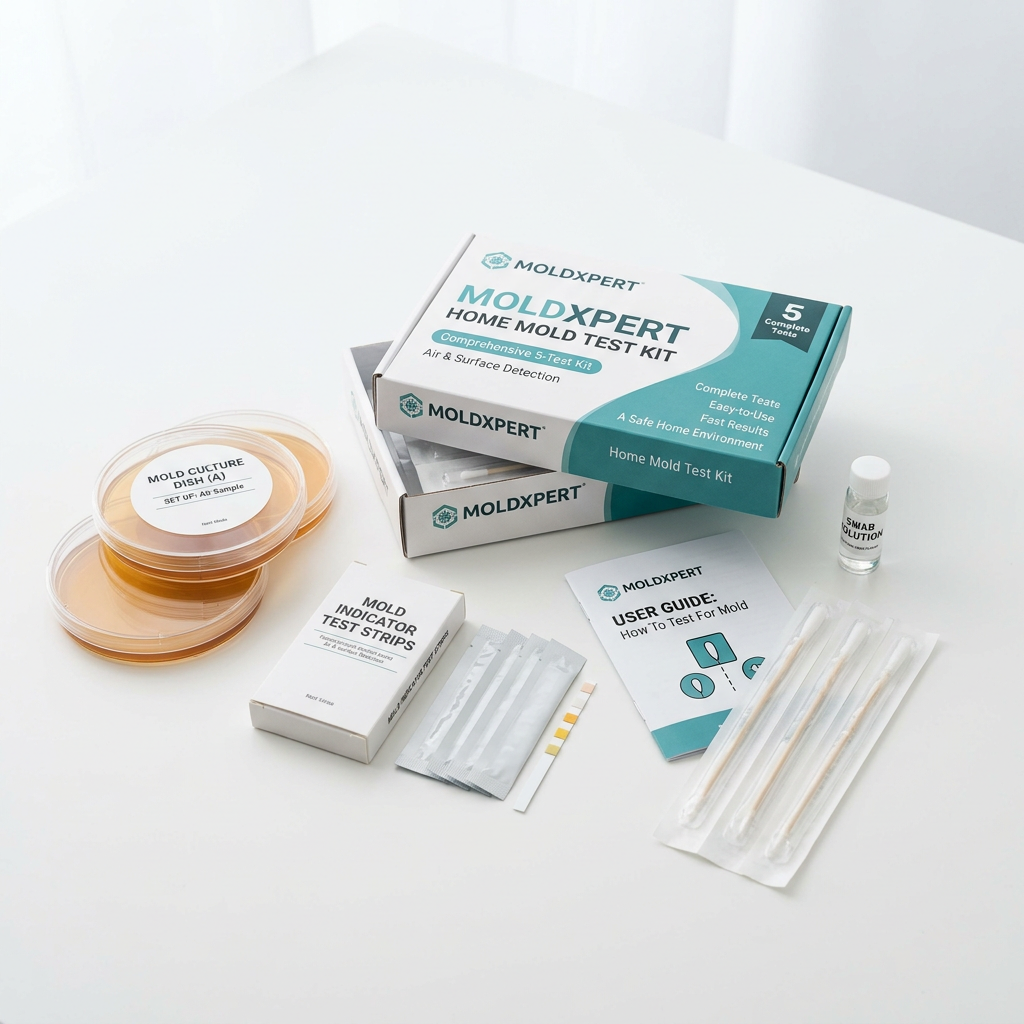
- Professional Mold Test Kit – Laboratory analysis confirms successful remediation and identifies specific mold species. Provides documentation for insurance claims and peace of mind.
- Commercial Dehumidifier – Maintains proper humidity levels during and after remediation. Essential for preventing mold return in high-moisture environments.
- Mold Encapsulant Paint – Seals and encapsulates mold on wood framing after treatment. Creates barrier against future contamination on porous surfaces.
- N95 Respirators (Box of 20) – NIOSH-approved respiratory protection specifically designed for mold remediation work. Essential safety equipment that should never be compromised.