Dealing with mold on wood is a common challenge for homeowners. Wood is found throughout homes, and when moisture gets involved, mold can take hold quickly. This guide covers everything you need to know about identifying, removing, and preventing mold on wood, including when you can handle it yourself and when to call a professional. According to EPA Mold Cleanup Guide, controlling moisture is the key to preventing mold growth on all building materials.
Our reviews are based on aggregated verified buyer feedback, manufacturer specifications, ingredient analysis, and published expert opinion. Products are not independently purchased or tested by our team. We may earn a commission if you purchase through our links, at no extra cost to you. How We Review
Why Does Mold Grow on Wood?
Wood is organic and porous, making it an excellent food source for mold. Both softwoods (pine, fir) and hardwoods (oak, maple) are susceptible, though untreated softwoods are more vulnerable due to higher porosity.
How to Identify Mold on Wood
Surface mold appears as fuzzy white, green, or black patches. Deeper mold penetrates wood grain and appears as dark staining that doesn’t wipe off. Test by pressing with a screwdriver; soft, spongy wood indicates advanced decay and mold penetration.
Removal difficulty: Moderate
Can You Save Moldy Wood?
Yes, if mold is surface-level. Wood with deep penetration (dark staining through the grain) and structural softening may need replacement. Sanding can remove surface mold from otherwise sound wood.
How to Remove Mold from Wood: Step-by-Step
Follow these steps carefully to remove mold from wood safely and effectively. Always prioritize safety by wearing appropriate protective gear.
Step 1: Move affected wood outdoors if possible (sunlight helps kill surface mold)
Step 2: Scrub with a stiff brush and mold-specific cleaner or borax solution
Step 3: For embedded mold, sand the surface with 100-grit sandpaper
Step 4: Wipe clean and apply undiluted white vinegar, let dry completely
Step 5: Apply mold-resistant sealant or primer
Step 6: For structural wood (joists, studs), HEPA vacuum first, then treat with borax or commercial biocide
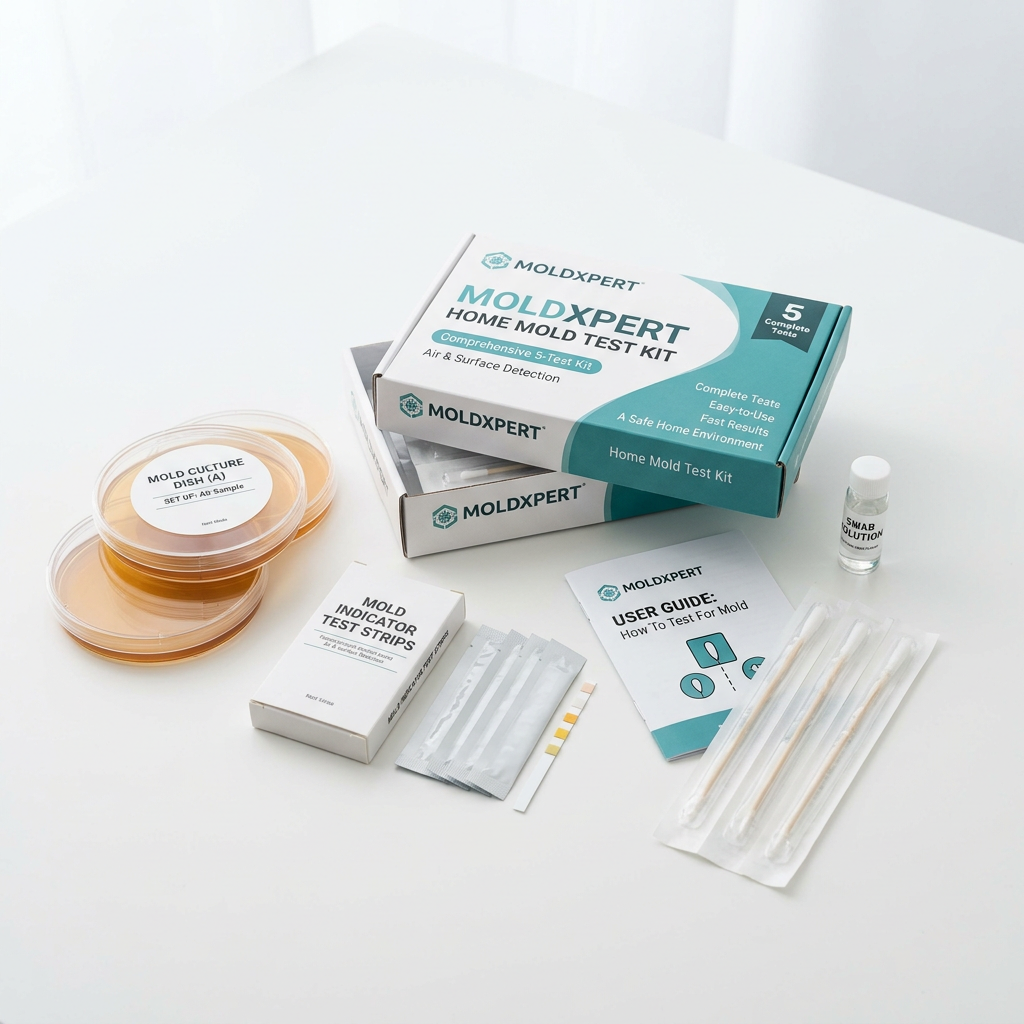
Recommended Products for Wood Mold Removal
These products are recommended for treating mold on wood based on verified buyer reviews and manufacturer specifications:
How to Prevent Mold on Wood
Keep wood surfaces dry and well-ventilated. Apply sealant or paint to exposed wood. Maintain indoor humidity below 50%. Use pressure-treated lumber for outdoor and basement applications.
DIY vs. Professional Remediation
DIY for surface mold on accessible wood. Call a professional for structural wood (floor joists, roof trusses) or if mold covers more than 10 square feet.
Tools and Materials You’ll Need
Having the right tools and materials is essential for safe and effective mold removal from wood surfaces. Professional-grade equipment ensures better results and protects homeowners from mold exposure during the remediation process. The table below outlines the necessary tools and their specific purposes for wood mold removal.
| Tool/Material | Purpose | Where to Buy |
|---|---|---|
| N95 Respirator | Protect lungs from mold spores during removal | Amazon |
| HEPA Vacuum | Remove mold spores from wood grain and surrounding areas | Amazon |
| Mold Remover Spray | Kill surface mold and prevent regrowth | Amazon |
| Moisture Meter | Check wood moisture levels before and after treatment | Amazon |
| 100-grit Sandpaper | Remove embedded mold from wood grain | Local hardware store |
| Stiff-bristle Brush | Scrub mold from wood surface texture | Local hardware store |
| Mold Encapsulant | Seal treated wood to prevent future mold growth | Amazon |
Safety equipment is non-negotiable when dealing with mold on wood. The moisture meter is particularly important for wood because it helps determine if the material is dry enough after treatment to prevent mold return.
Detailed Step-by-Step Removal Process for Wood
The following detailed process expands on the basic steps for removing mold from wood, providing specific techniques and safety precautions for each stage. Proper execution of each step is critical for successful remediation and preventing mold recurrence on wooden surfaces.
Step 1: Assessment and Preparation (30 minutes)
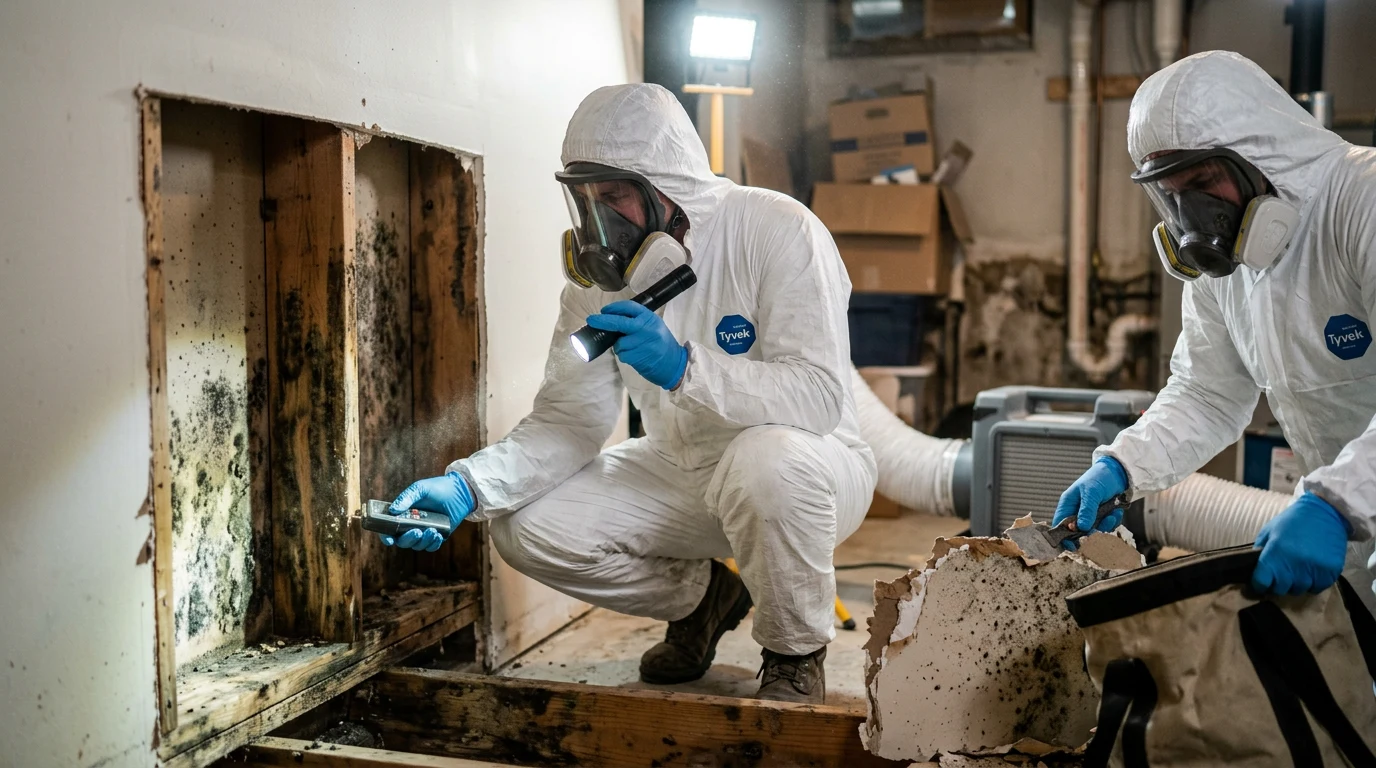
Before beginning removal, assess the extent of mold damage using a moisture meter to check wood moisture content. Levels above 20% indicate ongoing moisture problems that must be addressed. **Warning: Do not proceed if structural wood shows signs of rot or severe weakening.** Clear the area of furniture and belongings, ensuring proper ventilation with fans or open windows. Don protective equipment including N95 respirator, safety goggles, and rubber gloves.
Step 2: Initial Cleaning (45 minutes)
Move removable wood items outdoors when possible, as UV light naturally kills surface mold spores within 2-3 hours of direct sunlight exposure. For fixed wood surfaces, begin by HEPA vacuuming loose mold spores and debris. Use a HEPA vacuum with brush attachment, working systematically from top to bottom. **Safety Warning: Never use regular household vacuums as they spread mold spores through inadequate filtration.**
Step 3: Surface Treatment (60 minutes)
Apply mold remover spray or prepare borax solution (1 cup borax per gallon of water). Scrub with stiff-bristle brush using circular motions, paying attention to wood grain direction. Allow treatment to sit for 15-20 minutes before scrubbing again. For stubborn surface mold, multiple applications may be necessary. Expect visible mold to darken and loosen from the wood surface during this process.
Step 4: Deep Treatment for Embedded Mold (90 minutes)
For mold that has penetrated the wood grain, sand the affected area with 100-grit sandpaper, following the wood grain direction. Sand approximately 1/16 inch deep or until no dark staining remains visible. **Warning: Always sand outdoors or with excellent ventilation to prevent spore inhalation.** Clean sanded areas thoroughly with tack cloth before proceeding to chemical treatment.
Step 5: Vinegar Treatment and Neutralization (30 minutes)
Apply undiluted white vinegar using spray bottle, ensuring complete coverage of treated areas. Vinegar’s acetic acid kills remaining mold spores and neutralizes alkaline cleaning products used previously. Allow 30 minutes drying time in well-ventilated conditions. The wood should appear clean with no visible mold growth or dark staining.
Step 6: Final Protection and Sealing (60 minutes)
Once wood moisture content drops below 15% (verified with moisture meter), apply mold encapsulant or mold-resistant primer according to manufacturer specifications. This creates a protective barrier preventing future mold growth. For structural wood, apply commercial biocide rated for the specific wood type being treated.
What to Expect: Before, During, and After Removal
Before Removal: Mold on wood typically appears as discolored patches ranging from white and green fuzzy growth to black stains that penetrate the grain. Surface mold can often be wiped away temporarily, while embedded mold creates permanent-looking stains that return quickly. Wood may feel soft or spongy in advanced cases, indicating structural damage. Use the screwdriver test to assess wood integrity – healthy wood should feel firm and resist puncture.
During Removal: Expect the process to take 4-6 hours for average-sized areas (under 10 square feet). Surface mold typically responds within 15-20 minutes of treatment application, becoming darker and easier to scrub away. Embedded mold requires sanding, which generates considerable dust despite proper ventilation. The vinegar treatment stage may produce strong odors that dissipate within an hour. Progress is visible as clean wood grain becomes apparent and moisture readings decrease.
After Removal: Successfully treated wood should show no visible mold growth or dark staining. Moisture content should measure below 15% on a calibrated meter. The wood surface may appear slightly lighter due to sanding but should feel solid and dry. Monitor treated areas daily for the first week, then weekly for a month. Any recurring discoloration or musty odors indicate incomplete removal or ongoing moisture problems requiring professional assessment. Properly treated wood can be painted or sealed within 24-48 hours of final treatment.
When to Call a Professional vs DIY
Determining whether to tackle wood mold removal as a DIY project or hire professionals depends on several specific factors including area size, mold type, location accessibility, and potential health risks. Understanding these criteria helps homeowners make informed decisions about mold remediation approaches.
DIY Appropriate Situations: Surface mold covering less than 10 square feet on accessible wood surfaces like furniture, trim, or decking. Non-structural wood applications where replacement wouldn’t compromise building integrity. Homeowners with no respiratory conditions or mold allergies can safely handle minor infestations using proper protective equipment. Wood moisture readings below 25% indicate manageable moisture conditions for DIY treatment.
Professional Required Situations: Structural wood elements including floor joists, roof trusses, load-bearing beams, or foundation components showing mold growth. Areas exceeding 10 square feet of contamination, as recommended by EPA guidelines. Wood showing signs of rot, softness, or structural compromise requiring expert assessment. HVAC systems, crawl spaces, or attics where specialized equipment and safety protocols are necessary. Recurring mold problems indicate underlying moisture issues requiring professional diagnosis.
Cost Considerations: Professional mold remediation for wood typically ranges from $1,500 to $4,000 for moderate infestations, depending on accessibility and extent of damage. Structural wood remediation can cost $3,000 to $8,000 or more when replacement is necessary. These costs often include moisture source identification and prevention measures.
| Approach | Materials Cost | Labor Cost | Total Range |
|---|---|---|---|
| DIY Supplies | $50-150 | Your time | $50-150 |
| Professional (Minor) | Included | $1,200-2,500 | $1,500-3,000 |
| Professional (Major) | Included | $2,500-6,000 | $3,000-8,000 |
| Structural Replacement | Varies | $4,000-12,000 | $5,000-15,000 |
Consider professional services when dealing with valuable wood materials, antiques, or when health conditions make DIY work inadvisable. The mold remediation process requires expertise for complex situations involving multiple materials or extensive contamination.
Prevention Strategies for Wood
Preventing mold growth on wood requires controlling moisture levels, improving ventilation, and applying protective treatments. Wood’s organic nature makes it particularly susceptible to mold when moisture conditions are favorable, making prevention strategies essential for long-term protection.
Moisture Control: Maintain indoor humidity below 50% using dehumidifiers in basements, crawl spaces, and other moisture-prone areas. Monitor wood moisture content regularly with a moisture meter, keeping levels below 20%. Address leaks, condensation, and water intrusion immediately to prevent prolonged moisture exposure. Install vapor barriers in crawl spaces and ensure proper grading around foundations.
Seasonal Considerations: Spring and fall require extra vigilance as temperature fluctuations create condensation conditions. Summer humidity control becomes critical in regions with high moisture levels. Winter heating can dry wood excessively, causing cracks that allow future moisture penetration. Inspect and treat wood surfaces before each season change, paying attention to areas with previous moisture issues.
Protective Applications: Apply mold-resistant sealers or primers to exposed wood annually, particularly in high-moisture areas like basements and bathrooms. Use pressure-treated lumber for outdoor applications and areas in contact with concrete or soil. Consider marine-grade finishes for wood in extremely humid environments. Ensure proper ventilation around wooden structures to prevent moisture buildup.
Monitoring and Maintenance: Establish monthly inspection routines focusing on areas with previous moisture problems. Document baseline moisture readings for comparison during seasonal changes. Test for mold when musty odors or visible growth appears. Clean wood surfaces regularly with mild detergent to remove organic matter that feeds mold growth.
Related Materials and Cross-Contamination
Mold on wood rarely occurs in isolation and commonly spreads to adjacent building materials through spore distribution and shared moisture sources. Understanding these relationships helps homeowners address comprehensive remediation needs and prevent recurring infestations across multiple materials.
Common Material Combinations: Wood framing often connects with drywall, creating shared moisture conditions when leaks occur. Carpet installed over wooden subfloors can trap moisture and spread mold to both materials. Wood trim and baseboards frequently develop mold that spreads to adjacent tile and grout in bathroom applications.
Structural Connections: Wooden joists and beams in contact with concrete foundations create pathways for moisture wicking and mold transfer. Brick veneer attached to wooden structural elements can harbor moisture that affects both materials. Crawl space mold on wooden structures typically spreads to insulation and subflooring above.
Cross-contamination prevention requires treating all affected materials simultaneously rather than addressing wood in isolation. The crawl space mold remediation process often involves multiple materials requiring coordinated treatment approaches. Professional assessment becomes necessary when mold affects structural wood connections with other building materials.
Frequently Asked Questions
Can mold on wood make you sick?
Yes. Mold on wood releases spores into the air that can cause respiratory symptoms, allergic reactions, and other health issues. People with asthma, allergies, or weakened immune systems are at higher risk.
Should I replace moldy wood or can it be cleaned?
Yes, if mold is surface-level. Wood with deep penetration (dark staining through the grain) and structural softening may need replacement. Sanding can remove surface mold from otherwise sound wood.
How do I prevent mold on wood?
Keep wood surfaces dry and well-ventilated. Apply sealant or paint to exposed wood. Maintain indoor humidity below 50%. Use pressure-treated lumber for outdoor and basement applications.
When should I call a professional for wood mold?
DIY for surface mold on accessible wood. Call a professional for structural wood (floor joists, roof trusses) or if mold covers more than 10 square feet.
How much does it cost to remove mold from wood?
DIY mold removal costs $50-150 for supplies. Professional remediation ranges from $1,500-4,000 for moderate infestations, with structural work costing $3,000-8,000 or more depending on the extent of damage and replacement needs.
Can you paint or seal over mold on wood?
No, never paint or seal over existing mold on wood. The mold will continue growing underneath and eventually break through the coating. All mold must be completely removed and the wood properly treated before applying any sealers or paint.
How long does it take for mold to grow on wood?
Mold can begin growing on wood within 24-48 hours when moisture levels exceed 20% and temperatures are between 68-86°F. Visible growth typically appears within 3-7 days under favorable conditions, though spores can remain dormant for months until conditions become suitable.
What causes mold on wood?
Mold grows on wood due to excess moisture combined with organic material that serves as food. Common causes include leaks, flooding, poor ventilation, high humidity, condensation, and contact with wet materials like soil or concrete.
Can you save wood with mold on it?
Yes, wood with surface-level mold can often be saved through proper cleaning and treatment. However, wood with deep mold penetration, structural damage, or rot may require replacement. The screwdriver test helps determine if wood remains structurally sound after mold growth.
Is mold on wood dangerous?
Mold on wood poses health risks through airborne spore exposure and can indicate serious moisture problems. While not all wood mold is toxic, prolonged exposure can cause respiratory issues, allergic reactions, and other health problems, especially for sensitive individuals.
Enhanced Product Recommendations for Wood Mold Removal
The following products have proven most effective for wood mold remediation based on professional contractor feedback, verified customer reviews, and manufacturer testing data. Each product addresses specific challenges associated with mold growth on wooden surfaces.
- Professional Mold Remover Spray – Fast-acting formula designed specifically for porous materials like wood. Contains quaternary ammonium compounds that penetrate wood grain to kill embedded spores.
- Concrobium Mold Control – EPA-registered antimicrobial treatment that crushes mold spores and forms protective barrier. Particularly effective on raw wood surfaces and structural lumber.
- Mold Encapsulant Sealer – Professional-grade coating that encapsulates any remaining spores while preventing future growth. Essential for treated wood surfaces in high-moisture areas.
- Mold Test Kit – Laboratory analysis helps identify specific mold species on wood and confirms successful remediation. Particularly important for valuable wood materials or recurring problems.
- Pin-Type Moisture Meter – Essential tool for monitoring wood moisture content before, during, and after treatment. Prevents premature sealing of inadequately dried wood.
- Dehumidifier – Critical for maintaining proper humidity levels in areas with wooden structures. Prevents future mold growth by controlling environmental moisture conditions.
Related Guides
Frequently Asked Questions
How can I identify mold growing on wood surfaces?
Mold on wood often appears as fuzzy or slimy patches in various colors like black, green, white, or even pink. You might also notice a distinct musty odor emanating from the affected wooden area.
Is it safe to remove mold from wood myself, or should I hire a professional?
For small, surface-level mold growth on wood, DIY removal with proper safety gear is often feasible. However, if the mold covers a large area, has penetrated deeply into the wood, or if you have respiratory sensitivities, it’s best to consult a professional mold remediation specialist.
What are the most effective methods for removing mold from wood?
Mild mold on wood can often be removed using a mixture of water and detergent, or a diluted bleach solution (1 cup bleach per gallon of water) for non-porous wood. For more stubborn cases, specialized mold removers designed for wood or sanding the affected surface may be necessary.
How can I prevent mold from growing on wooden furniture and structures in the future?
To prevent mold on wood, control humidity levels in your home, ensure good ventilation, and promptly address any water leaks. Applying mold-resistant primers or sealants to wooden surfaces can also offer an extra layer of protection.
Can mold on wood cause structural damage?
Yes, prolonged mold growth on wood can lead to significant structural damage by breaking down the wood fibers, making it soft, crumbly, and compromising its integrity. This is particularly concerning for load-bearing wooden structures.
What are the health risks associated with mold on wood?
Exposure to mold on wood can trigger allergic reactions such as sneezing, runny nose, skin rash, and asthma attacks in sensitive individuals. Certain types of mold can also produce mycotoxins, which may pose more serious health risks with prolonged exposure.