Mold testing after water damage is one of the most time-sensitive decisions a homeowner or property manager faces. Mold spores are already present in every indoor environment, and all they need to colonize is moisture, an organic food source, and time. After a flood, burst pipe, roof leak, or sewage backup, that clock starts ticking immediately. Scientific research from the Institute of Inspection, Cleaning and Restoration Certification (IICRC) confirms that mold colonization can begin within 24 to 48 hours of water intrusion on porous materials like drywall, carpet, and wood framing. By 72 hours, visible mold growth is common in warm, humid conditions. By day seven, a localized moisture event can spread fungal contamination to adjacent wall cavities, subfloors, and HVAC ductwork. Understanding exactly when to test, which testing methods to use at each stage, and how to interpret the results determines whether a manageable water damage event becomes a costly mold remediation project.
This guide covers the complete timeline for mold testing after water damage, from the first 24 hours through post-remediation verification. It explains which testing methods are appropriate at each phase, what the results mean, how to coordinate testing with insurance claims, and what specific steps to take based on the type of water damage involved. Whether dealing with a Category 1 clean water leak or a Category 3 sewage backup, having a structured testing plan protects both the property and the health of its occupants.
Why Water Damage Creates Mold Risk: The Science
Mold is not something that “arrives” after water damage. Mold spores are ubiquitous in both outdoor and indoor air, with typical indoor concentrations ranging from 200 to 2,000 spores per cubic meter in a normal, dry home. These dormant spores land on surfaces throughout the building and remain inactive indefinitely as long as the surface moisture content stays below critical thresholds. For most building materials, that threshold is approximately 19% moisture content for wood and 1% for drywall paper facing. Water damage pushes moisture content well above these thresholds, activating the germination process in spores that may have been sitting dormant for months or years.
Three conditions must converge for mold colonization: available moisture (relative humidity above 60% or direct wetting), an organic nutrient source (cellulose in drywall, wood, carpet backing, dust), and temperatures between 40 and 100 degrees Fahrenheit. After water damage, the first two conditions are immediately satisfied. Since most occupied buildings maintain temperatures well within the growth range, colonization timing depends almost entirely on how quickly moisture is removed. According to the IICRC S520 Standard for Professional Mold Remediation, the 24-to-48-hour window is the critical response period where professional water extraction and structural drying can prevent mold growth entirely.
The type of water involved also matters significantly. The IICRC classifies water damage into three categories. Category 1 (clean water from supply lines or rainwater) presents the lowest immediate mold risk but still requires prompt drying. Category 2 (gray water from dishwashers, washing machines, or toilet overflow without feces) contains microorganisms that accelerate biological activity. Category 3 (black water from sewage, flooding, or standing water that has contacted soil) contains bacteria, fungi, and organic nutrients that dramatically speed mold colonization and introduce additional health hazards.
The Mold Testing Timeline After Water Damage
The timing of mold testing after water damage follows a specific logic based on the biology of mold growth and the practical needs of remediation and insurance documentation. Testing too early wastes money on results that reflect pre-existing background levels rather than new growth. Testing too late allows hidden contamination to spread. The following timeline outlines the optimal testing schedule based on IICRC and ACAC (American Council for Accredited Certification) guidelines.
Hours 0-24: Immediate Response (No Mold Testing Yet)
In the first 24 hours after water damage, mold testing is not the priority. The focus should be on water extraction, documentation, and starting the drying process. During this window, take the following steps:
- Document everything photographically before cleanup begins, including the water source, affected materials, and extent of saturation
- Contact your insurance company and open a claim immediately
- Extract standing water using pumps, wet vacuums, or professional water extraction equipment
- Remove saturated contents like rugs, upholstered furniture, and cardboard boxes from affected areas
- Begin structural drying with fans, dehumidifiers, and open windows if weather permits
- Take baseline moisture readings using a moisture meter on walls, floors, and subfloors to establish the scope of water penetration
Moisture readings taken during this phase serve a dual purpose. They guide the drying strategy by identifying the wettest areas, and they create a documented baseline that demonstrates the severity of the event for insurance purposes. A pin-type moisture meter should show readings below 15% for dry wood and below 1% for drywall in unaffected areas. Readings above 19% for wood or above 1% for drywall indicate conditions favorable for mold growth.
Days 2-3: Initial Assessment and Targeted Testing
If drying is progressing well and moisture readings are trending downward, formal mold testing may not be necessary at this stage. However, if any of the following conditions apply, initial testing is recommended between 48 and 72 hours after the water event:
- Category 2 or Category 3 water was involved (gray water or black water)
- The water sat for more than 24 hours before extraction began
- Wall cavities, subfloor spaces, or other concealed areas were affected
- A musty or earthy odor has developed
- Visible discoloration is appearing on surfaces
- Occupants are reporting new respiratory symptoms, congestion, or headaches
- The insurance company or a public adjuster requires testing documentation
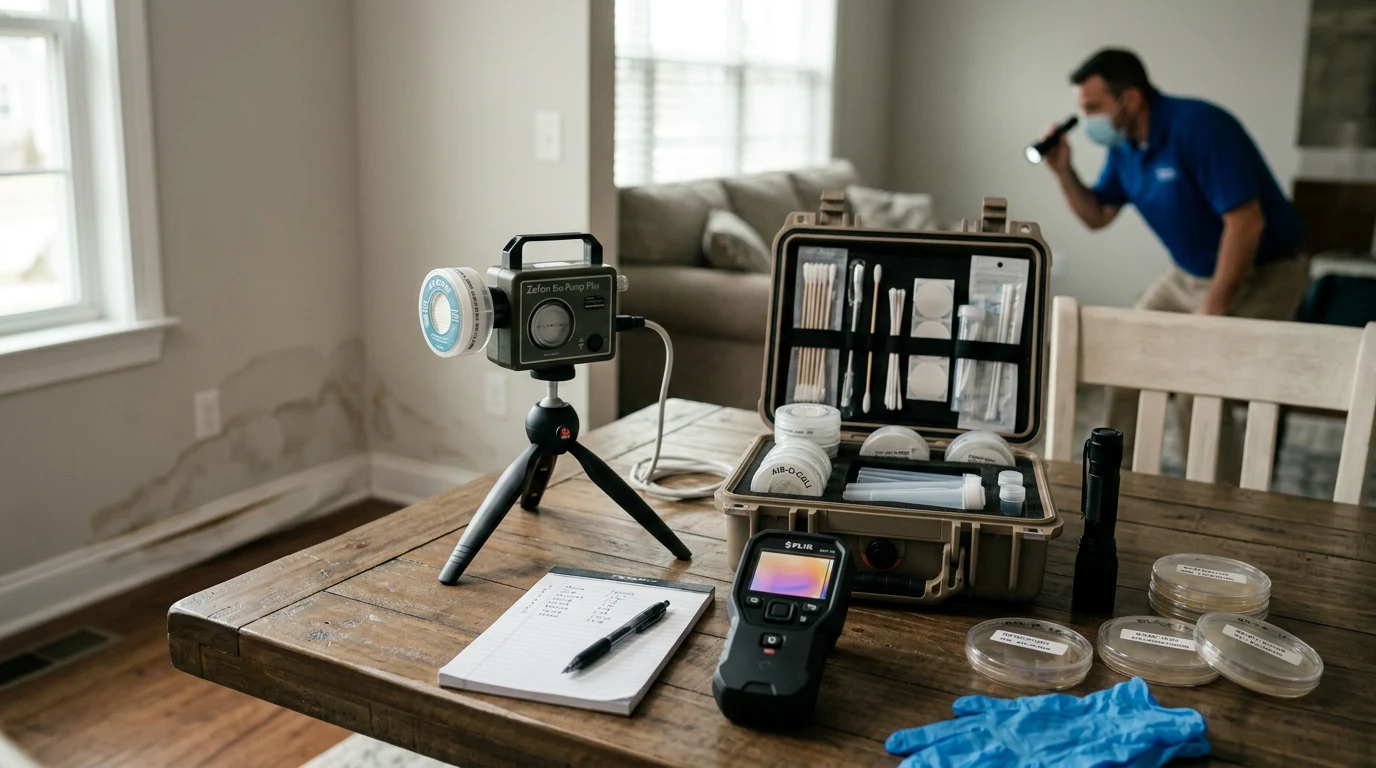
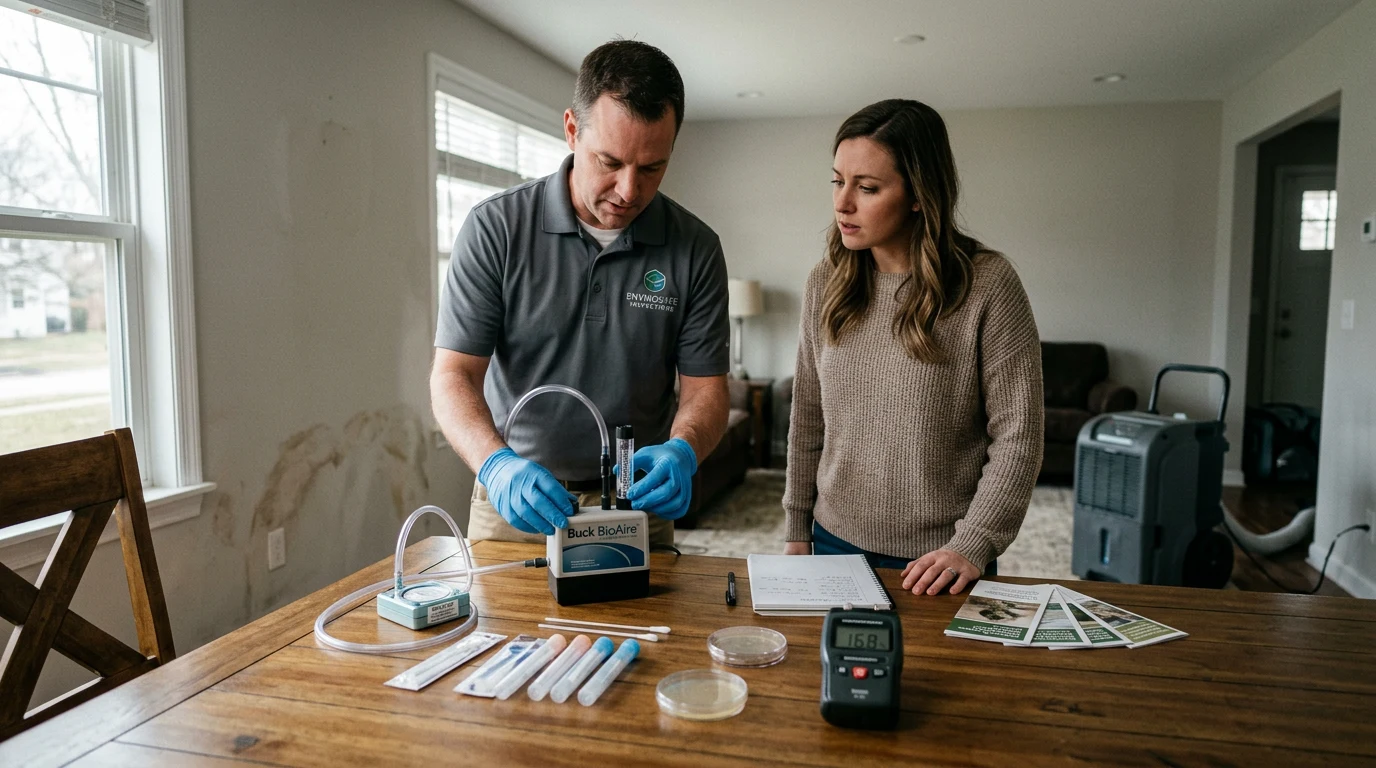
At this stage, the most appropriate testing method is moisture mapping combined with surface sampling. A professional mold inspector can use a thermal imaging camera (infrared thermography) to identify moisture pockets hidden behind walls and under floors that visual inspection would miss. Surface tape-lift or swab samples taken from areas showing early discoloration can be sent to a laboratory for microscopic analysis, confirming whether the material is mold and identifying the genera present. A mold test kit designed for surface sampling can be used for preliminary screening of suspect areas.
Days 4-7: Comprehensive Mold Testing Window
The period between four and seven days after water damage is the optimal window for comprehensive mold testing. By this point, any mold that has begun colonizing will have produced enough biomass to be detectable through both air sampling and surface testing. This is the testing phase that produces the most reliable and actionable results for several reasons:

- Active mold colonies are producing spores that air sampling can capture
- Surface growth is advanced enough for laboratory identification to species level
- Moisture conditions have stabilized enough to reflect the actual drying trajectory
- The results can inform whether professional remediation is needed versus continued DIY drying
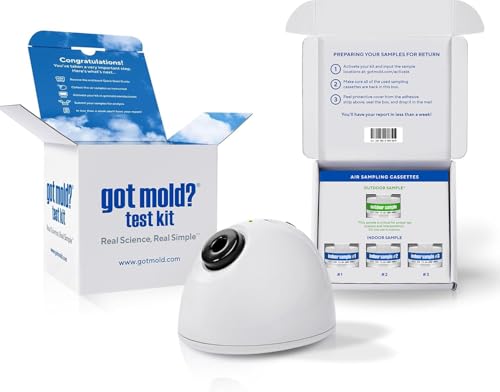
A comprehensive post-water-damage mold assessment at this stage should include three types of testing. First, air quality testing using spore trap cassettes establishes the current airborne spore concentration and species profile. An air quality test should include at least one outdoor control sample and one or more indoor samples from the affected zone. The outdoor sample provides the baseline comparison. If indoor spore counts significantly exceed outdoor levels, or if indoor samples contain species not present outdoors, it confirms that active mold growth is occurring inside the structure. For a deeper understanding of air testing, see the complete mold testing guide.
Second, surface sampling using tape lifts, swabs, or bulk material samples should target any visible growth or discoloration that has appeared since the water event. These samples allow the laboratory to identify the specific mold species and assess whether the organisms are actively growing or represent dead residual contamination. Third, ongoing moisture monitoring using both pin-type and pinless moisture meters documents whether the drying process has brought materials back below the mold growth threshold.
Days 7-14: Follow-Up Testing for Hidden Mold
Even when visible surfaces appear dry and clean, hidden mold growth can develop in concealed spaces during the one-to-two-week period after water damage. Wall cavities, spaces behind baseboards, under floating floors, and inside ceiling plenums are common locations where moisture persists long after surface areas have dried. If any of the following signs appear during this period, follow-up testing is warranted:
- Persistent musty odor despite visible surfaces being dry and clean
- Moisture meter readings that remain elevated behind walls even as surface readings normalize
- Occupant health complaints such as nasal congestion, eye irritation, or worsening asthma
- Visible mold appearing on materials that were thought to be dry
- Warping, buckling, or staining on baseboards, trim, or flooring
The most effective testing approach during this phase combines professional mold inspection with wall cavity air sampling. This involves inserting a small sampling tube through a drilled hole into the wall cavity and drawing air through a spore trap cassette. Wall cavity sampling detects mold growth inside walls that has no visible external indicators. Some inspectors also use borescope cameras inserted through small holes to visually inspect cavity conditions without removing drywall.
Weeks 3-4: Post-Remediation Verification
If mold remediation was performed, post-remediation verification (PRV) testing should occur after all remediation work is complete but before containment barriers are removed and affected areas are reconstructed. The PRV test serves as a “clearance exam” that confirms the remediation achieved its goals. Per IICRC S520 and ANSI/ACAC guidelines, PRV testing should be performed by an independent assessor who was not involved in the remediation work. This independence prevents conflicts of interest between the company doing the work and the party verifying its success.
PRV testing typically involves aggressive air sampling inside the containment area. The inspector uses fans to disturb settled spores, then collects air samples to measure the residual spore concentration. A successful clearance result shows that indoor spore counts inside the remediated area are comparable to or lower than the outdoor control sample, and that no unusual species dominance patterns exist. Surface samples from cleaned structural materials should show no visible mold growth and acceptable fungal fragment levels.
Which Mold Tests to Use After Water Damage
Different testing methods serve different purposes after water damage. The right test depends on the timeline, the type of water, whether growth is visible, and whether the results need to satisfy an insurance company, a real estate transaction, or personal health concerns. The following breakdown explains each method and its appropriate application in a post-water-damage scenario.
Moisture Meters: The First and Most Important Tool
While not a mold test in the traditional sense, moisture measurement is the single most important diagnostic tool after water damage. Moisture is the controllable variable in the mold growth equation. Every other testing method tells you about mold that has already grown, but moisture readings predict where mold will grow in the future. Two types of moisture meters are commonly used:
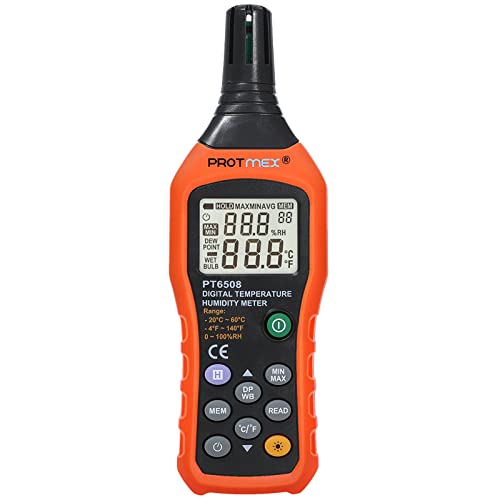
Pin-type moisture meters insert two metal probes into the material and measure electrical resistance between them. Water conducts electricity, so wet materials show lower resistance and higher moisture readings. Pin meters provide accurate readings at the specific depth of probe insertion and can identify moisture gradients by taking readings at different depths. They leave small pin holes in the surface material.
Pinless (capacitance) moisture meters use radio frequency signals to detect moisture without penetrating the surface. These scanners can identify wet areas behind walls, under tile, or beneath finished floors. They scan a larger area quickly but are less precise about the exact moisture percentage and can produce false readings from nearby metal objects or dense materials.
Professional water damage assessors use both types in combination. A quality moisture meter is the first tool to purchase after any water event, before investing in mold-specific testing. Monitoring relative humidity with a hygrometer in affected rooms also helps track whether the drying environment is adequate, as the target relative humidity for mold prevention is below 50%.
Air Sampling (Spore Trap Analysis)
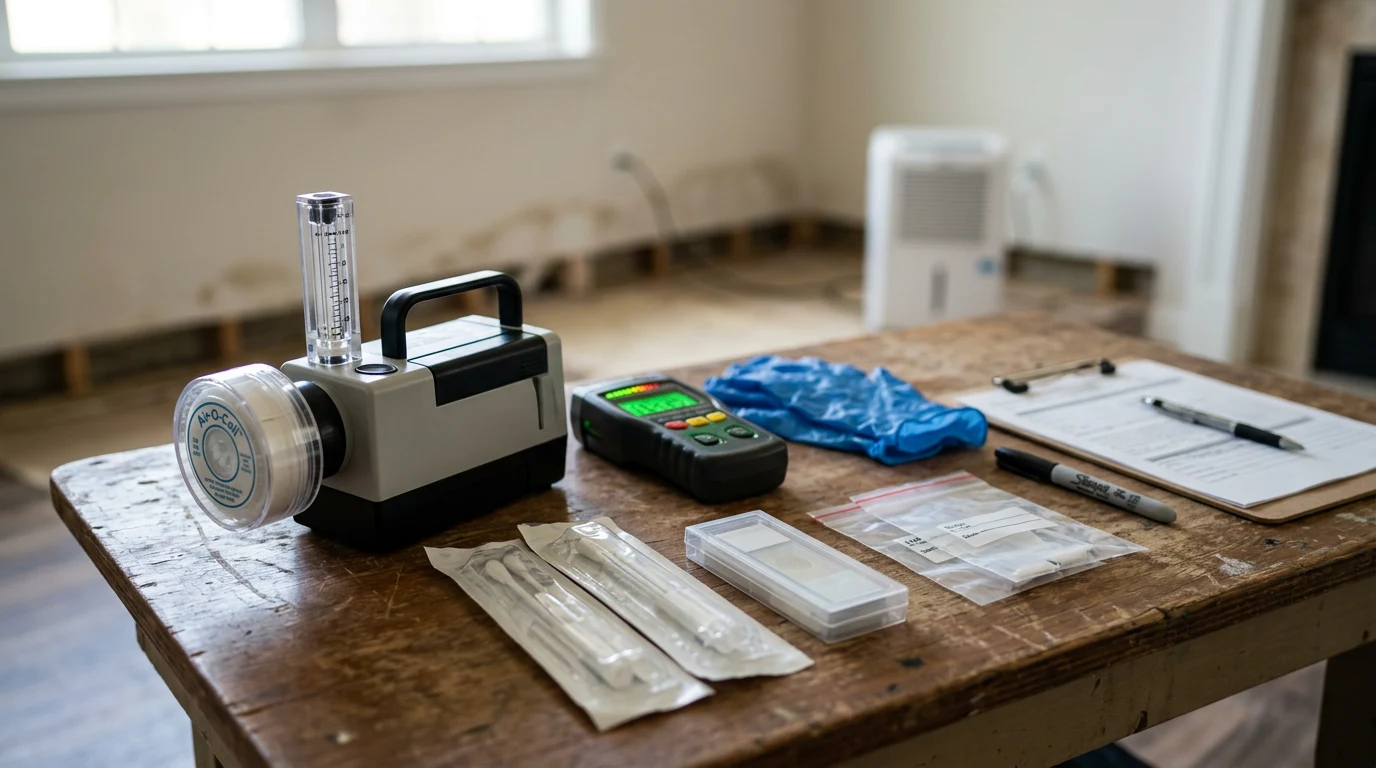
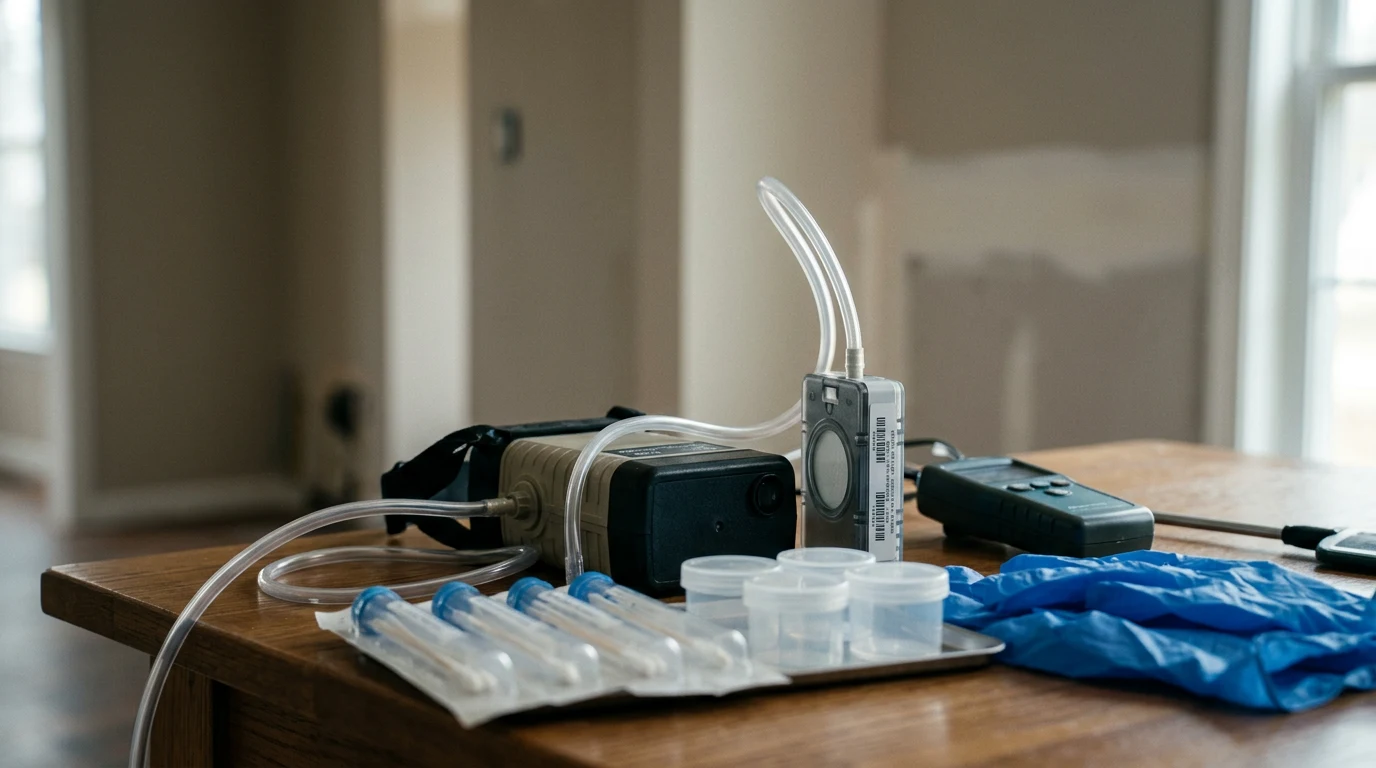
Air sampling captures airborne mold spores on a sticky collection medium inside a cassette connected to a calibrated air pump. A standard sample draws 75 liters of air over 5 minutes. The cassette is then sent to a laboratory where a microbiologist examines the collected particles under a microscope, identifies the mold genera present, and counts the spores per cubic meter of air. An air quality test kit is the standard tool for this type of assessment.
After water damage, air sampling is most useful when performed between days 4 and 14. Earlier testing often shows normal background levels because mold colonies have not yet matured to the point of releasing spores. Later testing may show elevated counts that have already peaked and declined as surface contamination is cleaned or materials are removed. For best results, keep windows and doors closed for 12 to 24 hours before sampling to allow indoor spore levels to concentrate to detectable levels.
Common genera found in air samples after water damage include Aspergillus, Penicillium, Cladosporium, Stachybotrys (the “toxic black mold”), and Chaetomium. The presence of Stachybotrys or Chaetomium in indoor air samples is particularly significant because these species strongly indicate active growth on wet cellulose-based building materials and are rarely found in normal outdoor air. For guidance on interpreting laboratory reports, see the article on how to use a mold test kit effectively.
Surface Sampling (Tape Lift, Swab, Bulk)
Surface sampling collects physical material from a suspect area for laboratory analysis. Three collection methods are used depending on the surface type and the goal of the test:
- Tape lift samples use clear adhesive tape pressed against the surface to collect spores, fungal fragments, and hyphal material. Best for smooth surfaces where growth is visible or suspected.
- Swab samples use a sterile cotton or polyester swab moistened with sterile solution. Best for rough or textured surfaces and for cavity spaces accessed through small openings.
- Bulk samples involve cutting and collecting a small piece of the affected material itself (drywall, carpet, wood). Provides the most definitive results because the laboratory can examine both surface and internal contamination.
Surface samples are most appropriate when visible discoloration or suspected mold growth is present and species identification is needed. They are less useful for detecting hidden mold because they only test the specific spot where the sample is collected. After water damage, surface sampling is most valuable for confirming whether the dark spots appearing on drywall, baseboards, or subfloor are active mold growth or simply water staining.
ERMI and MSQPCR DNA Testing
DNA-based mold testing using the Environmental Relative Moldiness Index (ERMI) or targeted MSQPCR analysis offers the highest species-level specificity of any available method. These tests extract and amplify mold DNA from collected dust or material samples, identifying 36 specific species and their relative concentrations. After water damage, ERMI testing is most valuable when:
- A comprehensive baseline is needed before and after remediation
- Occupants have ongoing health complaints but visual inspection shows no mold
- Litigation or insurance disputes require highly detailed, defensible laboratory evidence
- Standard air sampling results are inconclusive or conflicting
ERMI testing costs more ($250 to $400 per sample) and takes longer to process (7 to 14 business days) than standard spore trap analysis. For most residential water damage events, standard air and surface sampling provide sufficient information. ERMI testing adds the most value in complex cases where multiple contamination sources may exist or where elevated species specificity changes the remediation approach.
Interpreting Mold Test Results After Water Damage
Laboratory results from mold testing are only useful if interpreted correctly. Raw spore counts, species lists, and ERMI scores require context to translate into actionable decisions about remediation, insurance claims, and reoccupation. The following framework applies specifically to interpreting results in the context of a known water damage event.
Air Sampling Results: What the Numbers Mean
Air sample results report the total spore count per cubic meter of air and a breakdown of identified genera. There are no federal standards for acceptable indoor mold levels, but the following interpretation guidelines are widely used by industrial hygienists and mold assessors:
Indoor spore count lower than outdoor: This is the expected result in a building without active mold growth. After water damage, this result indicates that drying was effective and no significant colonization has occurred. No remediation is typically needed.
Indoor spore count moderately elevated (2x to 5x outdoor): This suggests some mold activity. Review the species profile carefully. If the dominant indoor species match the outdoor profile (typically Cladosporium, Alternaria), the elevation may reflect natural infiltration rather than active indoor growth. If species like Aspergillus/Penicillium dominate indoors but are minor outdoors, active indoor sources are likely.
Indoor spore count significantly elevated (more than 5x outdoor): This strongly indicates active indoor mold growth. Professional remediation should be considered, especially if the dominant species include Stachybotrys, Chaetomium, or high concentrations of Aspergillus species. These results should be shared with the insurance adjuster and used to scope the remediation project.
Presence of indicator species: Certain mold species are strongly associated with water-damaged building materials. Finding Stachybotrys chartarum, Chaetomium globosum, Memnoniella echinata, or Ulocladium in indoor air samples at any concentration is significant because these species require sustained high moisture and cellulose substrates to grow. Their presence confirms that water-damaged organic materials inside the structure are supporting active mold colonization.
Surface Sample Results: Culture vs. Direct Examination
Surface sample results depend on the analytical method. Direct microscopic examination (tape lift analysis) reports the types and quantities of mold structures observed, including intact spores, broken spores, hyphal fragments, and mycelial growth. Culture analysis (growing collected samples on nutrient media) identifies viable species that can reproduce. Direct examination detects more total mold material, while culture identifies only living organisms. After water damage, direct examination is preferred because it captures both active and recently killed mold, providing a more complete picture of the contamination scope.
Moisture Readings: Target Numbers for Clearance
For structural drying to be considered complete and mold risk to be minimized, moisture readings should reach the following targets:
| Material | Acceptable Moisture (%) | Elevated Risk (%) | Active Mold Risk (%) |
|---|---|---|---|
| Wood framing (2×4, 2×6) | Below 15% | 15-19% | Above 19% |
| Drywall paper facing | Below 1% | 1-2% | Above 2% |
| OSB / Plywood subfloor | Below 16% | 16-20% | Above 20% |
| Concrete slab (relative humidity) | Below 75% RH | 75-85% RH | Above 85% RH |
| Carpet and pad | Dry to touch, no readings | Any detectable moisture | Discard if wet 48+ hours |
These readings should be taken at multiple points across the affected area, including behind baseboards (removed if necessary), at the base of walls 1 to 2 inches above the floor, and in the center of the most heavily affected zone. Ambient relative humidity in the drying area should be maintained below 50% using a dehumidifier rated for the space.
Testing by Water Damage Type
The category and source of water damage affects both the urgency of testing and the types of mold most likely to develop. Tailoring the testing approach to the specific water source produces more useful results and supports a more targeted remediation strategy.
Clean Water Damage (Category 1)
Sources include broken supply lines, sink or tub overflows (with no contaminants), rainwater through a clean opening, and melting ice or snow. Category 1 water does not initially contain significant microorganisms, but it degrades to Category 2 within 48 hours if left standing because it absorbs contaminants from the materials it contacts.
Testing priority: Low in the first 48 hours if drying begins promptly. Elevates to moderate if drying is delayed or if moisture persists behind walls after 72 hours. Standard moisture monitoring with a moisture meter is usually sufficient if water is extracted within 24 hours and professional drying equipment is deployed. Air sampling at the one-week mark provides confirmation that no colonization has occurred.
Gray Water Damage (Category 2)
Sources include washing machine or dishwasher overflow, toilet overflow with urine but no feces, sump pump failure with ground water, and aquarium leaks. Category 2 water contains microorganisms and organic nutrients that accelerate biological activity, including mold growth.
Testing priority: Moderate from the outset. Surface sampling of affected porous materials at the 48-to-72-hour mark is recommended, especially for carpet padding, drywall below the flood line, and any organic materials that remained in contact with the gray water. Air sampling at day 5 to 7 establishes whether airborne spore counts have elevated above outdoor baseline levels. If carpet or padding was exposed to Category 2 water for more than 24 hours, replacement is recommended regardless of testing results because the material cannot be reliably decontaminated.
Black Water Damage (Category 3)
Sources include sewage backup, river or stream flooding, storm surge, and any standing water that has been present for more than 72 hours regardless of original category. Category 3 water contains pathogenic bacteria, viruses, fungi, and high concentrations of organic nutrients. It represents the highest mold risk scenario.
Testing priority: High and immediate. All porous materials contacted by Category 3 water (carpet, padding, drywall, insulation, particleboard, upholstered items) should be removed and discarded without testing, as they cannot be adequately cleaned. Testing focuses on structural elements that remain in place: wood framing, subfloor, concrete, and concealed spaces. Surface and air sampling should begin as soon as demolition and removal of contaminated materials is complete, typically at the 72-hour to one-week mark. A mold detector can provide rapid preliminary screening of structural surfaces after demolition.
DIY Testing vs. Professional Mold Inspection After Water Damage
The decision between self-testing with consumer kits and hiring a professional mold inspector depends on the scale of the water damage, the potential insurance implications, and the occupants’ health status. Each approach has strengths and limitations in the post-water-damage context.
When DIY Testing Is Appropriate
- Small-scale Category 1 water damage (less than 40 square feet affected)
- Drying began within 24 hours and is progressing well
- No visible mold growth or musty odors
- No occupant health complaints
- The purpose is personal reassurance rather than insurance or legal documentation
- The homeowner wants to establish a baseline before deciding whether to hire a professional
For DIY testing, a consumer-grade mold test kit with laboratory analysis can confirm whether active mold is present on suspect surfaces. Pair surface testing with ongoing moisture monitoring using a pin-type moisture meter and a hygrometer to track ambient humidity in the affected area. These tools provide a basic but actionable assessment for minor water events.
When Professional Testing Is Necessary
- Category 2 or 3 water was involved
- More than 40 square feet of building materials were affected
- Water sat for more than 24 hours before extraction
- An insurance claim is being filed (insurers often require professional documentation)
- The property is a rental, commercial building, or involved in a real estate transaction
- Occupants include immunocompromised individuals, young children, or elderly residents
- Hidden moisture pockets are suspected behind walls, above ceilings, or under floors
- Visible mold covers more than 10 square feet
- Post-remediation clearance testing is needed
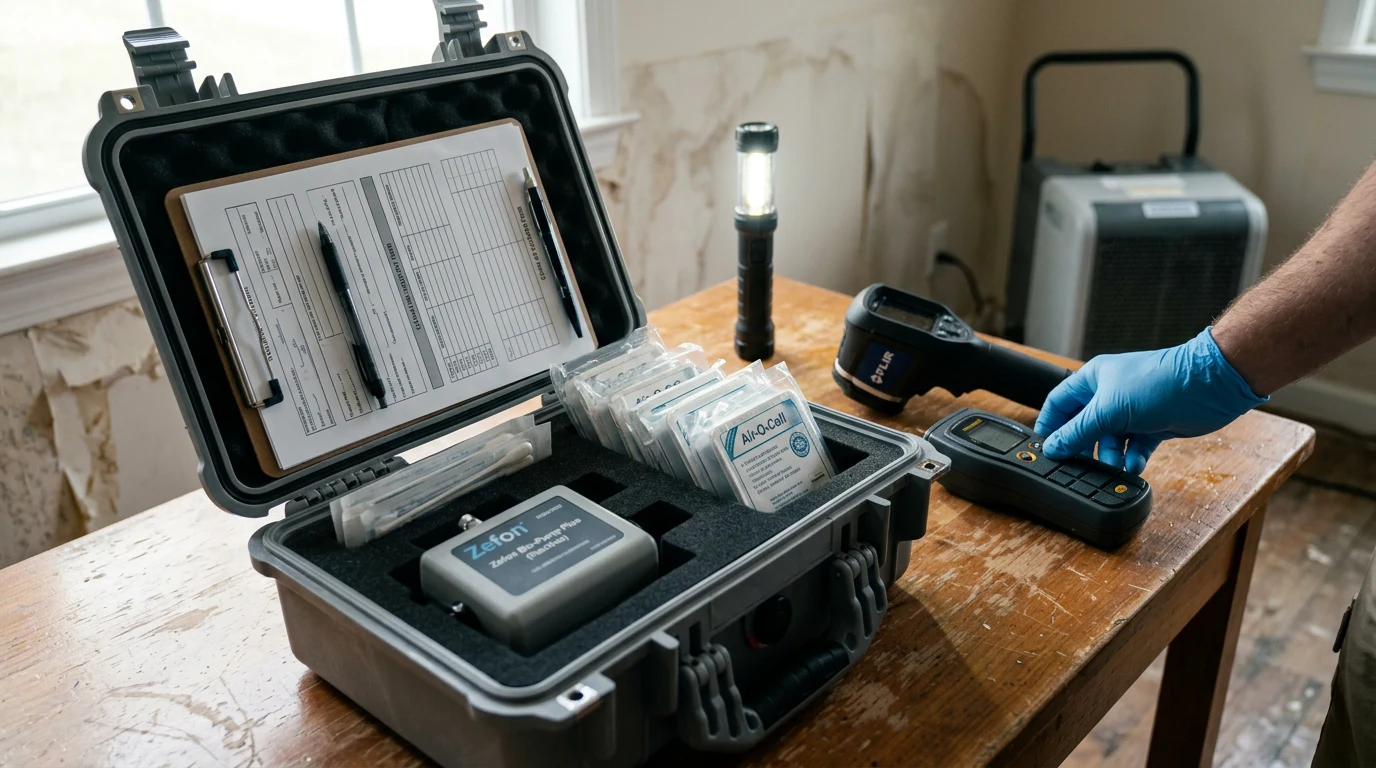
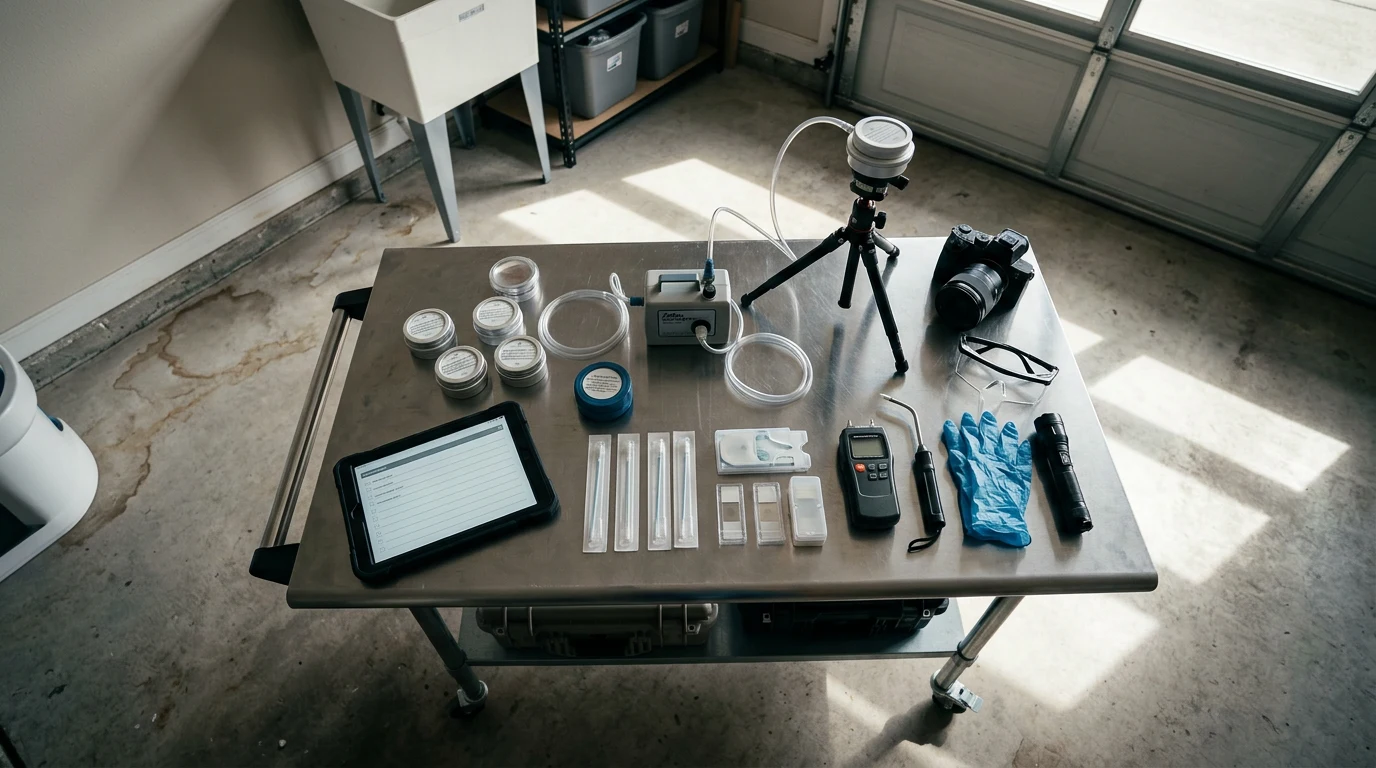
Professional mold inspectors bring thermal imaging cameras, calibrated air sampling pumps, and wall cavity access tools that consumer kits cannot replicate. A certified inspector (look for ACAC, MICRO, or IICRC certifications) also provides a formal inspection report that carries weight with insurance adjusters, attorneys, and remediation contractors. The typical cost for a professional post-water-damage mold assessment ranges from $350 to $800 depending on the property size and number of samples collected.
Preventing Mold Growth During the Drying Process
Testing identifies mold that has already developed, but prevention during the drying window is always more cost-effective than remediation after colonization. The following steps directly reduce the probability of mold establishment after water damage and should be implemented alongside any testing plan.
Structural Drying Best Practices
- Deploy commercial dehumidifiers immediately. Consumer dehumidifiers rated at 30 to 50 pints per day are insufficient for structural drying after significant water events. Professional desiccant or LGR (Low Grain Refrigerant) dehumidifiers remove 80 to 150 pints per day and maintain the low humidity levels needed to pull moisture from building materials. Rent from an equipment supply company or hire a water damage restoration firm. At minimum, use a residential dehumidifier rated for mold prevention in the affected space.
- Create air movement with axial or centrifugal fans. Position high-velocity fans to direct airflow across wet surfaces and into wall cavities through openings at the base of walls. Air movement dramatically accelerates evaporation from porous materials.
- Remove baseboards and drill ventilation holes in walls. If drywall is wet at the base, remove the baseboard trim and drill 2-inch holes at 16-inch intervals along the bottom of the affected walls. This allows airflow into the wall cavity and gives moisture an exit path.
- Monitor moisture daily. Take readings with a moisture meter at the same locations each day to track the drying curve. Drying is complete when all readings match the moisture content of unaffected materials in the same building.
- Maintain HVAC operation. Keep the heating or cooling system running to maintain air circulation, but change the air filter immediately and monitor the return ductwork for moisture or contamination if the water event affected areas near the HVAC system.
Materials That Should Be Removed vs. Dried
Not all water-damaged materials can be saved, and attempting to dry materials that should be discarded increases mold risk and delays the overall restoration. The IICRC S500 standard provides specific guidance:
| Material | Category 1 (Clean) | Category 2 (Gray) | Category 3 (Black) |
|---|---|---|---|
| Carpet | Dry if <48 hrs wet | Discard if >24 hrs wet | Always discard |
| Carpet padding | Usually discard | Always discard | Always discard |
| Drywall (paper-faced) | Dry if <48 hrs wet, no wicking above 12″ | Cut and remove 12″ above water line | Cut and remove 24″ above water line |
| Insulation (fiberglass batts) | Dry in place if accessible | Discard | Discard |
| Wood framing | Dry in place | Dry in place, treat with antimicrobial | Dry in place, treat with antimicrobial |
| Hardwood flooring | Dry slowly to prevent cupping | Dry if <48 hrs, assess for contamination | Often must discard |
| Particleboard / MDF | Discard if swollen | Always discard | Always discard |
Insurance Considerations for Mold Testing After Water Damage
Mold testing results play a critical role in water damage insurance claims. Understanding how insurance companies evaluate mold claims helps homeowners make testing decisions that strengthen their position and maximize covered losses.
Document the Timeline
Insurance companies evaluate mold claims based on whether the mold resulted from a “sudden and accidental” covered water event versus long-term neglect or maintenance failure. Detailed documentation of the water damage timeline, including photographs, moisture readings, and mold testing results with dates, establishes that mold developed as a direct consequence of the covered water event. This documentation is strongest when testing begins within the first week of the loss and continues through restoration.
Understand Your Policy’s Mold Coverage
Most homeowner insurance policies include a mold sub-limit, typically capped at $5,000 to $25,000, that covers mold testing and remediation resulting from a covered water loss. Some policies exclude mold entirely. Others cover it fully when it results from a listed peril (burst pipe, appliance failure, storm damage). Review the policy language before incurring testing expenses. If the mold sub-limit is low (under $10,000), prioritize professional testing to establish the scope of contamination early so remediation can be scoped and negotiated with the adjuster before the cap is reached.
Testing Reports That Insurance Adjusters Accept
Insurance adjusters are most likely to accept mold testing results that meet the following criteria: the testing was performed by a certified professional (not a DIY kit), the report includes a clear scope of work description, the laboratory is AIHA (American Industrial Hygiene Association) accredited, the outdoor control sample is included for comparison, and the report links the mold findings directly to the water damage event. Reports from professionals with ACAC or MICRO certifications carry additional credibility.
Common Mistakes in Post-Water-Damage Mold Testing
Avoiding these common errors improves the accuracy of test results and prevents unnecessary expense or delayed remediation. Awareness of these pitfalls is particularly important when testing is being performed for insurance documentation or health-related decision making.
Mistake 1: Testing Too Early
Air sampling within the first 24 to 48 hours rarely shows elevated mold levels because colonies have not yet sporulated. The results look normal, creating false confidence that no mold problem exists. This “clean” result can undermine a later insurance claim when mold does appear at the one-to-two-week mark and the insurer argues that the early test proves the mold is unrelated to the water event.
Mistake 2: Only Testing Visible Areas
Water travels through wall cavities, wicks up drywall, and pools on subfloors beneath finished flooring. Testing only the surfaces that show visible damage misses the most dangerous hidden contamination. Always include at least one wall cavity sample and one sample from an area adjacent to (but not visually affected by) the water damage to catch lateral moisture migration. Recognizing the signs of hidden mold helps identify where additional sampling points are needed.
Mistake 3: Relying on a Single Test Type
Air sampling alone can miss mold growing behind walls that is not yet releasing spores into occupied spaces. Surface sampling alone cannot detect airborne contamination from distant sources. Moisture readings alone show risk but not whether colonization has occurred. A comprehensive post-water-damage assessment uses all three methods together to produce a complete picture.
Mistake 4: Not Collecting an Outdoor Control Sample
Without an outdoor baseline, indoor air sample results are uninterpretable. A count of 2,000 Cladosporium spores per cubic meter indoors might be alarming in isolation, but if the outdoor sample shows 5,000 spores per cubic meter, the indoor reading is actually below normal. Always collect at least one outdoor sample during any air sampling event.
Mistake 5: Using the Same Company for Testing and Remediation
A company that profits from remediation work has a financial incentive to find mold. A company that already performed remediation has a financial incentive to report clean clearance results. Independent testing, where the assessor has no business relationship with the remediation contractor, produces the most trustworthy results. Many states now require this separation by law for transactions above certain dollar thresholds.
Step-by-Step Action Plan: Mold Testing After Water Damage
The following action plan synthesizes the timeline and testing guidance above into a sequential workflow that applies to most residential water damage scenarios. Adjust the timeline based on the water category and scope of damage.
- Hour 0-4: Stop the water source, document with photos and video, contact insurance, begin water extraction
- Hour 4-24: Deploy drying equipment, take baseline moisture readings at 10+ points, remove baseboards in affected areas for cavity ventilation
- Day 2-3: Continue moisture monitoring, remove porous materials per the IICRC material chart above, perform initial surface sampling if Category 2 or 3 water or if visible discoloration appears
- Day 4-7: Conduct comprehensive mold testing (air sampling with outdoor control, surface sampling of suspect areas, continued moisture monitoring)
- Day 7-14: Perform follow-up testing if musty odors persist, if moisture remains elevated behind walls, or if initial test results were borderline. Request wall cavity sampling if hidden contamination is suspected
- Post-remediation: Schedule independent clearance testing after all remediation work is complete and before containment is removed. Results should confirm indoor air quality matches or is better than outdoor baseline
- 30-day follow-up: Take final moisture readings and a follow-up air sample to confirm no delayed colonization. This final verification is especially important if the water event occurred during a heating season when mold growth may initially be suppressed by low humidity
When Mold Remediation Is Needed Based on Test Results
Not every positive mold test result after water damage requires professional remediation. The decision depends on the scope and type of contamination, the species involved, and the condition of affected materials. The following guidelines help determine the appropriate response level. For comprehensive remediation guidance, see the complete guide to mold removal and the basement mold remediation guide for below-grade water damage scenarios.
Self-remediation is appropriate when: Mold growth covers less than 10 square feet of non-structural surface material, the species identified are common environmental molds (Cladosporium, Penicillium, Aspergillus), no occupants are immunocompromised, and the moisture source has been fully controlled.
Professional remediation is recommended when: Mold growth exceeds 10 square feet, Stachybotrys or Chaetomium is identified, HVAC contamination is suspected, structural materials (framing, subfloor) are affected, the property is occupied by sensitive individuals, or insurance requires professional documentation of the remediation process.

Frequently Asked Questions
The following questions address the most common concerns homeowners have about mold testing after water damage events.
How soon after water damage does mold grow?
Mold spores can germinate within 24 to 48 hours after porous building materials become saturated. Visible mold colonies typically appear between 3 and 7 days in warm, humid conditions (above 70 degrees Fahrenheit and 60% relative humidity). In cooler or drier conditions, visible growth may take 10 to 14 days, but microbial activity begins much sooner at the microscopic level.
Can I test for mold myself after a flood?
Consumer mold test kits can detect surface mold on visible areas and provide basic species identification through laboratory analysis. However, after a significant flood, DIY kits cannot detect hidden mold behind walls, in HVAC systems, or in subfloor cavities. For flood damage affecting more than a single room, professional testing with thermal imaging and wall cavity sampling provides far more reliable results. DIY testing is reasonable for minor leaks caught and dried within 24 hours.
Does insurance cover mold testing after water damage?
Most homeowner policies cover mold testing when it results from a sudden and accidental covered peril (burst pipe, appliance malfunction, storm damage). Testing costs are typically applied against the policy’s mold sub-limit, which ranges from $5,000 to $25,000 on most policies. Mold resulting from long-term leaks, deferred maintenance, or flood events (which require separate flood insurance) is usually excluded. Review your specific policy language or ask your agent before incurring testing expenses.
How much does professional mold testing cost after water damage?
A professional post-water-damage mold assessment typically costs $350 to $800 for a standard residential property. This includes 2 to 6 air samples, 1 to 3 surface samples, moisture mapping, thermal imaging, and a written report with laboratory results and recommendations. ERMI testing adds $250 to $400 per sample. Post-remediation clearance testing ranges from $250 to $500 per event. These costs are generally recoverable through insurance when the water damage is a covered loss.
What if mold tests come back negative but there is still a musty smell?
A persistent musty odor with negative air sampling results usually indicates mold growth in a concealed space that is not releasing spores into the sampled air. Common locations include inside wall cavities, behind cabinetry, under vinyl or laminate flooring, and inside HVAC ductwork. Request wall cavity sampling, ductwork inspection, or targeted demolition of suspect areas to locate the source. Microbial volatile organic compounds (MVOCs) produced by mold can permeate through intact drywall and create odors even when spores are contained behind the wall surface.
Should I move out during mold testing after water damage?
Temporary relocation is recommended if Category 3 (black water) damage occurred, if visible mold covers more than 25 square feet, if HVAC contamination is suspected (which distributes spores throughout the building), or if any occupant has asthma, allergies, immune suppression, or is an infant or elderly. For smaller-scale Category 1 damage with no visible mold, remaining in the home is generally safe as long as the affected area is isolated with plastic sheeting and the drying equipment is operating continuously.
Frequently Asked Questions
When should I consider mold testing after water damage?
Mold testing is typically recommended if you suspect mold growth due to a musty odor or visible signs, but are unsure of its extent or type. It’s also useful if occupants are experiencing health issues potentially linked to mold exposure, and you need to identify the specific mold species present.
Is professional mold testing always necessary after water damage?
Not always. If the water damage was minor, quickly dried, and there are no signs of mold, testing might be unnecessary. However, for significant water damage, prolonged moisture, or if health concerns arise, professional testing provides valuable data for effective remediation.

What’s the typical timeline for mold growth after water damage?
Mold can begin to grow within 24 to 48 hours after water damage if moisture is not adequately addressed. Visible mold colonies may appear within a few days to a week, depending on environmental conditions and the type of materials affected.

What types of mold tests are commonly performed after water damage?
Common tests include air sampling to measure airborne mold spore counts and surface sampling (swabs or tape lifts) to identify mold species on visible growth. These methods help determine the presence, concentration, and type of mold, guiding remediation strategies.

Can I do DIY mold testing after water damage?
While DIY mold test kits are available, they often lack the accuracy and comprehensive analysis of professional testing. They may not identify specific mold species or accurately assess airborne spore levels, which are crucial for effective remediation planning.

What should I do if mold testing confirms mold after water damage?
If mold testing confirms growth, it’s crucial to address the underlying moisture source immediately. Subsequently, professional mold remediation should be initiated to safely and effectively remove the mold and prevent its recurrence.

These statements have not been evaluated by the Food and Drug Administration. This information is not intended to diagnose, treat, cure, or prevent any disease. Content is for informational purposes only and is not medical advice; consult a qualified healthcare provider before starting any supplement. As an Amazon Associate we earn from qualifying purchases.