When to Test for Mold: 7 Warning Signs
Knowing when to test for mold can mean the difference between catching a minor moisture problem and dealing with a full-scale mold infestation that threatens both property value and occupant health. Mold spores exist in virtually every indoor environment, but active mold growth only becomes dangerous when colonies establish themselves on building materials and release concentrated spore levels into the air. The challenge is that mold frequently grows in concealed spaces, behind drywall, under flooring, inside HVAC ductwork, and within wall cavities, where it can spread for months before visible signs appear. According to the EPA’s guidance on mold testing, testing becomes necessary when occupants suspect hidden mold or need to confirm remediation success.
This guide identifies the seven critical warning signs that indicate mold testing should be a priority, explains the different testing methods available, and provides clear guidance on which situations call for DIY test kits versus professional mold inspection services. Understanding these warning signs helps homeowners, renters, and property managers take action before mold contamination reaches levels that require expensive professional remediation.
Why Mold Testing Matters
Mold testing serves two primary functions: confirming the presence of mold when visual evidence is absent or inconclusive, and identifying the specific mold species present to assess health risk levels. Not all mold situations require testing. When visible mold growth covers an area smaller than 10 square feet and the moisture source is obvious, testing may be unnecessary since the response is the same regardless of species: fix the moisture problem and remove the mold. However, several scenarios exist where testing provides critical information that guides proper remediation strategy and protects occupant health.
Indoor air quality testing establishes whether airborne mold spore concentrations exceed normal background levels. Surface sampling identifies the specific genera and species of mold present, which matters because certain species like Stachybotrys chartarum (toxic black mold), Aspergillus, and Chaetomium produce mycotoxins that pose significantly greater health risks than common Cladosporium or Penicillium. For a comprehensive overview of testing methods and costs, see the complete mold testing guide.
Warning Sign 1: Persistent Musty Odors
A persistent musty smell is the most reliable early indicator that mold is growing somewhere in the home, even when no visible mold is present. Mold colonies produce microbial volatile organic compounds (MVOCs) as metabolic byproducts. These compounds create the characteristic earthy, damp, stale smell commonly described as “musty” or “like wet socks.” MVOCs are detectable by the human nose at concentrations far below what most mold testing equipment can measure, making olfactory detection one of the earliest warning systems available.
The smell may be strongest in certain rooms or areas, which narrows the likely location of mold growth. Basements, crawl spaces, bathrooms, laundry rooms, and areas under kitchen sinks are the most common sources. If the musty odor intensifies when the HVAC system runs, the ductwork itself may harbor mold colonies. A musty smell that appears only during humid weather or after rainfall often points to moisture intrusion through the building envelope. When the source of a musty odor cannot be visually located, an air quality test confirms whether elevated spore counts are present and helps narrow the search area.
How to Investigate Musty Odors
Systematic investigation starts with identifying which rooms or zones produce the strongest odor. Close all interior doors for several hours, then open each one and note where the smell is most concentrated. Check behind furniture placed against exterior walls, inside closets, under sinks, and around window frames. A moisture meter helps identify damp building materials that may harbor concealed mold growth behind finished surfaces. Moisture readings above 17% in wood framing or above 1% in drywall indicate conditions favorable for active mold colonization.
Warning Sign 2: Unexplained Health Symptoms
Health symptoms that improve when leaving the home and return upon re-entry are a strong indicator of indoor environmental contamination, with mold exposure being one of the most common causes. Mold-related health effects vary widely depending on the species present, spore concentration levels, duration of exposure, and individual sensitivity. Approximately 25% of the population carries genetic variants (HLA-DR gene) that impair their ability to clear mold-related biotoxins, making them significantly more susceptible to mold illness than the general population.
Common mold exposure symptoms include nasal congestion, sinus pressure, frequent sneezing, watery or itchy eyes, throat irritation, persistent cough, wheezing, shortness of breath, headaches, fatigue, and skin rashes. More severe exposure, particularly to mycotoxin-producing species, can cause cognitive impairment (brain fog, difficulty concentrating, memory problems), joint pain, neuropathy, and chronic inflammatory response syndrome (CIRS). Children, elderly adults, immunocompromised individuals, and people with pre-existing respiratory conditions like asthma face elevated risks. For a detailed breakdown of how mold affects health, see can mold make you sick and the mold exposure symptoms guide.
The Building-Related Illness Pattern
When multiple household members develop similar respiratory or allergic symptoms simultaneously, the likelihood of an environmental cause increases substantially. This pattern, known as building-related illness (BRI) or sick building syndrome (SBS), is well-documented in indoor environmental science. The key diagnostic indicator is temporal correlation: symptoms that consistently worsen while inside the home and improve after extended time away (vacations, weekends spent elsewhere). If this pattern is present, air quality testing with a professional-grade mold test kit should be conducted to measure indoor spore levels against outdoor baseline counts.
Warning Sign 3: Recent Water Damage or Flooding
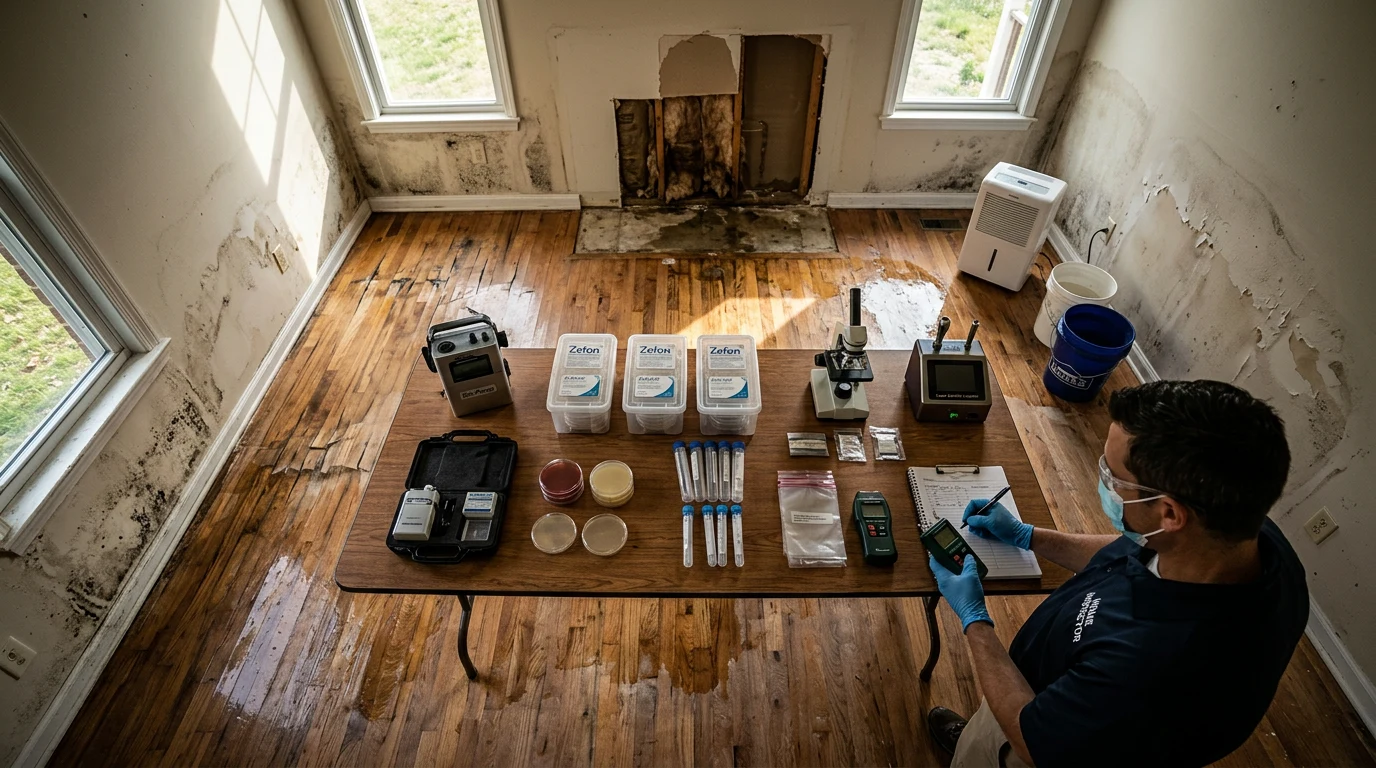
Any water damage event, regardless of how thoroughly it was cleaned up, creates conditions favorable for mold growth. Mold can begin colonizing wet building materials within 24 to 48 hours of water exposure, and once hyphae (mold roots) penetrate porous materials like drywall, wood framing, carpet padding, and insulation, surface drying alone does not eliminate the organism. Water damage from floods, burst pipes, appliance failures, roof leaks, and sewage backups all carry different contamination risks and timelines for mold development.
Even when water damage appears to have been fully addressed, testing 2 to 4 weeks after the event confirms whether mold has established itself in areas that were affected. This is particularly important for water events that saturated wall cavities, subfloor assemblies, or insulation, since these concealed spaces retain moisture much longer than exposed surfaces. Category 3 water damage (sewage or floodwater) introduces bacteria and organic contaminants that dramatically accelerate mold growth and require testing to verify that microbial levels have returned to normal after remediation.
Post-Restoration Verification Testing
After water damage restoration, clearance testing (also called post-remediation verification or PRV) provides documented proof that moisture levels and mold spore counts have returned to acceptable ranges. Insurance companies, real estate transactions, and property management agreements increasingly require PRV testing to demonstrate successful remediation. A hygrometer monitors ongoing humidity levels in affected areas during the drying process, with readings below 50% relative humidity indicating conditions unfavorable for continued mold growth.
Warning Sign 4: Visible Discoloration on Surfaces
Surface discoloration that cannot be explained by normal wear, staining, or aging may indicate mold colonization. Mold growth presents in a wide range of colors including black, dark green, gray-green, white, orange, pink, and brown. The color depends on the mold species, the substrate it grows on, and the maturity of the colony. Not all discoloration is mold; mineral deposits, water stains, efflorescence on concrete, and oxidation can mimic mold appearance. Testing resolves ambiguity when visual inspection alone cannot confirm whether discoloration is biological.
Small spots of surface discoloration in predictable moisture areas (around shower tiles, under sink cabinets, on window sills) are common and typically addressable with cleaning alone. However, certain discoloration patterns warrant testing. Dark staining that appears on drywall ceilings or walls without an obvious water source suggests moisture intrusion from concealed plumbing leaks, roof damage, or condensation within wall cavities. Discoloration that returns after cleaning indicates an active moisture source feeding ongoing mold growth. For help identifying whether what you see is actually mold, see signs of mold in house.
When Visual Mold Requires Testing
- Mold growth covers an area larger than 10 square feet (approximately 3 feet by 3 feet)
- Mold appears on structural elements (floor joists, wall studs, roof decking)
- The mold is dark black or dark green and growing on cellulose materials (drywall paper, wood)
- Multiple areas of mold growth are found in different rooms or on different floors
- The property is involved in a real estate transaction, insurance claim, or landlord-tenant dispute
- Occupants include infants, elderly adults, or immunocompromised individuals
Warning Sign 5: High Indoor Humidity Levels
Chronically elevated indoor humidity creates an environment where mold growth is not just possible but virtually inevitable. The relationship between humidity and mold is well-established in building science: mold spores germinate at relative humidity levels above 60%, and active growth accelerates significantly above 70%. When indoor humidity consistently exceeds these thresholds, mold colonization occurs on building materials even without direct water contact, because moisture condenses on cool surfaces and absorbs into porous materials through hygroscopic action.
Warning signs of chronically high humidity include condensation on windows (especially double-pane windows, which indicates extreme moisture levels), peeling wallpaper or paint, warping wood flooring, damp-feeling carpet, and visible condensation on cold water pipes. A hygrometer placed in different rooms throughout the home provides objective measurements. Readings consistently above 55% relative humidity in occupied spaces indicate conditions requiring humidity management intervention, while readings above 65% in any area create near-certain mold growth conditions on susceptible materials.
High-Risk Humidity Zones
Certain areas within a home are particularly susceptible to humidity-driven mold problems. Basements and crawl spaces commonly maintain humidity levels between 60% and 80% year-round due to ground moisture migration through concrete foundations. Bathrooms without adequate exhaust ventilation accumulate humidity during and after bathing. Kitchens generate moisture from cooking, dishwashing, and boiling water. Laundry rooms, especially those where dryers are improperly vented, add significant moisture loads to indoor air. In multi-story homes, humidity naturally migrates upward through the stack effect, concentrating in attic spaces where it condenses on cold roof sheathing during winter months.
Warning Sign 6: HVAC System Concerns
The heating, ventilation, and air conditioning system is both a potential source of mold contamination and a distribution mechanism that can spread spores throughout an entire building. Mold growth inside HVAC ductwork, on evaporator coils, in drain pans, and on air handler components affects every room the system serves. When mold colonizes HVAC components, every air cycle distributes spores to all connected spaces, creating elevated exposure levels that persist continuously while the system operates.
Several indicators suggest the HVAC system may be contaminated with mold. A musty or stale smell that intensifies when the system activates is the most common sign. Visible mold growth on supply registers, return grilles, or accessible ductwork confirms contamination. Dust-like deposits around vents that appear dark or discolored may be mold colonies. Occupants who experience respiratory symptoms that worsen when the HVAC system runs, particularly shortly after startup, may be reacting to mold spores distributed through the duct system. An air quality test taken at supply registers while the system operates captures representative samples of what occupants breathe.
HVAC Mold Risk Factors
Certain HVAC configurations carry higher mold contamination risk. Systems with oversized cooling capacity short-cycle, meaning they cool the air quickly without running long enough to dehumidify, leaving evaporator coils and drain pans perpetually wet. Ductwork routed through unconditioned spaces (attics, crawl spaces) develops condensation on exterior surfaces during temperature swings. Clogged condensate drain lines cause water to back up into the air handler, creating standing water that supports mold growth. Dirty air filters restrict airflow, causing pressure imbalances that draw unconditioned, moisture-laden air into the duct system through gaps and joints.
Warning Sign 7: Real Estate Transactions and Legal Situations
Certain legal, financial, and transactional situations create specific requirements for mold testing that go beyond personal health concerns. In these contexts, mold testing provides documented evidence that serves as a baseline measurement, informs negotiation, establishes liability, or satisfies regulatory requirements. Skipping testing in these scenarios can result in significant financial consequences or legal exposure.
Home purchases represent the most common transactional trigger for mold testing. A pre-purchase mold inspection protects buyers from acquiring a property with concealed contamination that could cost thousands or tens of thousands of dollars to remediate. Sellers benefit from pre-listing testing that either documents a clean result or identifies issues that can be addressed before marketing the property. For guidance on choosing between self-testing and hiring a professional, see DIY mold test vs professional.
Situations Requiring Documented Testing
- Home purchases and sales: Pre-purchase inspection protects buyers; pre-listing testing helps sellers demonstrate property condition
- Landlord-tenant disputes: Testing provides objective evidence when tenants report mold concerns or when landlords dispute claims
- Insurance claims: Documented mold testing results support claims for water damage remediation and demonstrate the scope of contamination
- Post-remediation clearance: Independent testing after professional mold removal verifies that the remediation was successful and spore levels returned to normal
- Workplace complaints: Commercial buildings with occupant health complaints require documented indoor air quality testing to identify or rule out mold contamination
- Child custody and family court: Living condition disputes sometimes require environmental testing documentation
Types of Mold Tests and When to Use Each
Understanding the available mold testing methods helps determine the right approach for each warning sign scenario. Different test types provide different information, and selecting the wrong test can produce results that fail to answer the actual question. The three primary categories of mold testing are air sampling, surface sampling, and bulk sampling, each with specific strengths and limitations.
Air Sampling (Spore Trap Analysis)
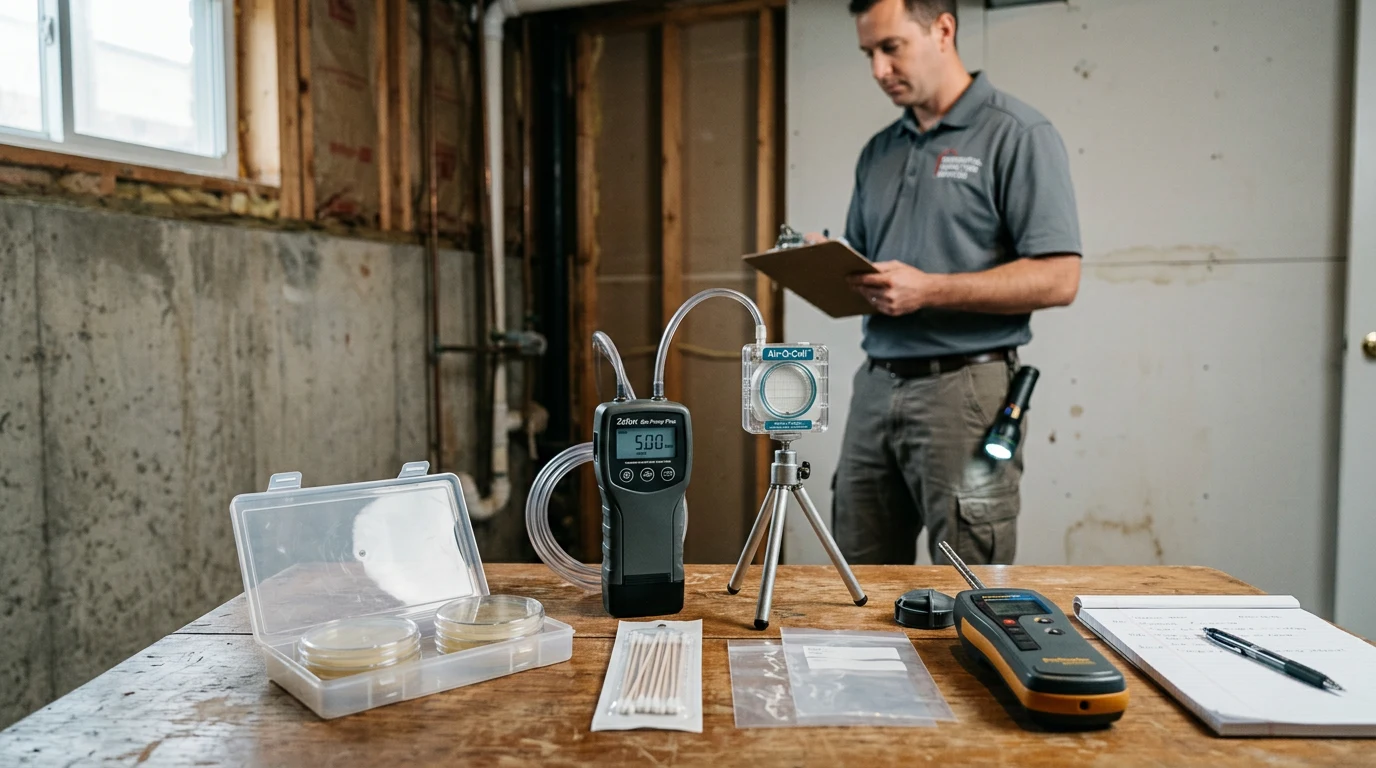
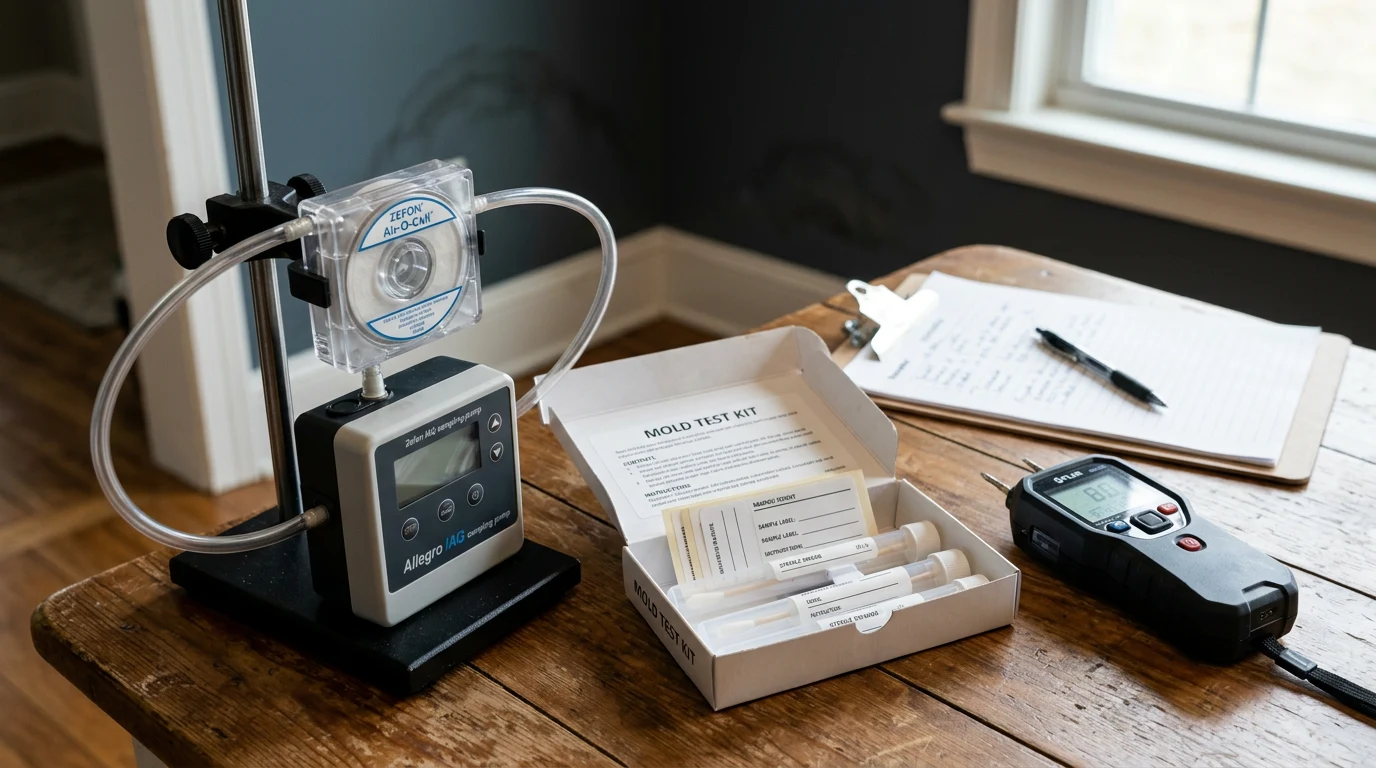
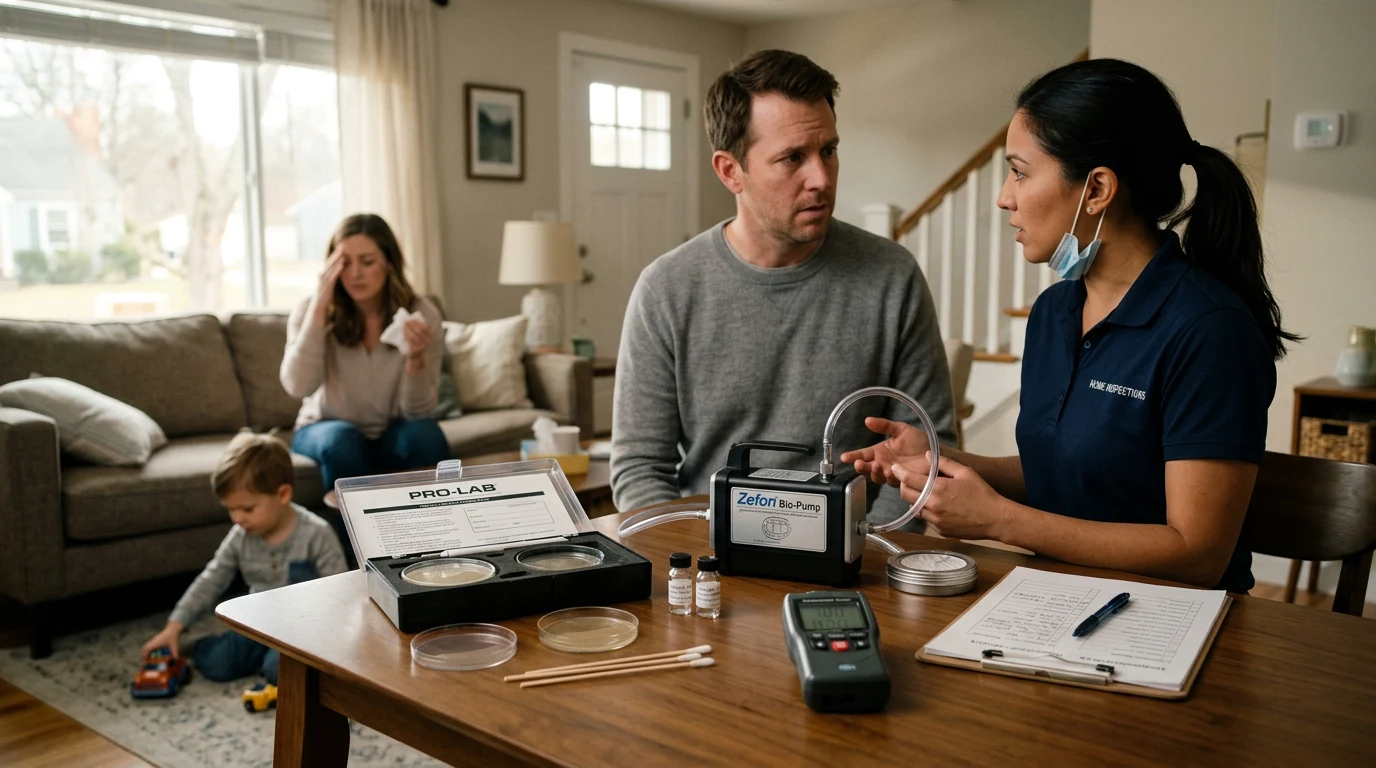
Air sampling captures airborne mold spores on a collection medium by drawing a calibrated volume of air through a cassette. Samples are analyzed under a microscope by a certified laboratory, which identifies the genus and provides a spore count per cubic meter of air. Air sampling is the most common professional mold testing method and is best suited for evaluating overall indoor air quality, detecting hidden mold sources, and comparing indoor spore levels to outdoor baseline measurements. A valid air sampling protocol requires at least one outdoor (control) sample and one sample from each area of concern.
Air sampling is the appropriate choice for warning signs 1 (musty odors without visible mold), 2 (unexplained health symptoms), 5 (high humidity environments), and 6 (HVAC concerns). It is less useful for identifying the specific location of a mold source, since spores travel through air currents and may appear in rooms distant from the actual growth site. For a detailed comparison of air testing methods and what results mean, see professional mold inspection.
Surface Sampling (Swab, Tape Lift, Bulk)
Surface sampling collects material directly from a suspected mold colony for laboratory identification. Swab samples use a sterile cotton swab rubbed across the surface. Tape lift samples press clear tape against the surface to collect spores and hyphal fragments. Bulk samples involve removing a piece of the contaminated material (drywall, wood, carpet) and sending it to the laboratory. Surface sampling identifies the specific mold species present on a particular material and confirms whether discoloration is biological mold growth or a non-biological stain.
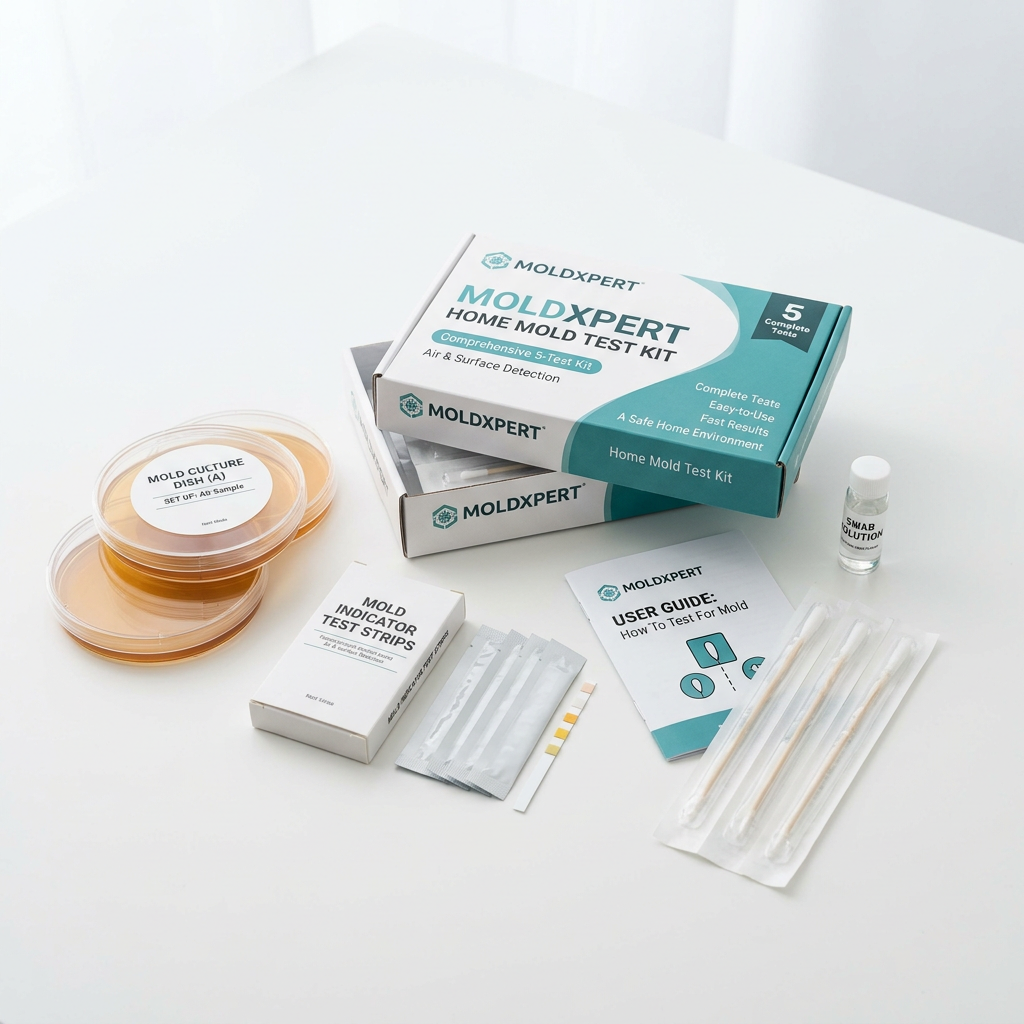
Surface testing is most appropriate for warning signs 3 (post-water-damage verification) and 4 (visible discoloration requiring identification). A quality mold test kit for surface sampling includes swabs or tape lift supplies with prepaid laboratory analysis, providing species-level identification within 3 to 5 business days. Combined air and surface sampling provides the most comprehensive assessment when multiple warning signs are present simultaneously.
Moisture Mapping
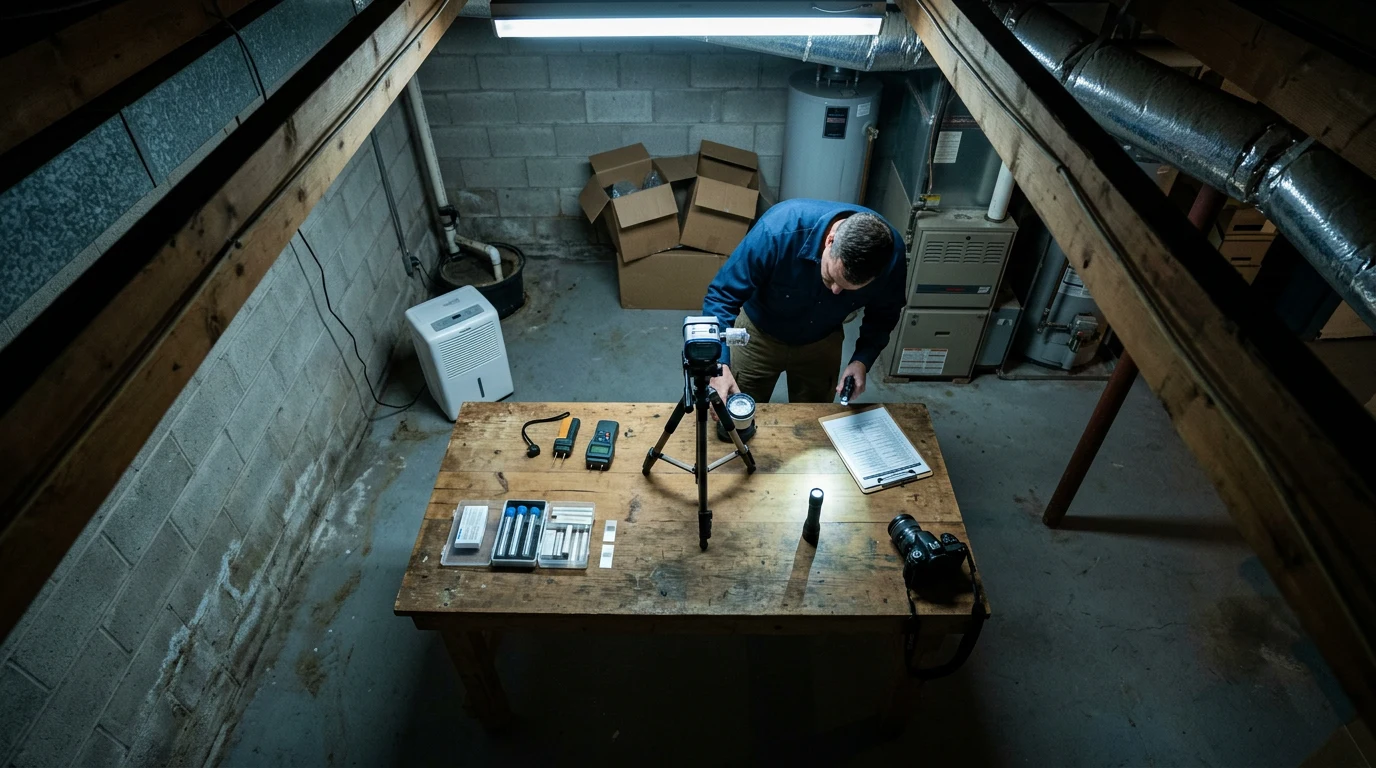
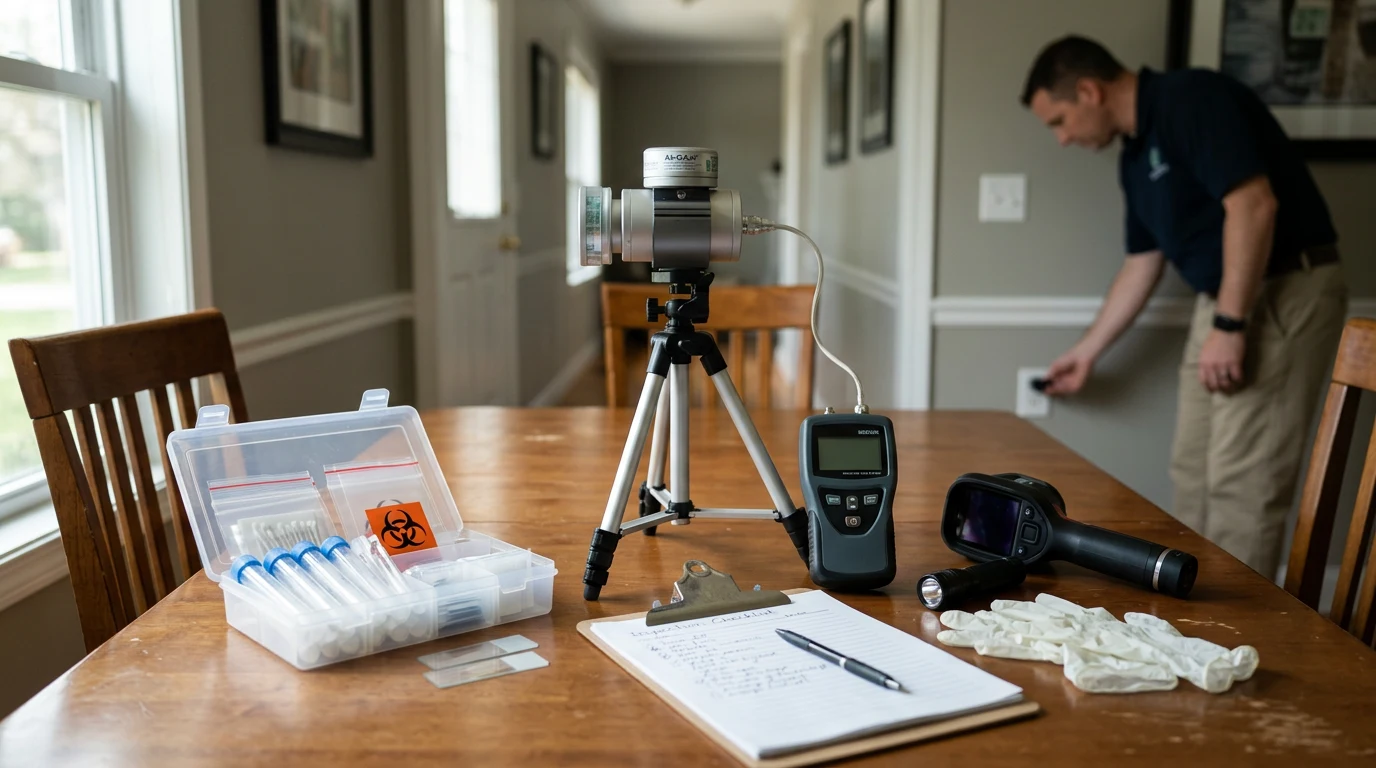
While not a mold test in the traditional sense, moisture mapping using pin-type and pinless moisture meters identifies areas with elevated moisture content in building materials. Since mold cannot grow without moisture, mapping the moisture profile of walls, floors, and ceilings reveals areas where mold growth is likely occurring or imminent. Professional mold inspectors routinely use thermal imaging cameras alongside moisture meters to identify moisture patterns invisible to the naked eye, such as plumbing leaks behind walls or condensation within wall cavities.
DIY Testing vs. Professional Mold Inspection
The choice between DIY mold testing and professional inspection depends on the specific warning signs present, the intended use of the results, and the complexity of the suspected contamination. Both approaches have legitimate applications, but they serve different purposes and produce results of different evidentiary quality.
When DIY Testing Is Appropriate
DIY mold test kits work well for initial screening when a homeowner suspects mold but has no visible evidence. Gravity plate (settle plate) tests and cassette-based air sampling kits provide general confirmation of whether indoor spore levels are elevated. These tests cost between $30 and $150 including laboratory analysis and deliver results within one to two weeks. DIY testing is suitable for personal peace of mind, initial investigation of musty odors, and ongoing monitoring after remediation. A mold detector designed for home use provides instant screening results, though with lower specificity than laboratory analysis.
When Professional Testing Is Necessary
Professional mold inspection is necessary when results will be used for legal proceedings, insurance claims, real estate transactions, or landlord-tenant disputes. Certified mold inspectors follow standardized protocols, maintain chain of custody documentation, and use calibrated sampling equipment that produces defensible results. Professional inspection is also essential when contamination is suspected in HVAC systems, wall cavities, or other concealed spaces that require specialized equipment (thermal cameras, borescopes) to access. The cost of professional mold inspection typically ranges from $300 to $700 for a standard residential assessment, with additional laboratory fees for each sample analyzed.
Testing Decision Matrix by Warning Sign
The following table maps each warning sign to the recommended testing approach, helping prioritize the most effective response for each scenario.
| Warning Sign | Recommended Test Type | DIY or Professional | Priority Level |
|---|---|---|---|
| Musty odors, no visible mold | Air sampling (spore trap) | Either; professional if persistent | Moderate |
| Health symptoms, building-related pattern | Air sampling + surface sampling | Professional recommended | High |
| Recent water damage or flooding | Moisture mapping + air sampling | Professional for insurance claims | High |
| Visible discoloration, unknown origin | Surface sampling (swab or tape lift) | DIY adequate for identification | Moderate |
| Chronic high indoor humidity | Air sampling + humidity monitoring | DIY monitoring; professional if symptoms | Moderate |
| HVAC contamination suspected | Air sampling at supply registers | Professional strongly recommended | High |
| Real estate or legal situation | Comprehensive (air + surface + moisture) | Professional required | Critical |
What to Do After Testing Confirms Mold
Positive mold test results trigger a response that depends on the type of mold identified, the extent of contamination, and the location of growth. Understanding test results requires context: laboratory reports include spore counts, species identification, and sometimes comparison to outdoor control samples, but interpreting these results correctly requires knowledge of normal background levels and species-specific health implications.
Interpreting Results
Indoor air samples showing total spore counts significantly higher than outdoor samples (generally more than 2x to 3x outdoor levels) indicate an active indoor mold source. The species composition matters as much as the total count. Indoor samples dominated by Aspergillus, Penicillium, Stachybotrys, or Chaetomium at levels exceeding outdoor concentrations point to active indoor growth of potentially hazardous species. Samples showing primarily Cladosporium at levels comparable to outdoor readings are generally considered within normal range, since Cladosporium is the most common outdoor mold and routinely enters buildings through normal air exchange.
Next Steps Based on Results
- Identify and eliminate the moisture source. No mold remediation succeeds without first resolving the underlying moisture problem. Fix leaks, improve ventilation, install dehumidifiers, and correct grading or drainage issues as needed.
- Determine remediation scope. Contamination under 10 square feet on non-structural surfaces can typically be addressed with DIY methods. Larger areas, structural contamination, HVAC involvement, or mycotoxin-producing species warrant professional remediation.
- Protect occupants during remediation. Mold removal disturbs colonies and releases concentrated spore bursts. Containment, negative air pressure, and personal protective equipment are essential during active removal.
- Conduct post-remediation verification testing. Independent clearance testing after remediation confirms that spore counts have returned to normal levels and the moisture source has been successfully controlled.
- Implement ongoing monitoring. Place hygrometers in previously affected areas and check moisture levels periodically with a moisture meter to catch any recurrence early.
Common Mistakes to Avoid When Testing for Mold
Several common errors reduce the reliability of mold testing results or lead to wasted money on testing that fails to answer the relevant question.
- Testing visible mold instead of remediating. When mold is clearly visible, testing to identify the species is rarely necessary. The response is the same: remove it and fix the moisture source. Testing is for hidden or suspected mold.
- Using gravity plate (settle plate) tests as definitive evidence. Gravity plates capture whatever settles on them over a set time period. They detect mold spores that are always present in indoor air and almost always grow something. A positive result from a settle plate test does not confirm a mold problem; it confirms that mold spores exist indoors, which is universally true.
- Skipping the outdoor control sample. Indoor air sample results are meaningless without an outdoor comparison. Mold spore concentrations vary dramatically by season, weather, and geographic location. The outdoor sample establishes the baseline against which indoor levels are evaluated.
- Testing during or immediately after cleaning. Cleaning activities, especially vacuuming, sweeping, and scrubbing, temporarily elevate airborne particle counts. Air sampling should occur under normal conditions with at least 24 hours of undisturbed settling time after cleaning.
- Relying solely on air testing in confined spaces. Crawl spaces, attics, and wall cavities may have heavy mold growth on surfaces without proportionally elevated air spore counts. In these spaces, surface sampling and visual inspection are more reliable than air testing alone.
When Mold Testing Is NOT Necessary
Understanding when testing is unnecessary prevents spending money on information that does not change the course of action. Testing should be skipped in these situations:
- Visible mold on a small area with a known moisture source. A patch of mold around a leaky faucet or on bathroom grout does not require species identification. Fix the leak, clean the mold, and monitor the area.
- Routine maintenance situations. Minor mold on window sills during humid months, surface mold on bathroom caulk, and small amounts of mold on food-storage areas are normal maintenance items, not testing triggers.
- Immediately after a water event (too early). Testing within the first 48 hours of water damage rarely detects mold because colonies have not had time to establish. Wait 2 to 4 weeks after the event and the completion of drying before testing.
- When the remediation plan is already established. If a professional remediation company has already scoped the work and the property will be cleared-tested after completion, pre-remediation testing adds cost without changing the remediation approach.
Frequently Asked Questions
How do I know if I need to test for mold?
Test for mold when you notice persistent musty odors without a visible source, unexplained respiratory or allergic symptoms that improve away from home, recent water damage that may not have fully dried, visible discoloration that might be mold, chronically high indoor humidity above 60%, suspected HVAC contamination, or during real estate transactions and legal situations requiring documentation.
What is the best way to test for mold in a house?
The best approach depends on the situation. Air sampling (spore trap analysis) is most effective for detecting hidden mold and evaluating overall indoor air quality. Surface sampling (swab or tape lift) identifies specific mold species on visible growth. Moisture mapping with a moisture meter locates areas where mold growth is likely. For comprehensive assessment, combine air sampling with surface sampling and moisture mapping.
Can I test for mold myself or do I need a professional?
DIY mold test kits are appropriate for initial screening, personal peace of mind, and post-remediation monitoring. Professional testing is necessary when results will be used for legal proceedings, insurance claims, real estate transactions, or when contamination involves HVAC systems, large areas, or concealed spaces requiring specialized equipment like thermal imaging cameras.
How much does mold testing cost?
DIY mold test kits with laboratory analysis cost between $30 and $150 per test. Professional mold inspection for a standard residential property ranges from $300 to $700, with additional laboratory fees of $30 to $75 per sample. Comprehensive testing that includes air sampling, surface sampling, and moisture mapping typically costs $500 to $1,000 total.
What does a musty smell mean if I can’t see mold?
A musty smell without visible mold typically indicates hidden mold growth behind walls, under flooring, in ceiling cavities, or inside HVAC ductwork. Mold produces microbial volatile organic compounds (MVOCs) that create the characteristic musty odor. Air quality testing can confirm elevated spore levels, and moisture mapping helps locate the concealed moisture source feeding the mold colony.
Should I test for mold after water damage?
Yes, but timing matters. Wait 2 to 4 weeks after the water damage event and completion of drying before testing, since mold colonies need time to establish before they produce detectable spore levels. Testing immediately after water damage rarely finds mold. Post-water-damage testing is especially important for areas that were saturated but could not be visually inspected, such as wall cavities and subfloor assemblies.
What level of mold spores is dangerous?
There is no single spore count threshold that defines “dangerous” because sensitivity varies between individuals. However, indoor total spore counts that exceed outdoor levels by 2x to 3x or more indicate an active indoor mold source. The species composition matters as much as the count: any detectable level of Stachybotrys chartarum (toxic black mold) or elevated counts of Aspergillus or Chaetomium indoors warrants remediation regardless of total spore count.
How long does mold testing take to get results?
Professional mold testing results typically arrive within 2 to 5 business days after the laboratory receives samples. Rush processing is available from most labs for an additional fee, delivering results in 24 to 48 hours. DIY mold test kits that include mail-in laboratory analysis take 5 to 10 business days total, including shipping time. On-site inspection and sample collection takes 1 to 3 hours for a standard residential property.
Key Takeaways
Recognizing when to test for mold prevents small moisture problems from escalating into serious health hazards and costly remediation projects. The seven warning signs outlined in this guide, musty odors, health symptoms, water damage history, surface discoloration, high humidity, HVAC concerns, and transactional or legal situations, each indicate different types of potential mold contamination and call for different testing approaches. Early detection through appropriate testing methods saves money, protects health, and preserves property value.
For most homeowners, the practical approach starts with monitoring indoor humidity using a hygrometer and investigating any persistent musty odors with a moisture meter. When these screening tools suggest a problem, a mold test kit provides laboratory confirmation. For situations involving health symptoms, large contamination areas, HVAC systems, or legal documentation needs, professional mold inspection delivers the comprehensive, defensible results that the situation requires.